
‘@Play‘ is a frequently-appearing column which discusses the history, present, and future of the roguelike dungeon exploring genre.
We’re approaching the end of our burst of coverage of Unix, DOS, Linux, Mac and Amiga roguelike Omega. There are even other places to play it that have arrived since then, including OS/2, Windows console native, Windows with graphics, and even in-browser.
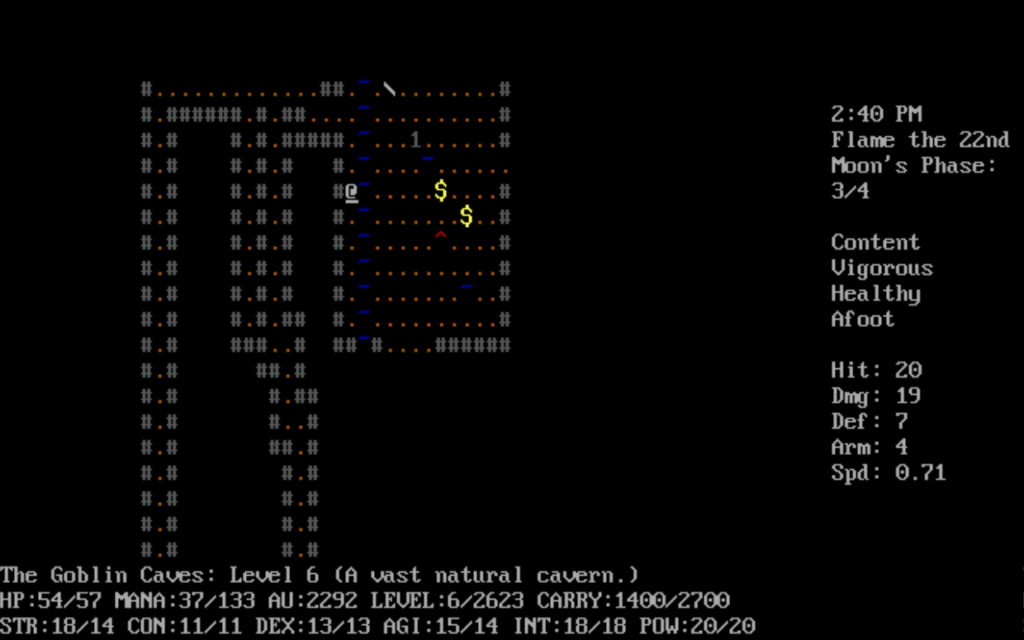
My experiences with Omega have been filled with death, frustration, annoyance, exasperation, and death. But I have also greatly enjoyed the game. While even with source-diving I have not gotten much farther than completing the Goblin Caves, the game is still enjoyable for me to play. There’s lots of cool things to discover, powerful items to find, and interesting strategies to formulate. In Omega one may see early forms of ideas found in venerable NetHack and ADOM.
Those two games have had a lot more fan obsession directed at them over the years, which has broken off some of their sharper edges. There are entire genres of NetHack variants devoted to fixing things about it that some people disagree with.
Omega has not had this advantage. Rather more things will just kill you in Omega. There are a lot of things that deserve experimentation, but that experimentation will often result in an expedited demise, or else make your character unplayable, or merely erase much of your progress.
At @Play we are of the opinion that more people should play all roguelikes, be they classic, modern, or lite. So please, allow me to present a basic strategy FAQ for Omega. Information from this has been derived from many sources: an old FAQ for 0.75, ancient posts on the Usenet group rec.games.roguelike.misc (that’s a link to Google Groups, so follow it before it goes the way of late lamented Reader), and the source code to Omega (these here are the sources I examined).
Why am I so into this? It’s because it’s a worthy game, one that can give an interested player a lot of enjoyment, yet few people talk about it anymore. And yet there is a real sense that this game could someday just vanish. While there’s several Github projects hosting the source with grandiose aims, like converting the code to use C++ or making a “Next Generation” version, they haven’t seen movement in several years.
In a file in the code, Omega creator Laurence Brothers offers his hopes for future development of his project. But then he graduated from college, and passed the game on to others, who, after some initial effort, have not done a great amount with it in the decades since.
Adult Life happens to everyone, and no one should be faulted for failing to maintain an old terminal game that was mostly played by college students. But it is a shame that Omega doesn’t have an inscrutable and forbidding DevTeam like NetHack does, to be mysterious in their aims and slightly malicious in their efforts.
As I’ve said, I’ve been tooling around a little with the source code. Omega’s structure isn’t that hard to understand. Maybe something will come of it. If it does, you can be sure that I’ll mention it here, and probably try to get some more column mileage out of it. Until then, here is a whole lot of strategy discussion on Omega.
This is pretty long! It may be the longest single @Play column I’ve ever written. It’s basically a FAQ itself, although in actuality few have done any asking for a long time. NetHack and ADOM have full wikis. Omega deserves one too, but until that day happens, this is what I’ve been able to piece together.
This logjam of an article is presented along the lines that, if people want to read it, it’s here, and if they don’t, well, at least I’m done talking about Omega for now, and it’s all here neatly in a single page that you can hit Close Tab on with a song in your heart. I don’t expect you to share my obsessions, only that you recognize why I’m obsessed, and to consider if you’d like to house this ancient DOS roguelike in your own brain too.
Here, you will discover how to join guilds, what spells the religions teach, how to immediately earn thousands of gold pieces, the details of more than one secret game mechanic, what to wish for, and how to enter Omega’s secret cheat mode….
Here are the previous posts on Omega: one – two – three – four. And while we’re at it, here’s the two previous posts on Omega’s contemporary Alphaman: first – second.
What Is The Objective?
So, what is your character trying to accomplish in Omega? The answer is: who knows?
In its way a bit like Animal Crossing, there is no definite ending to Omega. Your character can retire if they earn 50,000 gold pieces and buy a condo in Rampart. If you do that, then visit it and choose to retire, to the game, that’s a win: it calls the function p_win(), and ends the game. Pay off Tom Nook!
The other form of winning involves becoming an Adept, which means completing the Adept’s Challenge. In the game’s code this is called a “bigwin.” I am not completely sure of the requirements, but part of it involves going to the Astral Plane, which is done through the auspices of the Oracle of the Blue Flame, so don’t attack her! Once you do so you can make wishes when you want, but your score is frozen at the moment you complete the challenge.
Another form of victory is to get your name in one of the positions of the scoreboard. Instead of a Top-X list of scores, it’s a number of positions in the game world. If your character gets to the top of a guild, or a religion, or completes all the Duke’s quests, or gets the greatest Law or Chaos alignment score seen on that installation, gets commemorated, not just on the scoreboard, but as a presence in the game world for future players to hear about.
Some Nuances
Alignment
Maintaining alignment is a weird process. Omega was created at a time when old school D&D’s lawful/chaotic system was still in recent memory. In this moral setup, good and lawfulness get generally conflated, as do evil and chaoticness. A necessarily reductive, even medieval, outlook upon the world, no distinction is made for rulebreaking to help the oppressed, or the enforcement of evil laws.
In D&D, you decide your character’s alignment when you create it, and the DM is expected to enforce that decision, with consequences should the player’s actions not line up with it. This is especially bad for paladins, who can lose all their class powers. In roguelikes like Hacklikes, ADOM and Omega, alignment naturally changes according to the player’s actions: if you do lawful things, your character slowly becomes more lawful, and the same goes for chaotic things.
There are a small number of things that can greatly affect your alignment. One of them is reading a scroll of law or drinking a potion of chaos when you’re already of that alignment. I find it instructive to recognize how Omega represents: law is information, but chaoticness is physical. There is a “chaos sea” in the game, but no such physical manifestation of law. Even so, each undoes the other.
Over time, the things that affect your alignment the most are small but frequent changes, especially how you deal with monsters. If you attack a monster before it gets a swing on you, it’s chaotic; if you let try to hit you first, it’s lawful. No allowance is made for whether you had a choice in the matter.
If you are purposely trying to change your alignment, the best way to do it is, perhaps oddly, by threatening to intelligent monsters.
By threatening them, instead of killing them wordlessly, you get three lawful points. If you threaten them and they surrender (usually from goblins), you’re give a choice to kill them, rob them, or to free it.
If you let them free, you get two more lawful points. If you rob them, you gain two chaotic points, which is not enough to overwhelm the push towards lawful. But if you execute them on the spot, you gain thirteen chaos points, enough to negate the lawful gain and ten more! It’s unsporting, but it’s a good way to ensure that you stay chaotic, like, if you’re in the Sorceror’s Guild and you don’t want to get mega-cursed, or want to advance with them.
Guilds
One of the first things you’ll want to do in a game of Omega is to join at least one guild in the town of Rampart.
There is a ton of information to relate on the guilds and what they each do, their requirements for joining, what you get when you join up and advance, etc. I decided to summarize it all by way of this chart:

You might have to right-click it and save if you want to get a good look; I’d like to increase its size by more, but WordPress seems determined to maintain that left margin, argh.
The Fighting, Magic and Religion categories of guilds are all mutually exclusive with each other: you can only belong to one of each at a time. Some will throw you out if you escape their good graces, which allows you to then join another one: the Paladins if you cease to be lawful, the Gladiators if you somehow escape a match without winning, and the Sorcerors’ if you stop being chaotic-although in that case, you also get pretty heavily cursed, and they refuse to sell you mana for the rest of the game. (I’ve seen at least one report that they outright kill you, but this is not supported by my reading of the source code. They do cause some damage, though.)
The whole early period in Rampart is a lot like an extended character creation session. In D&D terms, you don’t even have a “class” until you pick out your first guild. It’s a good idea to not to earn any experience points until you’ve joined at least one XP-using guild, so you don’t waste any.
Once you’re a member of a guild, however, it can be a good idea to hold back before joining a second. Your earned XP is split between all the guilds you’re a member of. While you’re a member of only one guild, all of your experience goes only into it, making your advancement in it very rapid. The next-to-last rank in each guild is reached at 4,000 XP. It’s not hugely difficult to get to this if you only have one. That’s only like four trifids. If you have four XP-needing guilds (the maximum), you need to get 16,000 XP to get that far.
The exception to this is the Gladiators. Advancement in the Gladiators doesn’t use XP, and so it doesn’t take a share of the XP you earn. This, makes the Gladiators rather best fighting guild for the magic reliant. Even if you never choose to fight in the Arena, you can still take advantage of their extra combat maneuver point and gym credit. You still need pretty good stats to get accepted by them, however.
The highest rank in all the guilds but the Gladiators requires both completing a special quest and exceeding the guild experience total of the last player to reach the top of that guild. In the Gladiators, you must beat a character with about the strength of the current Arena champion. On multi-user systems, players may compete on a shared scoreboard. Provided you then retire, this puts your character up on the scoreboard as the leader of that guild.
Back in the day, I’ve read, players would compete with each other to get up on the board; nowadays, is there any system in the whole world still running Omega this way? It is sadly a lost form of gaming. Nowadays, if you’re playing solo and don’t come up with a different name for all your characters, you’ll end up with multiple slots taken up by the same name, which breaks your perception of the world, a little.
This explanation of higher-level Omega play brings with it the caveat that I myself have yet to win, despite (and, in a way, because of) all of my experimentation with Omega. I will report in with more on Omega’s endgame someday, once I’ve managed to get to it.
So, which guilds should you choose?
Fighting guilds: My favorite is the Gladiators, because they don’t take a share of XP away from the other guilds, and because they give you gym credit, which lets you pick which stats you want to improve. The Mercenaries mostly give you cash, Strength, and Constitution. The Paladins don’t give you any stat advances at all, and you have to be Lawful to join and remain a member. They do give you a lot of perks though, and every advancement gives you a very good item. That absence of stat advances hurts though, it means you end up spending your own money on stat boosts to make up for it.
Magic guilds: There are two choices here. The tradeoff here is between a chance of random spells from the Collegium Magii, or specific spells and half-price mana refills from the Sorcerors. The randomness from the college is fun, and sometimes gets you very powerful magic (and free experience for learning it!) but makes it difficult to plan your magic game. The Sorcerors’ discount on mana helps you make much more use of your spells, whatever they end up being.
The college is free to join if your Int is at least 18. The Sorcerors Guild is much cheaper to join if you become more chaotic first; the fee can be reduced to as little as 100 gold pieces merely by executing a few goblins (talk to the with ‘t’, threaten them, then kill them).

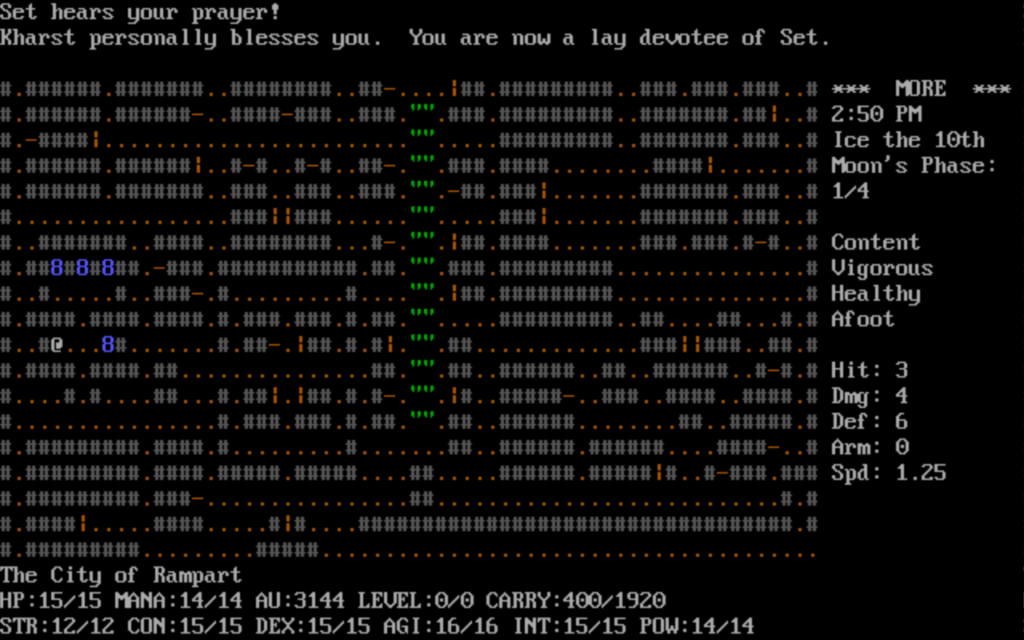
Religions: The main reasons to join a religion, it seems to be, are some extra Power and the many spells they can teach you. Here they are, and the levels on which you receive them:
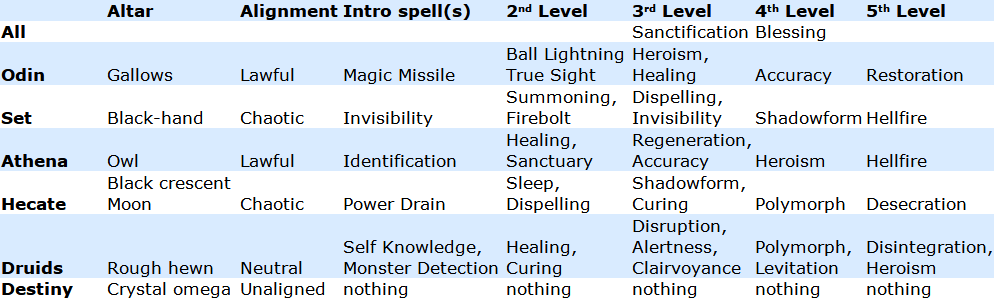
Level 3 in all the religions teaches Sanctify, and Level 4 gives you Blessing. The Lords of Destiny don’t offer any spells other than those, but you do still get Pow for advancing.
Note that Set grants Invisibility at Level 1, and again at Level 3, which seems to be an error. Getting Invisibility right away is a point in favor of Set, but getting it twice is a point against him. And Athena and Hecate get Shadowform, a very cool spell, a whole level before Set does.
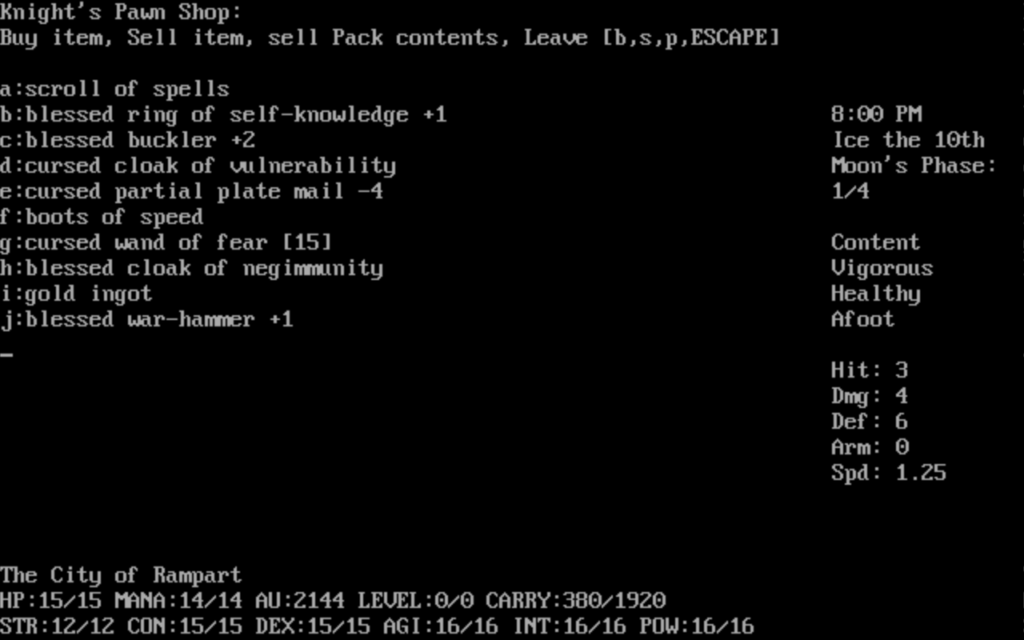
Pawn Shop

One of my favorite aspects of the game is the pawn shop in Rampart. It’s a rotating selection of random items for sale at a discount. Everything there is pre-identified, both good and bad items can be found, and a large selection of items can appear there. There’s enough good items that show up that it’s usually worth your while to check in, but not so many that it makes the random items you find in dungeons pointless.
Coupled with the cash from robbing the autoteller, it’s a great resource that helps make every game feel different, even when much of the opening time in Rampart is not actually all that random. It also has a lot of psychological value. As I mentioned last time, Omega can be really capricious, and sometimes there’s nothing you can do to save your character. If you’re going to be forced to start over for frustrating reasons, it helps a lot to know you can look in on the pawn shop and have a good chance of finding something useful and different to help your new character get on their feet.
If you’re playing Omega 0.90, you’ll find that the Pawn Shop has a much larger selection!
Strategies
There are a lot of spoilers here, many of which derived from reading the source code. That is your only warning. A game like Omega benefits strongly from having a community around it, to trade discoveries and observations and compete against each other. This community used to exist. Its annals are recorded in the archives of rec.games.roguelike.misc. It doesn’t seem to exist any more. Please take these notes in substitution for it. I have yet to get into the later portions of the game anyway. The early phases are the hardest parts to survive, so maybe this will help get you through the early frustrating phases.
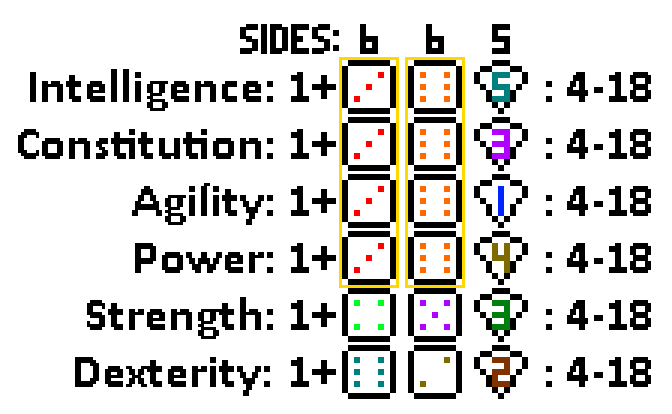
Rolling a character
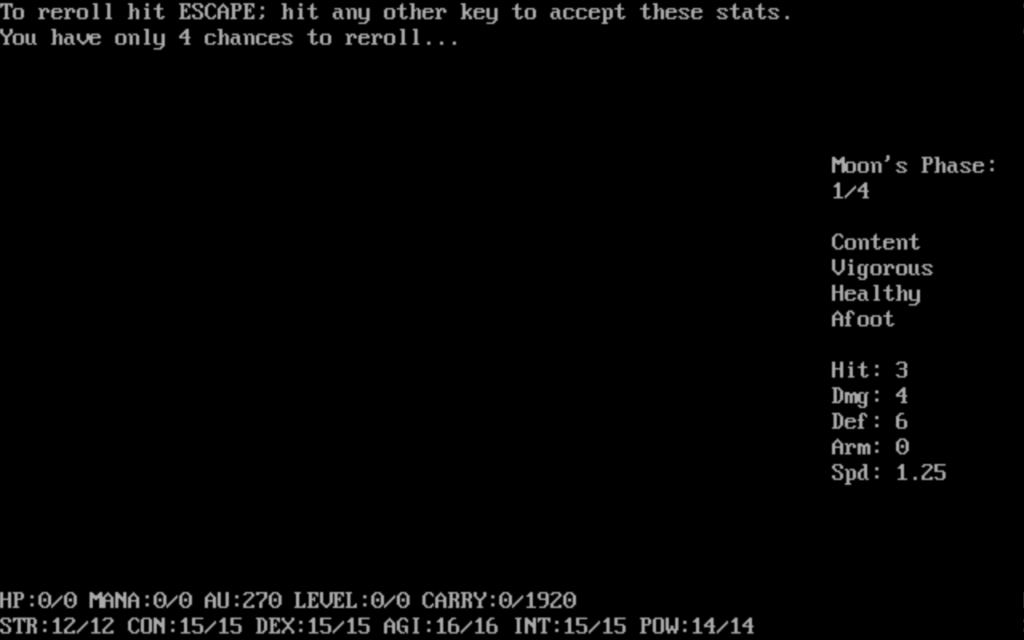
Major effects of the stats
Strength: Damage with heavy weapons and carry capacity
Constitution: Maximum hit points
Dexterity: Chance to hit and damage with light weapons, chance to disarm traps
Agility: Movement speed and dodging
Intelligence: Chance of learning spells randomly and some aspects of spellcasting
Power: Maximum mana points
Caveats of the above: I have yet to decode the source far enough to be sure of the effects of Strength and Dexterity in fighting; what’s given here is summarized from the game’s help file. There may be minor cases for each that are not covered here.
So long as your character can join a guild that can increase the above, low stats are not necessarily a big problem. See the section on guilds, above, for more information.
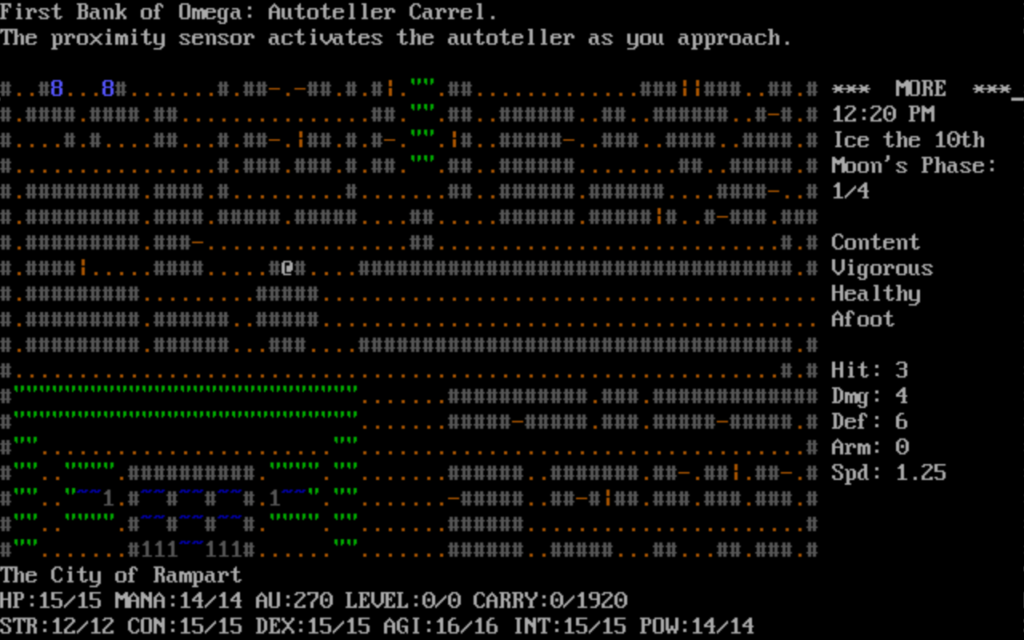
Robbing the autoteller
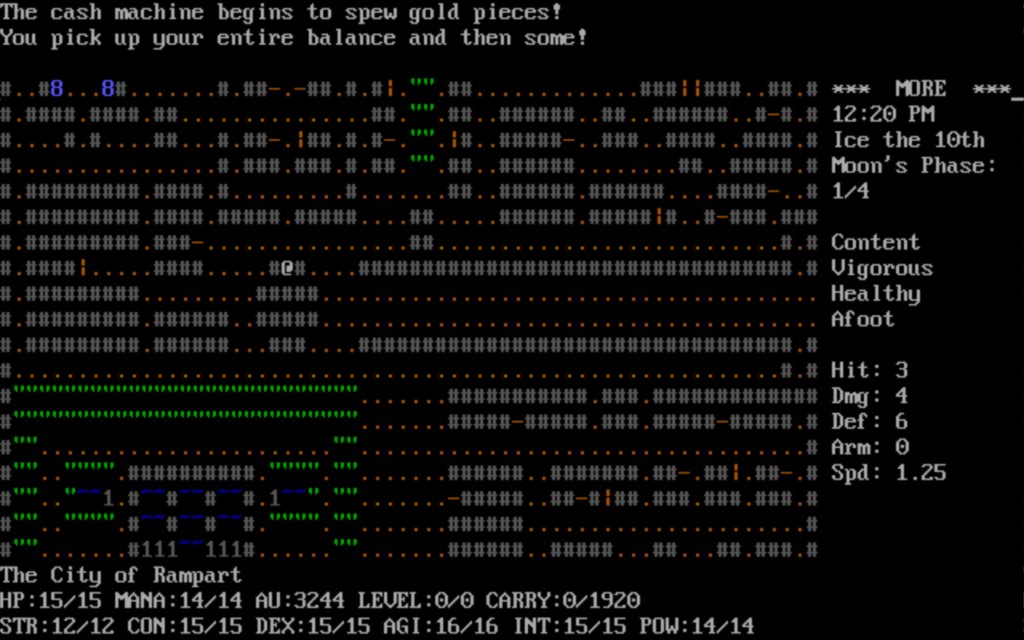
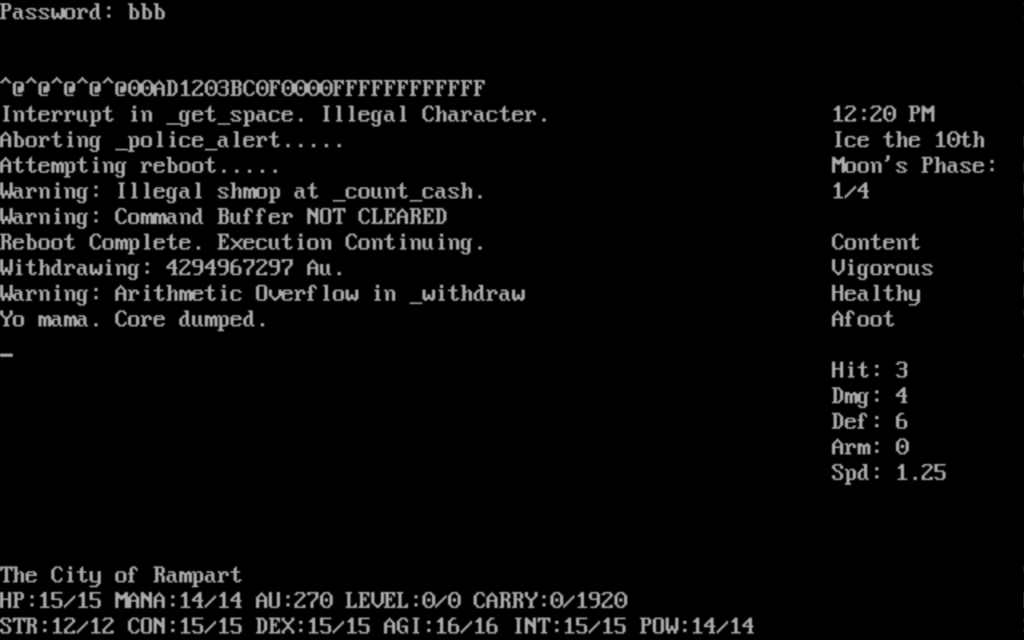
The ATM is “badly programmed,” not in the game’s code but in the game’s fiction, and can be easily exploited. Use Shift-O to open an account and set a password. (All of the ATM key commands are shifted, for some reason.) Then use Shift-P to enter a password, and enter anything except the password you entered. The teller will print a message saying the police have been alerted, and to press space to continue. Hit any key other than space, and after about half a minute you’ll have from 1,000 to 4,000 more gold pieces and five more chaos alignment points.
You can use those alignment points to get started on a career of gleeful lawlessness, or have the Archdruid neutralize most of them, or give 100 gold pieces at the hospice (or 1 gold piece five times) to get back to net zero if you want to join the Paladins or a lawful religion.
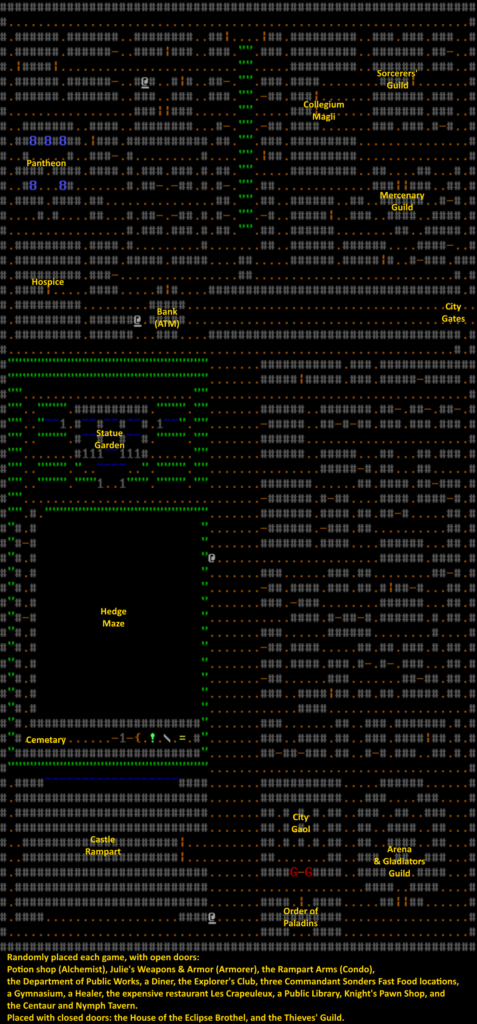
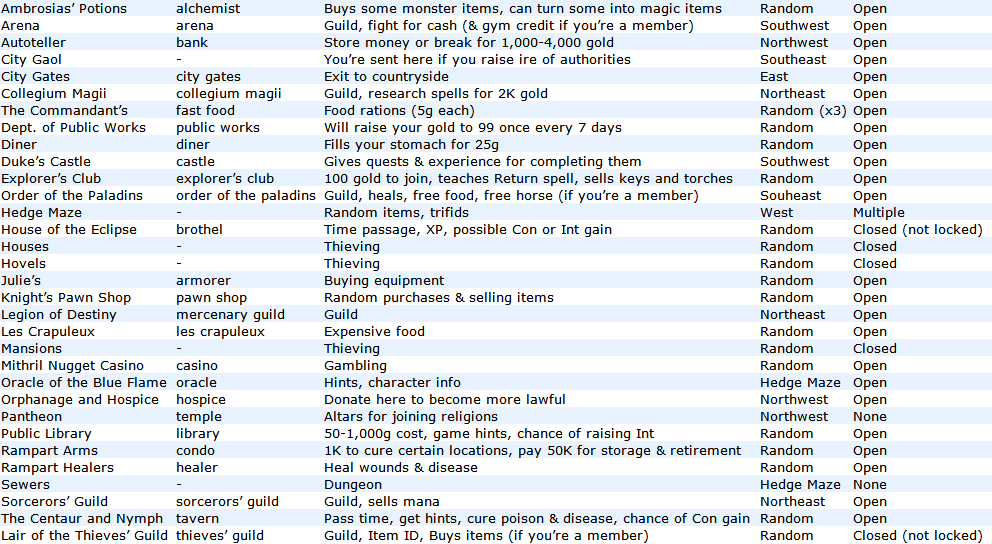
Exploring town
Rampart has a lot of resources available, enough so that it can be hard to keep them all in your head. I offer this chart to summarize what’s there. Note, while the layout of the main city is the same from game to game, many of these locations are moved to a random door. Most of these doors will be the ones that are open at the start of the game, but two, the Thieves’ Guild and the Brothel, will be in random closed (yet, unlocked) doors.
The Hedge Maze

The hedge maze is probably the most dangerous location in Rampart, other than the Sewer dungeon. Traps in the maze are a concern; setting off an alarm trap in here can be disastrous, setting the whole guard off looking for you. If this happens, the game can become almost unplayable. Talk to one of them and they may ask you to give yourself up. Doing this pacifies them, but also means you are sent to the City Gaol, although you tend to be released the first time this happens.
There are certain locations in each hedge maze layout that tend to generate either a trap, an item or a monster. As you play you’ll gradually get a sense of where those are.
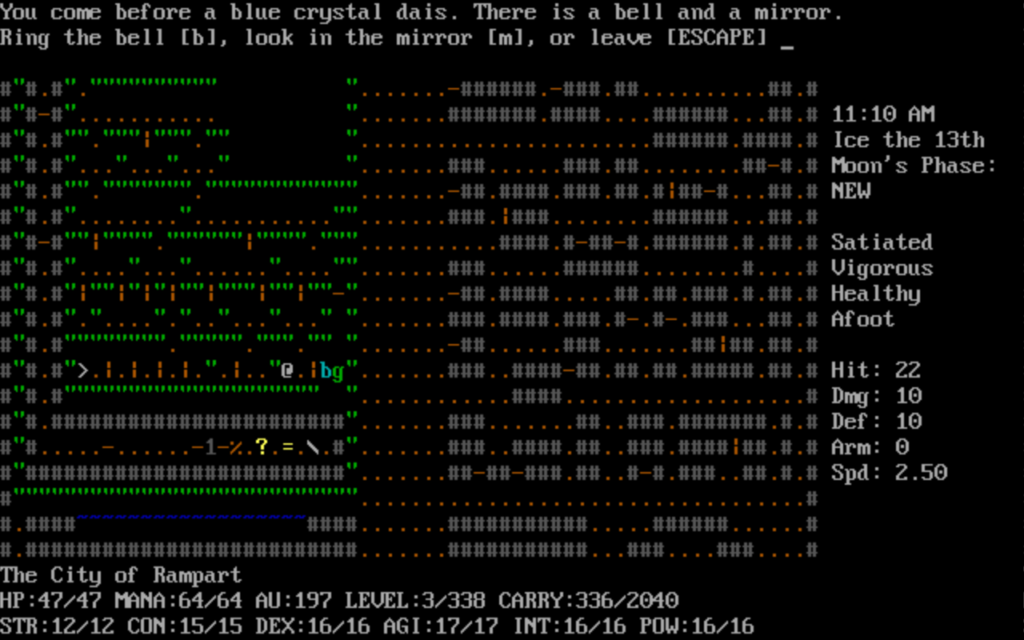
The primary attractions in the hedge maze are the house of the Oracle, who gives advice as to the next places to go as well as having a mirror that can provide a free self knowledge spell, and the entrance to the Sewers, a popular second destination after finishing with the Goblin Caves.
Around the side and back of the maze is the Cemetary, which has some interesting items in it, which are unfortunately guarded over by liches. At the entrance to the cemetery, when you try to walk in, you’ll be asked something like “Are you sure?” This is not because of any special property of the cemetery itself, there’s a peaceful invisible monster, a haunt, standing in the entrance.
Of special note, the hedges of the maze are separated from the castle by only a narrow moat of water. It is thought that there might be a secret back way into the castle, if one could get past the moat….
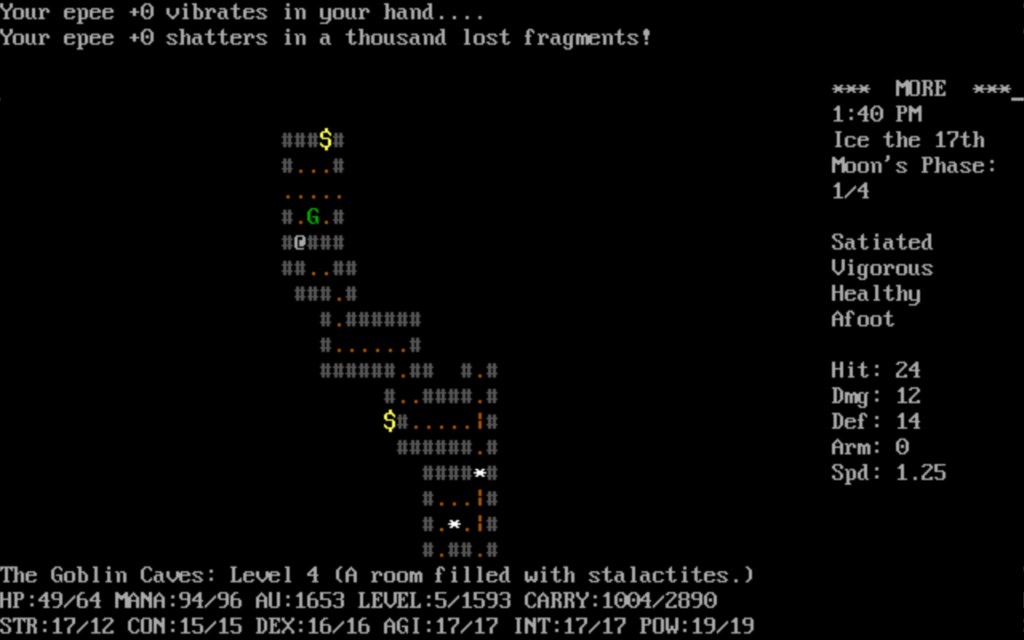
There is one more interesting property of the hedge maze. Randomly each game, a few of its bushes are chosen to be trifids. They look identical, and it’s not easy to tell them apart from hedges without special means. If you walk into either, you’re asked if you’re sure.
Walking into a hedge can do a variety of bad things to you, including tearing up your cloak or poisoning you, but walking into a trifid is usually fatal-unless you’re carrying a bucket of salt water outside of your pack! If this is the case, then instead of getting devoured by an evil plant monster, you automatically destroy the trifid and get 1,000 experience points for it! This is usually enough to advance you to the next experience level until you get up to 8,000 XP, and even then it’s a substantial boost. The more experience you get from methods like this, the less you’re put at the mercy of Omega’s combat systems.
The key is, you need the bucket of salt water to perform this trick, and also to either identify which bushes are the trifids. The salt water is sometimes sold for cheap in the Pawn Shop, and are reasonably common finds in the Goblin Caves. Identifying the trifids can be as simple as walking systematically through the hedges, although it’s best if you go cloakless and have poison resistance from a ring. You can also use some spells, like Firebolt and Ball Lightning, which destroy hedges but don’t affect trifids.
Why am I so into this? It’s because it’s a worthy game, one that can give an interested player a lot of enjoyment, yet few people talk about it anymore. There is a real sense that this game could vanish. There’s several Github projects hosting the source. They tend to have grandiose aims like converting the code to use C++ (last update: three years ago), or making a “Next Generation” version (last update: six years ago).
In a file in the code, Omega creator Laurence Brothers mentions his hopes for future development of his project. And then he graduated from college, and passed the game on to others, who, after some initial effort, have not done a great amount with it in the decades since.
Adult Life happens to everyone, and no one should be faulted for failing to maintain an old console game that was mostly played by people in college. But it is a shame that Omega doesn’t have an inscrutible and forbidding DevTeam like NetHack does.
I’m tooling around a little with the source code. Omega’s structure isn’t that hard to understand. Maybe something will come of it. If it does, you can be sure that I’ll mention it here, and probably try to get some column mileage out of it. Until then, here is the conclusion of our strategy coverage of Omega. Previous articles are here: first – second – third – fourth.
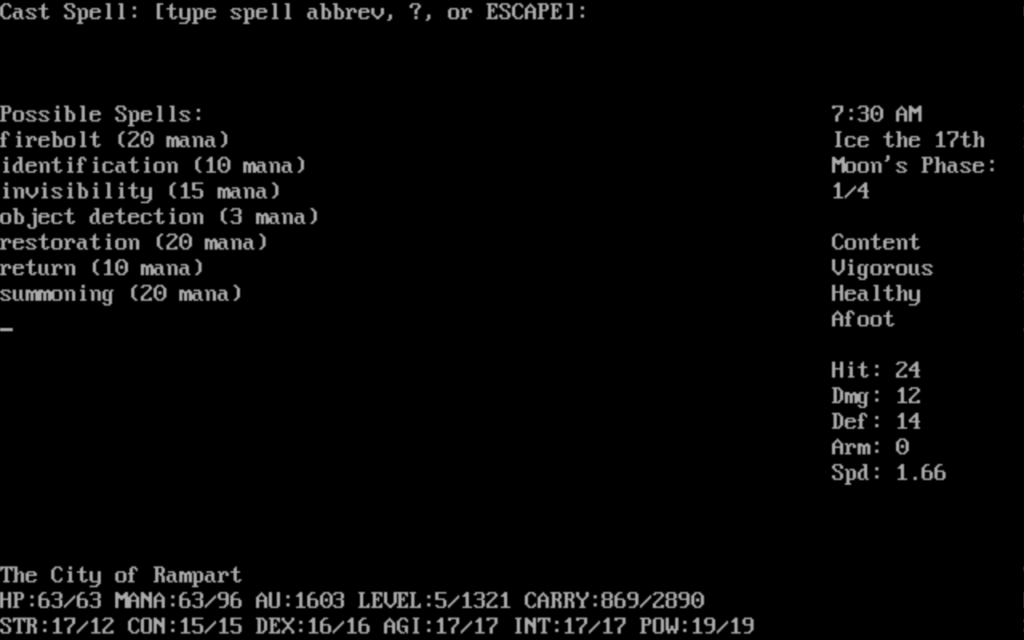
Spells
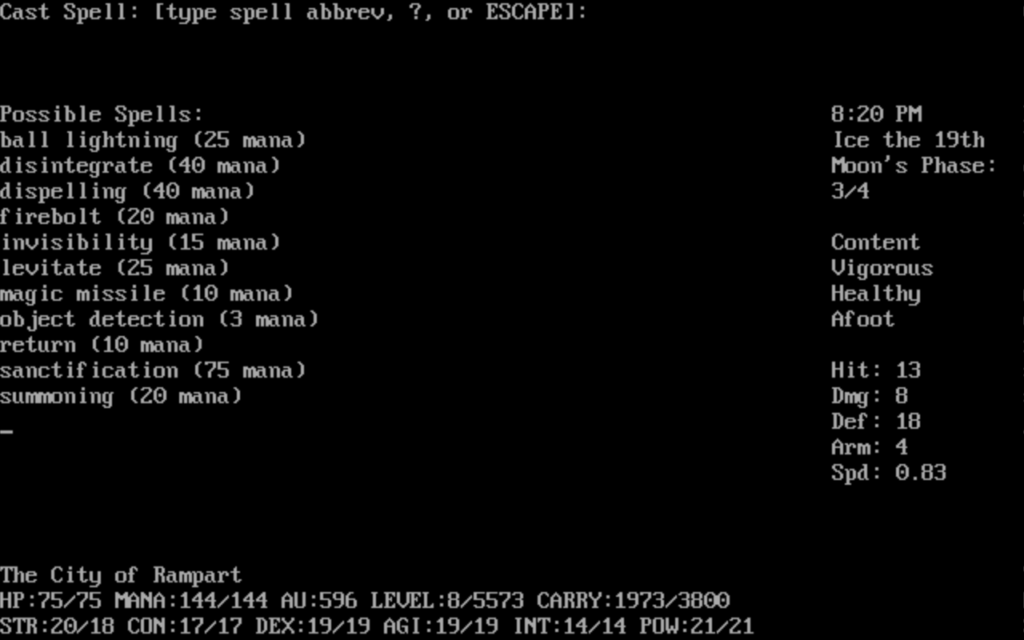
Certain spells, if you can get them, can make your journeys much easier:
- Invisibility makes most enemies escapable if you can get at least one space away from an attacker. It offers no protection in melee combat, but no one can chase or shoot you while you’re unseen. Items can make you invisible too, though.
- Sleep used against you is dangerous (but see more on that below). Sleep used against a monster tends to be even more dangerous for them, however: they tend to stay asleep indefinitely until attacked. You can doze a monster in the Arena and take your time resting for many minutes (with the comma key), and I haven’t seen the opponent awaken yet!
- Firebolt is does moderate damage, and can destroy hedges. It doesn’t affect trifids, so it’s a good way of telling them apart.
- Ball lightning is even better, and can affect a 3×3 area. However the low-end attack spell, Magic Missile, tends not to be too helpful.
- Identification is extremely important if you don’t join the thieves’ guild; there are so many cursed items that some means of identification is basically required, and identification scrolls are too uncommon.
- Shadowform makes exploration a lot easier, making overland travel faster, letting you pass through walls, and making it harder for many monsters to hit you.
- Curing is nice for battling disease without having to find healers or a Potion of Curing. Healing, however, isn’t that useful; it doesn’t heal for much so in battle it’s mostly giving your enemy free hits, it consumes your precious mana points, and if you’re not in battle, you can use the comma key to rest for ten minutes for a similar effect.
- The Enchantment spell is extremely useful if you can get it. It allows you to add pluses to equipment, weapons, armor, and rings, at the cost of mana points. All of these things help out a lot. I have discovered that enchanting an item to more than +6 will probably destroy the item. Beyond that, the catch is that nothing in the game that I know of grants Enchantment specifically. The only way to get it is through random means, particularly studying at the Collegium Magii.
- At higher levels I can’t offer much advice. Two gods offer Hellfire at top rank, which instantly kills many monsters. Disrupt does high damage at a point in sight of your choosing. Disintegrate can destroy both monsters and walls.
Free experience
There’s a good number of ways to gain experience points without fighting!
- Every lock you pick with thieves’ picks gives you 3 XP. Given the number of locked doors in Rampart, and the low experience requirements for the lowest levels (level 1 at 20 XP, level 2 at 50), if you can get picks somewhere, you can gain two levels right off the bat that way. You get free lockpicks from the Thieves’ Guild, but you don’t have to be a member to pick locks, or gain experience from it. If you don’t want to join the guild, sometimes you can find some in the pawn shop.
- Disarming a trap earns 5 XP. If you score a critical success on the roll (more common at high Dexterity) and manage to salvage a trap component, you gain another 25 XP.
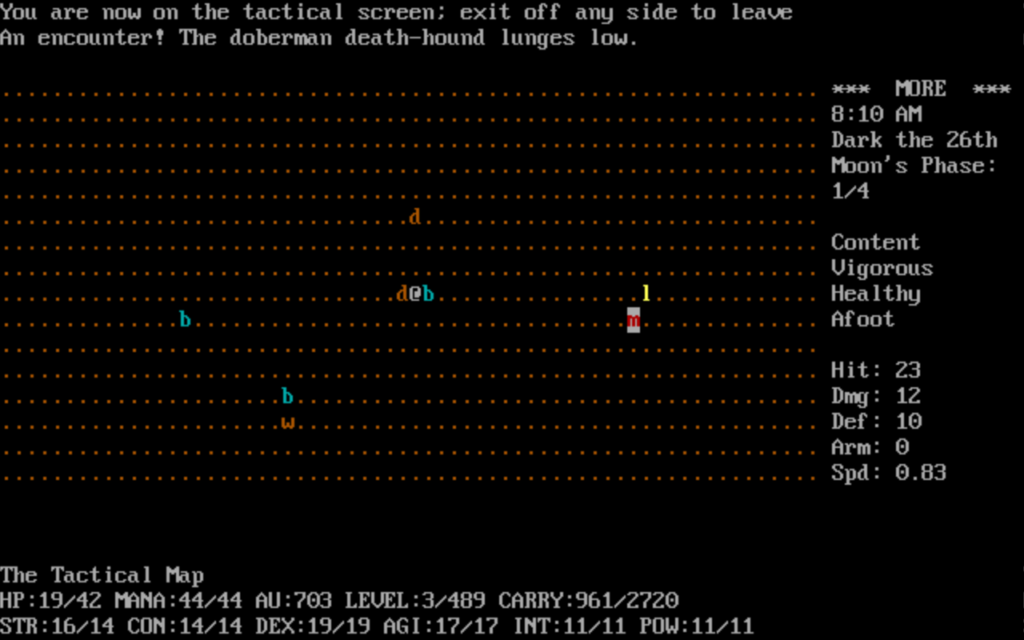
- Greeting the Archdruid in the temple north of Rampart (talk with the ‘t’ key) is worth 300 XP. This is not only worth three levels from zero XP, but if you’re a member of only one guild or religion, it’s nearly enough to get you to the first level of advancement in it, which happens at 400 guild XP points. Reaching the first tier in a religion earns you two new spells! The biggest danger of doing this is the chance that you’ll be eaten by the lions and doberman death-hounds that perpetually roam the countryside.
- Scrolls of Law and Potions of Chaos earn you experience points relative to how much alignment you have in their areas. They can be worth a lot! Don’t read/drink one if you’re of a different alignment, though.
- I mentioned above that killing a trifid by carrying salt water earns you 1,000 free XP!
- At the brothel in town (“The House of the Eclipse”), if you knock on the door at night and have 500 gold, you’ll have an “educational experience” and earn 100 XP. This also has a chance of increasing your Constitution, unless you answered “n” to the sexual preference prompt at the start of the game. In that event, you’ll instead have a chance to increase Intelligence. That’s rather a lot of money for 100 XP, but it’s a risk-free option if you have a lot of cash.
Survival
Food
You can always buy cheap food from the fast food places in Rampart, but they weigh 20 units. Although the default description of fast food is “red-and-white buckets,” they’re just food rations that haven’t been identified yet. Other food may be lighter, but can only be found randomly. I usually buy 10 food rations to start out, which is enough to make it to the Archdruid’s temple and back to Rampart. Note that the food rations you find in dungeons may be poisoned food, which is a different item class than normal food rations.
Combat
Remember to set your combat routine! That’s Shift-F. Read the game’s help about combat to find out more about it. At first you only two points to spend. Generally I find it’s best to spend them on Lunge Center: you get hit more often, but at least you can strike opponents with reasonable frequency. Whenever you gain some Agility, gain a level, or join the Gladiators, check to see if you gained another combat maneuver point. All of these matter, but except for the guaranteed bonus point you get as a Gladiator, they seem to be awarded a bit randomly. My first addition to my combat routine is Block Low at the start; after than, Block Center. From there I may add extra attacks. You can have as many as eight points, which can make you quite the terror.
If you’re against a stronger foe in an encounter, and have a chance, set your fighting routine to blocking at as many different levels as you can. You can escape from an encounter if you get to an edge of the tactical map, even if monsters are adjacent to you. Remember to set your moves back to how you want them later.
If you speed drops significantly (to 0.50 or slower), you’ll be warned that your maneuvers have been reset. This usually means you’re already in big trouble.
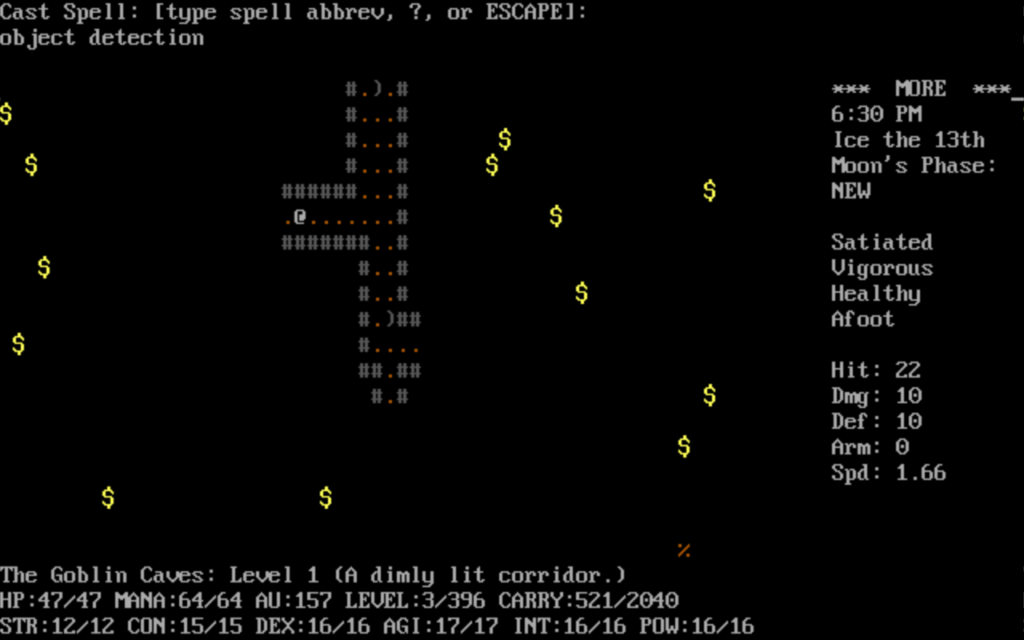
Lunarity
This is an obscure but extremely important aspect of Omega! At the side of the screen, there is a display they tells you what the current phase of the moon is. Do not ignore it!
If the phase of the moon matches your alignment, then you get an extra to-hit bonus equal to your experience level, and also do double damage! But if the phase is opposite your alignment, then you take a to-hit penalty of half your level, and do half-damage!
The Lawful phase is a full moon; the Chaotic phase is a new moon. Each is each other’s bad phase. For Druids, the half phases are the best times, and the bad phases are both full and new moons. Each phase period lasts for two game days. If you’re not aware of the effects of the moon, the result is your character just mysteriously rocks or sucks every so often. Lunarity also affects the magic consumption of your spells.
Overworld
In the overworld, unless your character is really strong, there is always the chance the game will screw you over with an adverse effect. Chaos storms can, on a whim, reduce your Power by 10 and zero out your mana, or teleport you into the middle of the Chaos Sea, or even reset your experience total and level to zero and remove all your spells and guild ranks. These eventualities are unavoidable, except by wearing Seven League Boots, which nullifies outdoor travel time. In all other cases they happen ever game hour when on the land. The only solution is to spend as little time outside as possible. Being a Druid, riding a horse, or being in shadowform can reduce this time, but only Seven League Boots negates it entirely.
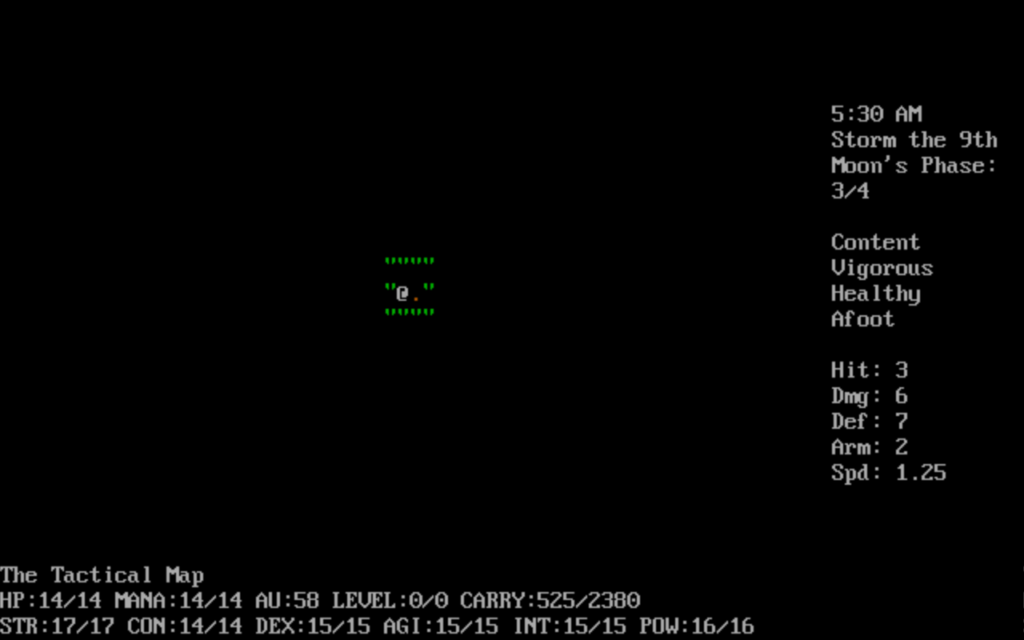
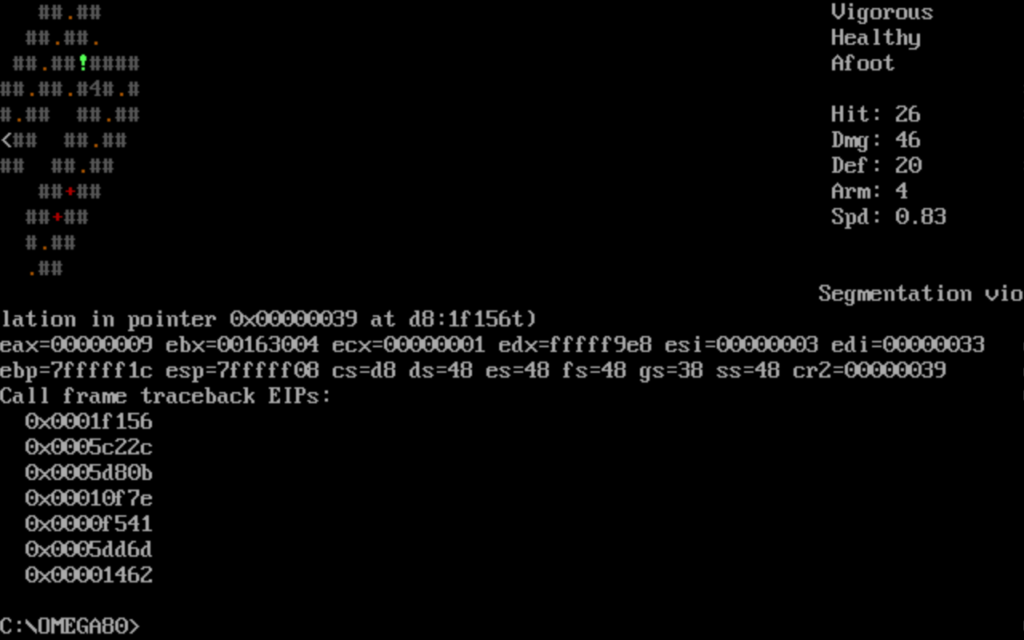
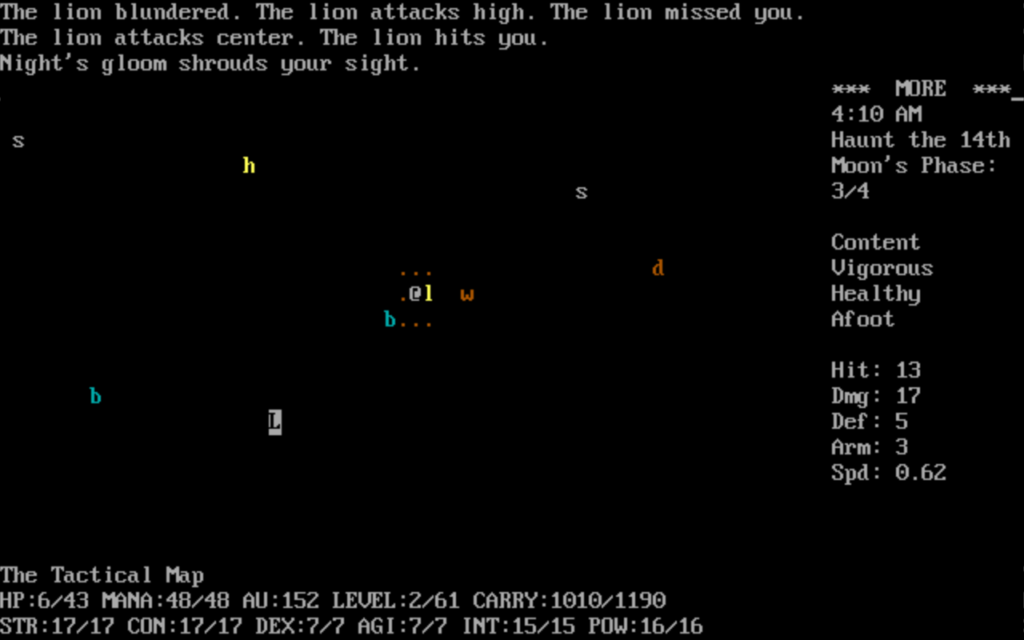
Aside: One possible result of a chaos storm is being teleported to a random location in the overworld. A possible result of this is being sent to the middle of the Chaos sea, surrounded on all sides. Your only recourse in this instance is to try to swim to shore. The following is one possible result of that:
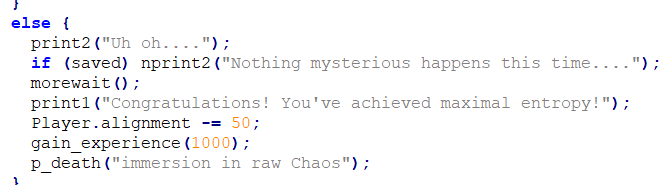
Summarized: the player is given a big negative alignment boost, then usually a whole experience level, and is then killed outright. Thanks for nothing!
Traps
Four types of traps offer special dangers:
Alarm – In dungeons, basically harmless. In Rampart though, probably makes the game unplayable until you turn yourself in by talking to the guards out trying to kill you.hysically, harmless. But spellcasters will find their magical reserves instantly depleted by this, usually meaning an expensive trip to the Sorceror’s Guild at the very least.
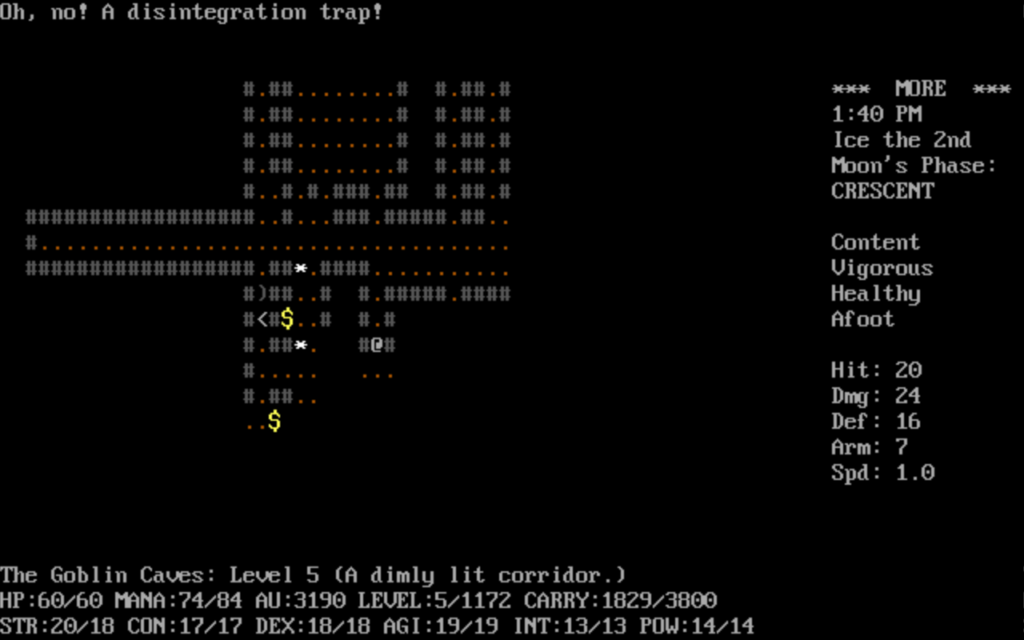
Disintegration – Destroys your cloak, your armor, or you, in that order. It does no damage to you personally if you’re wearing either of those two things. Just be sure to always be wearing either of those things.
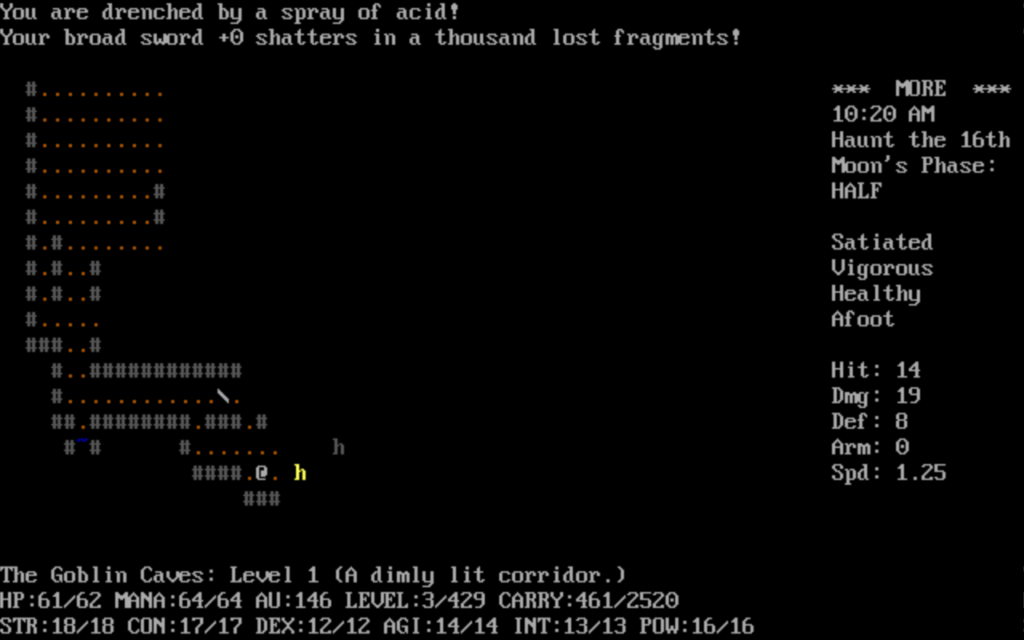
Acid – Does damage, but more importantly, can destroy multiple items you’re carrying, even in your pack. Worst of all, if the trap decides to destroy a wand it’ll explode and cause a manastorm, doing heavy damage to you. I’ve been wiped out by two wands exploring from an acid trap.
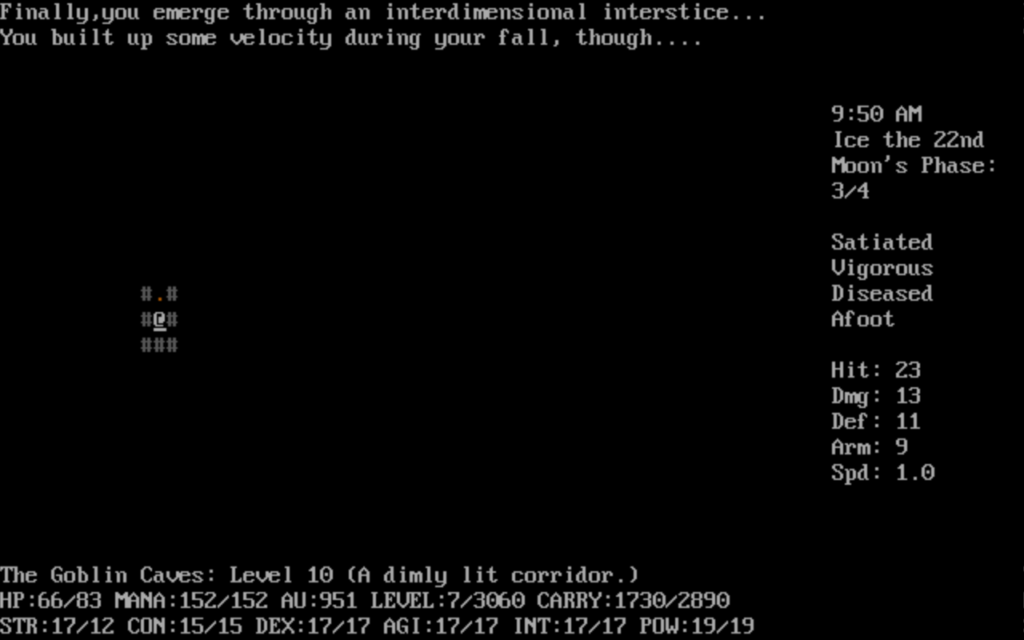
Abyss – This is the worst trap. Teleports you to The Abyss, a place where you fall for an arbitrary distance, then back to the countrysite to land and take falling damage from the distance you fell. The higher amounts of damage are uncommon, but all too possible, and it can thdo any amount of damage.
Curses
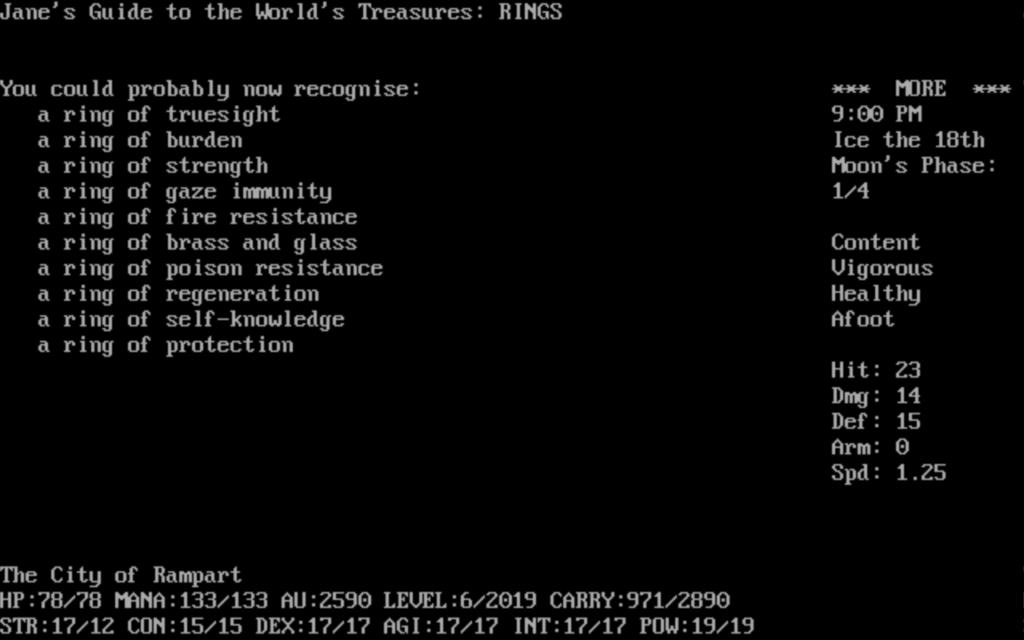
Generally curses are of the typical roguelike style. Both wearable equipment and wands you’re carrying can be cursed. Worn equipment that gets cursed can’t be removed unless you can somehow lift the curse. The item often gains big negative effects too, like Rings of Strength are transformed into Rings of Burden when cursed.
I don’t have all the information on curses that I’d like to give you. As near as I can tell so far, to actually remove a curse, you have to get a blessing from a god you worship, which relies on sacrificing a good-enough item to them first. Scrolls or spells of blessing do not appear to work, although a blessed item is further away from being cursed to begin with and so can be an effective preventable measure. Your best recourse, that I know of, is to destroy the item by bashing it (Shift-Z). Some items may take multiple attempts.
Dungeon features
Rivers
Water is sometimes a big obstacle dungeons. Once in a while you might get a setup where you can’t make forward progress. You can jump over water, but only if you have seen the ground on the other side and know it’s empty. This is a prime use for a scroll of clairvoyance, which lets you map out a small square section of the current dungeon of your choosing. As an aside, this definition of “clairvoyance” in roguelike terms may have been an influence on NetHack’s, which maps out a section of the dungeon around the player. Or, maybe it was the other way around, and NetHack inspired Omega?
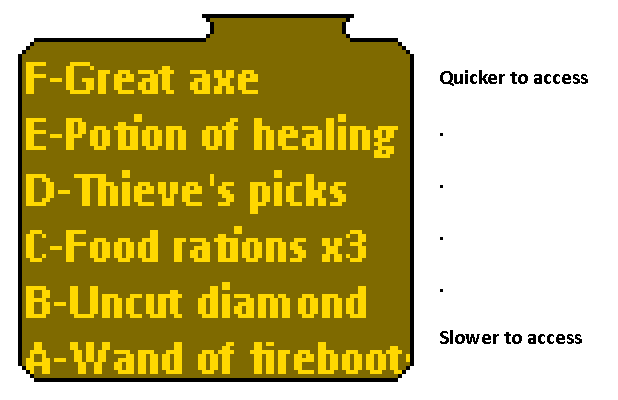
Anyway, a good way to die is to jump into water, which puts you at the mercy of whether the game thinks you’re carrying too much weight to swim out. You’ll be offered the chance to drop various objects to try to lighten your load enough, including as a single action, dropping your entire pack to be lost in the unknown depths. This is one of a number of ways the game has to destroy your whole non-equipped inventory at once; others include overweighing your horse while out in the countryside (it runs off and your pack is in its saddlebags) and an effect from touching a stone in a village.
It’s difficult to have a horse in a dungeon, since your character automatically releases a horse when you enter, but if you can manage it, it seems that they will swim across it readily. The way I know is to befriend a horse found in the dungeon.
Statues
There are statues in Rampart and the villages too. You can try to bash them (with the ‘z’ key), which can turn them to rubble, cause them to give you a random hint, or sometimes come to life. I have seen a statue, in a dungeon once, actually come to life when I stepped near it and immediately attack me. (It was a salamander, and since I didn’t have fire resistance at the time, I died very quickly. Statues aren’t defined to be of any type, they describe as “A strange-looking statue,” so there’s no hint as to what a statue might turn into. It’s for the best to be wary of them.
Rubble
Rubble is created when you tunnel through a wall, sometimes when you bash a statue, and when a monster destroys a door, as well as sometimes just generated randomly in dungeons. When you step on rubble, sometimes you take a small amount of damage, and sometimes you’re stuck in place for a number of turns. You don’t have to repeatedly try to get out of the rubble to escape it. All that matters is the amount of time that passes. You can still attack adjacent monsters while you’re stuck in rubble, you just can’t leave it.
Altars
Altars appear in dungeons as well as in Rampart and villages, and can be used for the same purposes. Most of these random altars will be of alignments other than that of your current god just from the law of averages, so if you’re already in a religion, praying at one in the dungeon is usually a bad idea. You can interact with altars in a couple of other ways. You can bash one, but this will draw the wrath of the altar’s deity. You can also cast the spell of Energy Drain at one. If I read the code right, you might get a couple of points of Power out of one this way if you’re not in a religion, but in any event you’ll still suffer from divine wrath. In this case, you take a random amount of damage between 0 and ten times your experience level, which is often a chance of immediate death. For many characters, this has the potential to be instantly fatal. I shouldn’t have to say this, but especially don’t bash or cast Energy Drain on an altar belonging to a god you’re a follower of.
Lava
Most lava takes the form of isolated pools. You can jump over it. I wouldn’t jump into it. Having a horse is no use here. There seems to only be one defense against walking into lava, other than just answering “n” to the question of whether you’d like to cook yourself: from reading the code, if your character’s name is “Saltheart Foamfollower”, and it’s got to be that exact capitalization, you’ll only take one damage from lava. It appears to be a reference to the Thomas Covenant books by Stephen Donaldson.
Conditions
Poison: Caused by hedges, spells, traps and some monsters. Means your hit points decrease maybe once a game minute. Cure it at the Healer’s, at the Paladins if you’re a member, a potion of poison antidote, or by eating lembas. It goes away on its own if you can survive long enough, but don’t take it lightly.
Disease: Caused by spells and some monsters. Means you don’t naturally heal. (Usually, you regain some hit points every ten minutes.) Get it cursed at the Healer’s, the Paladins if you’re a member, by eating lembas, or by drinking a potion of curing. Note, this is a different curative potion than poison.
Stat loss: Caused by poisoning and miscellaneous other causes. This lowers a stat, but not the max stat associated to it. Cured with a potion of spell of restoration, or by resting for a week in a rented condo. (That cures a number of the more obscure conditions.)
Slowness: This is caused by some spells, especially those of the goblin shamans. It is a long-lived condition. The only cure I know of is a week of rest in a condo, which you should avail yourself of as soon as possible.
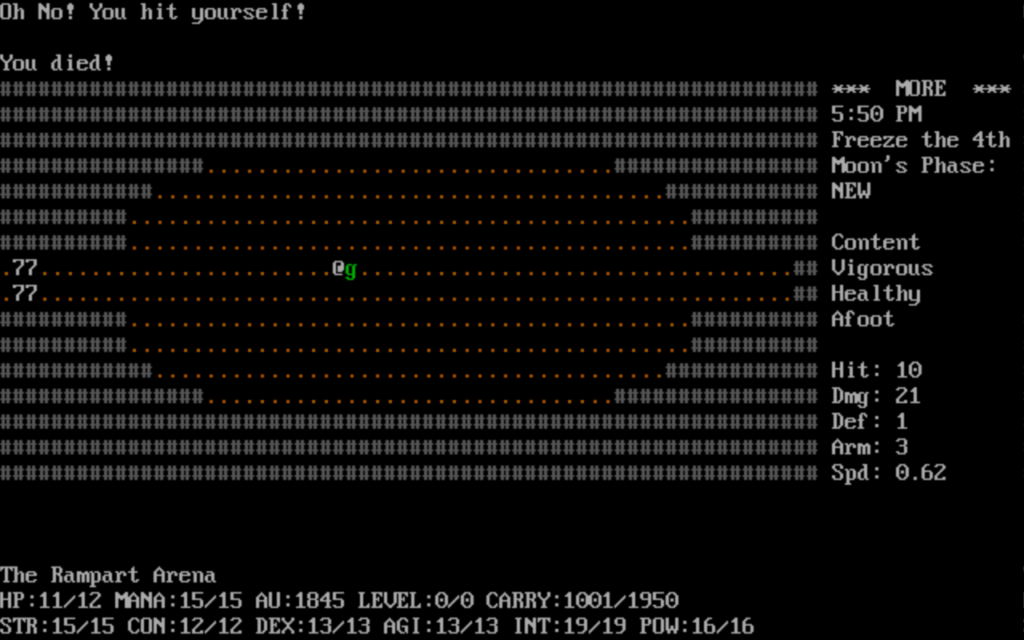
Sleep: This one is extremely dangerous. Although the game still lets your character block and even counterspell while you’re asleep, you don’t get to take any non-automatic actions. The death march of flipping through page after page of attack messages, unable to do anything, is one of the most frustrating events in Omega. Fortunately it’s simple to become completely immune to sleep: just eat a schezuan pepper, which when unidentified are described as being “withered reddish stringy vegetables.” They’re not uncommon in the Goblin Caves, and sleep resistance is important enough to get that, if you haven’t found them by the time you’re done with Level 5 in the Caves, it’s worth regenerating the caves to gain more chances to find one. (You regenerate a dungeon by entering a different dungeon, even if just for one turn, the Sewers in the Hedge Maze are good for this. When you go back to the Goblin Caves, they’ll be unmapped, with a new set of monsters, and some of the treasure will be different.)
Level drain: Your level is distinct from your experience total. You can lose levels without losing experience points, which is what level drain is. If it happens, it’s immediately bad, but you get those levels back the next time you earn XP. You can also lose experience points, which in turn brings your level down. That can only be fixed by earning those experience points anew. Certain interactions with altars, particularly, can cause that, like asking for a blessing when a god doesn’t think you’re worthy.
Of special note, conditions are recorded by the number of turns they have left. There are special cases in the code that cause conditions that have more than 1,000 turns to never run out! At that point, the game considers them to be permanent! This is true of both good and bad conditions.
Specific monsters
Lions – Deadly if you’re not already a competent fighter, and fast. A common source of death from random encounters. If you don’t think you can take one, you might set your combat sequence to all blocking at different heights, then trying to get out of the map.
Goblin Chieftains – Common foes in the Goblin Caves, and will kill you a lot if you’re not ready for them. Setting one of your combat sequence items to Lunge Center helps. The big trouble with them is the great axes they wield, which have the potential to go lots of damage. If your own Strength is high, they aren’t bad weapons to wield yourself.
Goblin Shamans – They begin appearing at Level 6 of the Goblin Caves. You need to be sleep resistant (use the schezuan pepper trick I mentioned) before you try fighting them. If one of the slows you, rent a condo for a week to cure it.
Grunts – Usually pretty easy to beat, but if it connects with that club it can do 20+ damage. Best to treat it with respect, especially the one that shows up in the Arena.
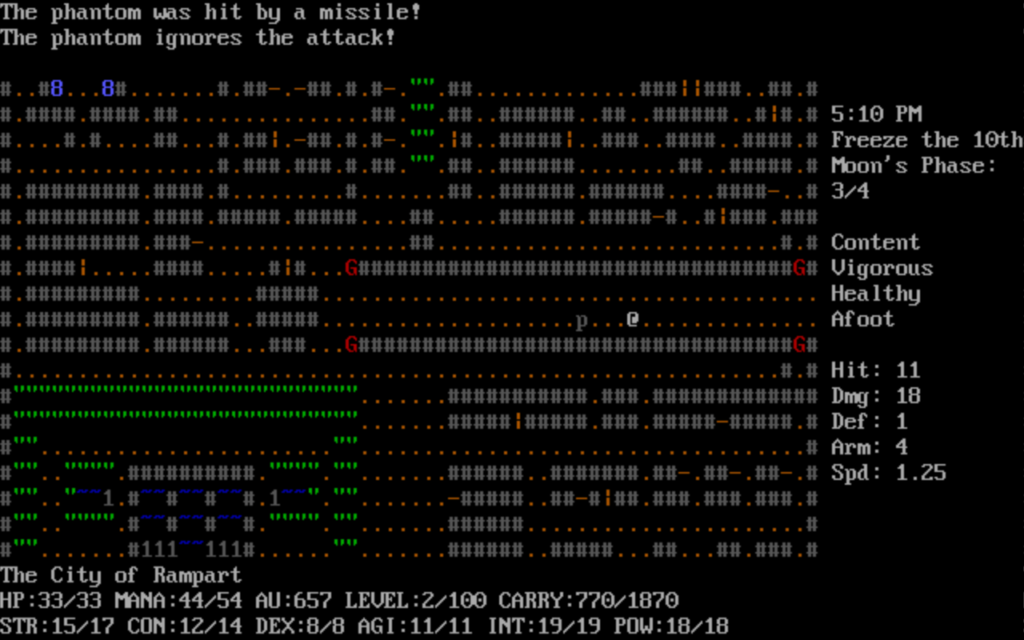
Phantoms – They can drain your levels, which a cloak of negimmunity can protect against. They’re also incorporeal, so you can’t just smack them to re-death, but they can be harmed with magic.
Salamanders – As near as I can tell, you just want to make sure you have fire resistance. If you do, they’re pretty easy. If you don’t, you will be well-roasted.
Horses – Can be tamed by giving them a bag of unmilled grain (give with ‘g’). Talk (‘t’) to a tamed horse to ride it.
Mendicant Priests – These annoying supplicants follow you looking for a handout. Once they see you, they stick to you like glue, and can block you in a dead-end. You can give them a trinket to make them go away; this counts as a lawful act. They aren’t hard to kill, but can curse an item if you don’t finish them quickly.
Itinerant Merchants – Worth talking to on the off chance they have a good item for sale. They usually just sell junk, or hype their stables back home.
Fnords – These peaceful creatures are nevertheless very dangerous; while you’re adjacent to them, they summon other monsters, who probably won’t be peaceful. Usually best to just slay, despite this being a chaotic act you may want to avoid.
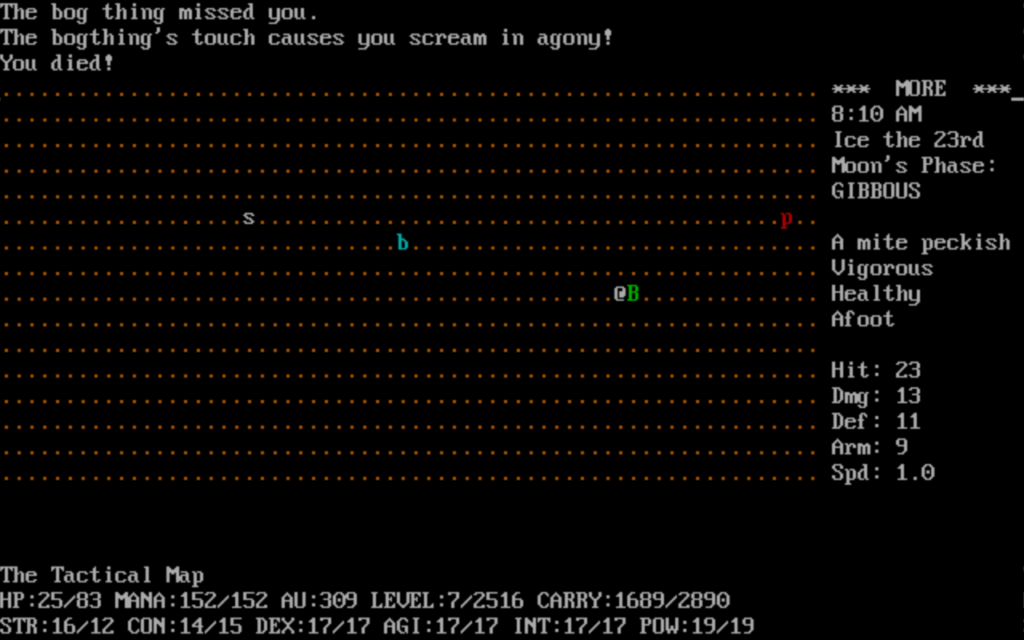
Soldier Ants – As in NetHack, soldier ants are a particularly deadly foe in Omega. They’re fast and the can poison you. While poisoning in Omega doesn’t have the risk of instant death that it does in NetHack, it drains significant health over a short period of time. If you get stung more than once, you’re probably done for. It can be worth trying to drink unidentified potions to save yourself; either Curing or Neutralize Poison will end the condition. It might be best to turtle up (set your fighting maneuvers to all blocks) and make for the stairs.
Harder foes – Run. A tactic that might work is to set your combat maneuvers to all Block at different heights, to “turtle up.” If you do that, and you do escape, remember to change your maneuvers back after. Note, however, that if you see a really out-of-depth monster, there’s a good chance that it’s actually a phantasticon, a fairly weak creature that masquerades as other types of monster. Its alternate appearances do not give it any special powers. It flips randomly between forms every few turns, so hang out at a distance and see if it changes.
Miscellaneous advice
Here’s something really basic: how should you run the game? Most of my playing has been in the DOS version of 0.80.4 running in DOSbox, and that’s how I suggest you play. Every other version has some issue: the Amiga version requires you set up UAE and figure out how to activate it in Workbench; the OS/2 version requires you set up a virtual machine running that OS; the two Windows versions both hide your location from you (the player) when you (the character) are invisible, a joke that’s not so funny when it makes the game difficult to play. The DOS version also hides your location, but still reveals where you’re standing with the terminal cursor.
In that DOS version, when you see the Oracle in the Hedge Maze, the game will ask if you want to ring the [b]ell or look in the [m]irror. Due to a coding oversight, after you look in the mirror, it looks like the prompt is still active. If you then press ‘b’, it’ll be interpreted as a movement command (diagonal down-left), and ask something like “Are you sure?” If you then answer ‘y’es, you’ll walk into the hedge, where you might get stuck, poisoned, or if you’re really unlucky eaten by a trifid. There is a command for interacting again with something right where you’re standing: the ‘@’ key.
There’s a similar issue when you step on a disintegration trap. The game will flip immediately past the notice that your cloak or armor has been destroyed. You can see the notice if you press CTRL-O (in DOS) to look back through the message buffer. Be careful not to step on the trap again immediately after, as you’ll probably disintegrate yourself if you do.
Don’t forget to check the key commands, with ‘?’. There are different keys for ordinary play and the overworld map.
It’s easier to get started playing a chaotic character than a lawful one. A chaotic character can get cheap mana from the Sorceror’s Guild, can build experience and alignment alike by threatening goblins then killing them (starting at around Level 5 you can even do it to chieftains), and you don’t have to worry about giving monsters the first try to hit you. Lawful characters have to play a bit more carefully at first. Neutral characters (like druids) have to play more carefully still.
Don’t drop anything in the overworld, as you won’t be able to pick it back up.
When you see an unfamiliar monster (especially in the overworld, where almost anything can turn up), the first thing you should use is Shift-X to identify it. Especially if it’s displayed as a letter with a background color, it’s almost guaranteed to be something dreadful.
Unlike NetHack, there are no “false” rumors. Anything you read on a hint sheet, hear on the wind, or get from other sources is true.
True Sight protects you from blindness.
At the start of the game, if you plan on going Lawful, it’s not a bad idea to save enough money from the ATM to join the Thieves’ Guild, which can be done before you get to +10 alignment. You can join the Paladins so long as your alignment is >0, so there is a window in there where you can join both. Once you’re in with the Thieves, they’ll never kick you out, but the Paladins definitely might.
Why join the thieves? They identify things cheaply, and then buy the identified things for more than the Pawn Shop will. Identified things generally sell for much more than un-identified. Joining the Thieves, depending on your Dexterity and alignment, may cost more than 1,000 gold. If you don’t have the cash from robbing the autoteller, you might get trapped in a spiral where it’s difficult to scrounge up enough money to join later.
If you get trapped in a dungeon, which happens once in a while, you can tunnel (Shift-T) through walls to get out of it, but you’ll leave a pile of rubble where you dig, which can trap you for some turns and harm you when you try to get over it. Also: if you tunnel too much on a level, you can collapse the dungeon around you, usually resulting in an immediate demise. (There are several warning messages that appear before that occurs though, so occasional tunneling is okay.) Tunneling is generally not useful for getting money embedded in walls, though: the money gets buried in the rubble.
Monsters in Omega never follow you through the stairs to a different level. This is an important fact!
Once the money from robbing the autoteller is used up, you may find yourself in need of more cash. The money you find in dungeons (in the early game at least) tends to be small amounts, worth 10 gold or less.
Here are some other likely sources of money. The best way to earn cash in the early going is selling great axes from goblin chieftains to the Thieves’ guild. You can’t do this unless you’re a member. You get more money if items are identified. If you identify them first, you can get 133 gold each, which tends to pay for your membership before long. The pawn shop doesn’t pay as much, but can be an acceptable fallback, although they, too, pay more if an item has been identified. Neither location will accept cursed items, but great axes used by the goblins are not generated cursed.
Once you find better magic items, you can get a good amont of money from them. And look out for “huge green gem” and “some stones,” as those are gem stones that bring you a lot of cash once they’re ID’d.
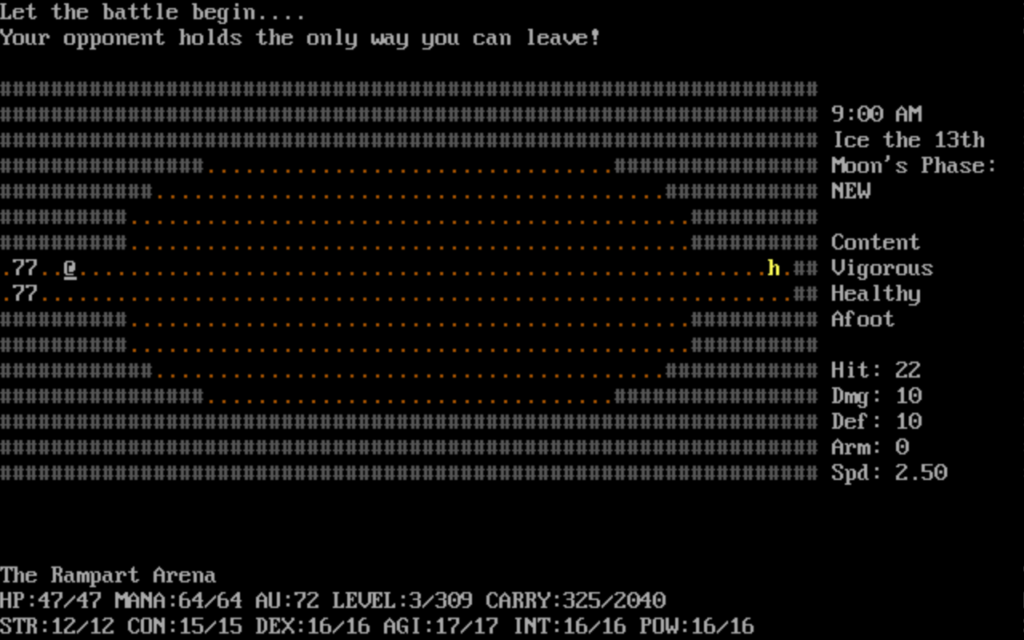
It’s risky at low levels, but there’s the Arena. Look out for the grunt, apprentice ninja, and especially salamander opponents in the early going. The salamander follows the apprentice ninja, you really want fire resistance before you tackle that one.
If you’re really low on money, you can go to the Public Works building in Rampart to get your money increased to 99 gold once.
When you talk to an animal, you get a silly reaction that results in the animal handing you an academic paper indicating that ANIMALS CAN’T TALK, DUMMY. Har har.
The Alchemist’s shop in Rampart can buy monster parts from you, or else for a fee turn some parts into useful items. But if you go to see them with such items in your pack, you might be dismayed to constantly be told you don’t have anything. In fact they can use lots of things, but they can only see items if you’re carrying them in one of your main inventory slots. They won’t notice anything in your pack.
The single most useful thing you can do to survive the early game is buy a good weapon (warhammer or morning-star for strong characters, epee or rapier for dexterous ones), then set your fighting routine (Shift-‘F’) to Lunge Center. I usually check the Pawn Shop before buying something in the Armory, in case something better can be had there for cheap. If you’re a strong character, you should probably switch to a great axe, from a goblin chieftain, as soon as you can.
The second most important thing is to have decent armor, which takes the edge off of each source of damage. I usually go with chain mail, or better if the Pawn Shop has something, but try to upgrade to plate, or especially . Generally, I find good heavy armor is better than light armor, even if it slows you down a bit.
Many of the miscellaneous items you find in dungeons, like tin soldiers or broken swords, have no useful purpose, but a few do. We’ve already noted eating schezuan peppers makes you permanently sleep resistant. Giving (with the ‘g’ key) a sack of grain to a horse can make it rideable.
The general loop of the early game is to find useful stuff in the Goblin Mines that you can identify at the Thieves’ Guild (only open at night), then either use or fence there. Use this money to improve your equipment and build your stats at the Gym and Library. There are stones you can touch in the towns that can also improve your stats, but they can have severe drawbacks, including but not limited to destroying everything in your pack.
If you manage to get the Enchantment spell, I know from experimentation that enchanting rings past +6, at least, is risky.
The problem with most good armor is that it’s heavy, and reduces the amount you can carry back to town at once. An exception to this is the best armor the Armory sells, lamellar armor, which offers both great protection and is very light. The problem is, it costs 3,000 gold pieces.
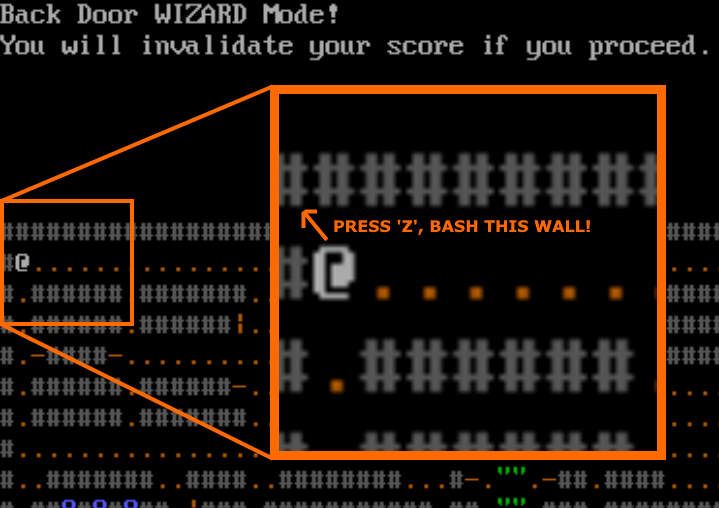
Omega has a cheat mode, which is called “wizard mode” by roguelike tradition. The DOS binaries have it enabled. While broadly intended for development use, it’s also a good way to learn how to play the game. You can activate it by going to the very upper-right corner of Rampart and attacking the corner of the wall to the north-west. The game will ask if you’re sure. Wizard mode is cheating and will disqualify you from the winner’s board, but it can be a less frustrating way to get used to Omega. It has a couple of special commands: Ctrl-W maps the current area, and Ctrl-X lets you make a wish.
If you do this, or you get a wish randomly (which happens once in a great while), a text prompt will appear asking what to wish for. The first thing you’ve got to know is, you only get one try. If you wish for something and the game doesn’t like it, it tells you “you feel stupid,” and what you actually receive is bupkis.
There’s a very limited number of things you can wish for. This isn’t an Infocom-style parser, nor a NetHack-style wish for an item. You can only wish for one of a small number of discrete things. This is a pretty big spoiler, but the game is so laughably precise about what you can wish for and how you must wish for it that I’m going to go ahead and lay out the whole damn list, directly from the source code. You can wish for:
- Power (grants a lot of mana)
- Skill (seems to grant one experience level in 0.80, or a flat 10,000 xp in 0.90)
- Wealth (10,000 gold)
- Law or Chaos (25 alignment points in that direction)
- Balance (zeros out alignment completely)
- Location (asks you which area of the game you want to go to)
- Knowledge (teaches you a highly random number of spells, and may reduce the casting cost of some spells you already know)
- Health (heals you and curses any poisons or diseases)
- Acquisition (gives you a random item, works differently in wizard mode)
- Summoning (sends in a monster, also works differently in wizard mode)
- Death and Destruction work, but they’re really not a good idea.
- You can wish for Stats only from wizard mode
Everything you wish for must be in lowercase beginning with a capital letter, and with no trailing spaces. You won’t get anything you wish for if you don’t capitalize it! The code uses the standard C library function strcmp() to do the check, so you have to get it exactly right.
If you do some searching for old Omega spoilers, you might find indication that you can wish for the main stats in normal play. That used to be possible, but was removed from the game by 0.80. You also used to be able to decide what was summoned. It’s not the only feature that had been heavily nerfed: blessed rods of summoning used to let you specify what you wanted to summon in an oblique way, but in 0.80 and 0.90, it’s always random.
And…
Rods of Apportation lets you get money embedded in walls.
Day businesses in Rampart open at 7 AM and close at 9 PM. Night businesses keep the opposite hours.
Dungeon levels can have multiple down and up stairs, but each has only one entry point coming from above and below. All the stairs doing down from a level lead to the same upstairs. All the stairs going up from a level lead to the same downstairs. If you teleport into a level, you end up at the same entry point. This can be taken advantage of sometimes to speed your travel, but it can also slow you down. It also means, if you’re sent down into a level by a pit trap, you’ll always be left at a place where you can immediately walk back up stairs.
White underscores in dungeons are elevators, they ask you to enter a dungeon level to be taken to. Don’t use them to ascent by more levels than there are in the dungeon. If you’re on Level 3, and go up three levels, it’ll take you to the surface. Higher than that and you’ll suffer a terrible fall.
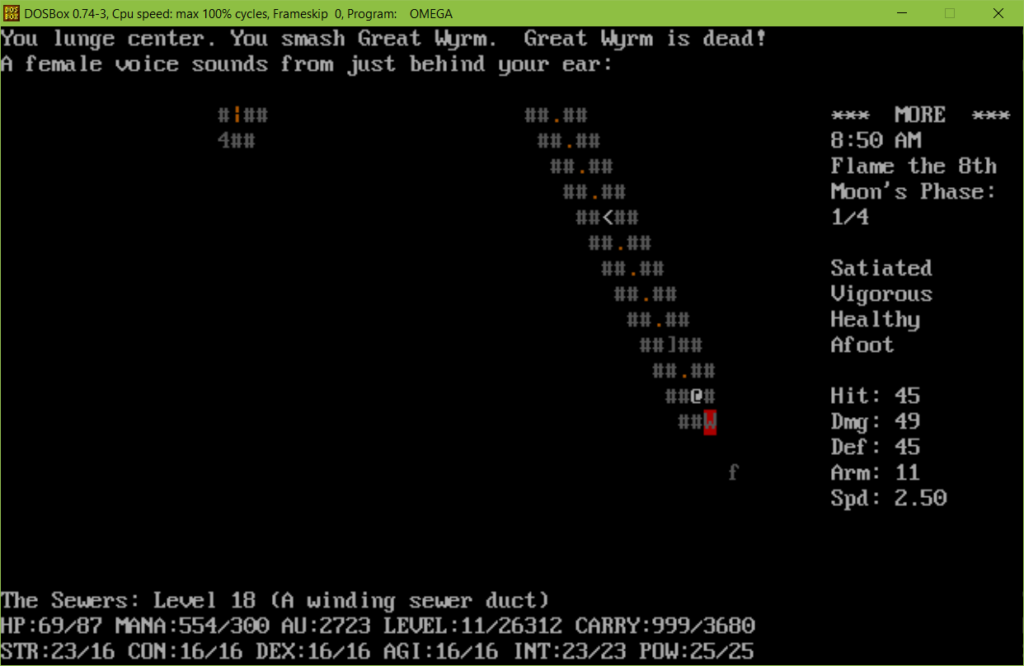
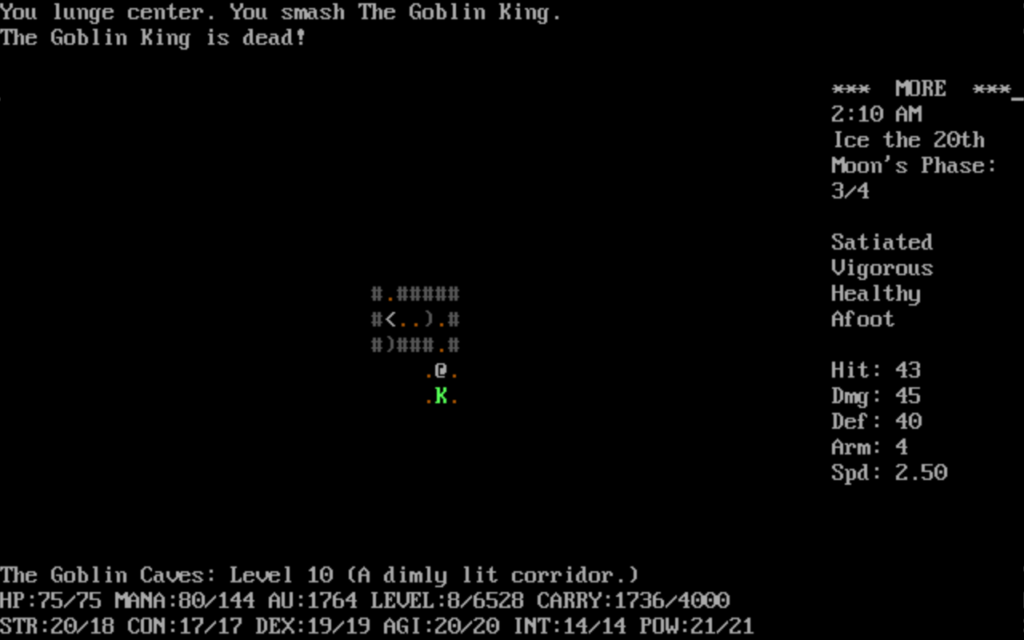
Goal levels in dungeons cannot be warped to, so go to the level before. The goal level of the Goblin Caves is Level 10, and the goal of the Sewers is Level 18. The other dungeons you’ll have to find yourself (or read one of the FAQs linked below).
The Return spell from the Explorer’s Club is great, acting somewhat like Angband’s Scroll of Recall, or Diablo’s Scroll of Town Portal. Cast it on the first level of a dungeon, and it’ll take you to the deepest level you’ve been to. Otherwise, it’ll take you back to the first level. It usually takes some time to activate though. Because of its operation, it’s usually a good idea to go down stairs you find in a dungeon, even if just for one turn, if they’ll take you to a level you haven’t seen.
In addition to the chance of arbitrary damage, when you trigger an abyss trap, the game rolls d100, and if it comes up 13, you meet Yog-Sothoth (people familiar with H.P. Lovecraft will recognize the name), and if your alignment is higher than -10, you just die instantly. If your alignment is lower than that, you are granted 2,000 XP. There is no special effect if the number comes up as anything other than 13.
At Last!
We’re done talking about Omega for a good while! If you need more information, some documents on the official Omega distribution site may help you, although they’re all for 0.75: the FAQ for 0.75, a hint sheet, and a spoiler file. There’s more to say, I’m sure, but let’s save some for a future time.
Next month, we’ll have some other roguelike obscurity to talk about. See you then!