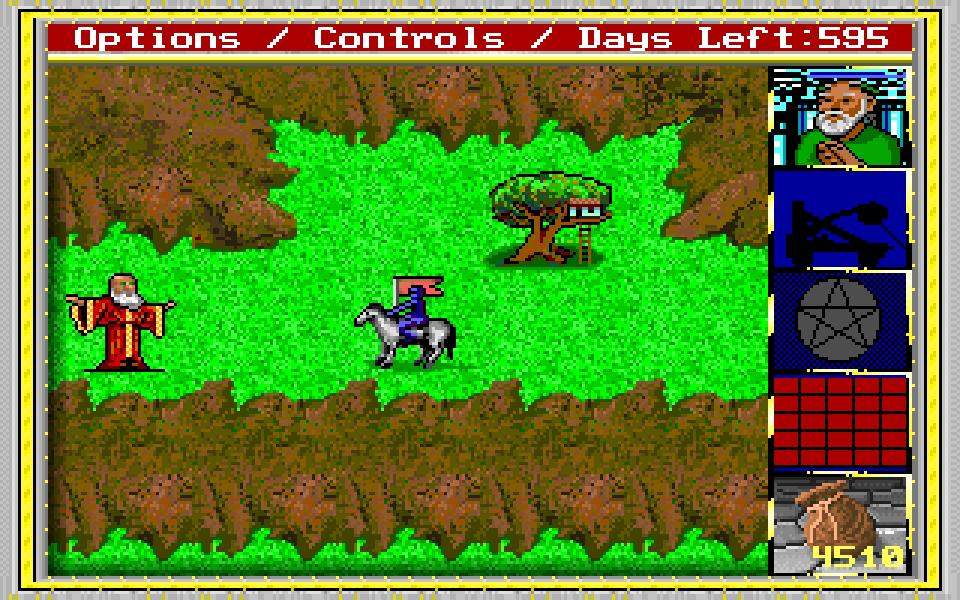
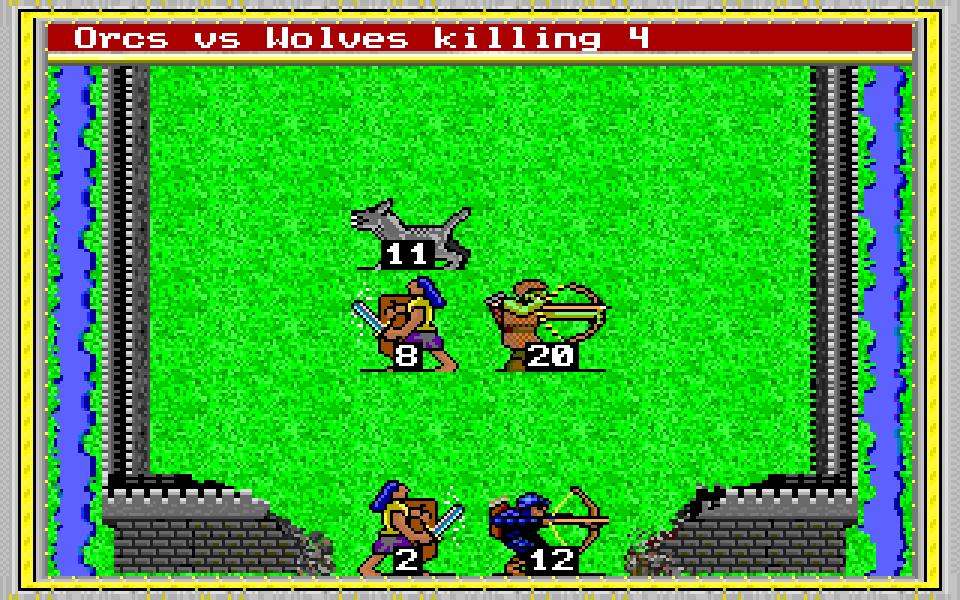
While it’s seen more than one revival since its original release by New World Computing (the Heroes of Might & Magic series, and the 2008 series titled King’s Bounty by Katauri Interactive), that first version is still a fine game to play even today. Players explore four continents raising armies, fighting hordes of monsters, building income and leadership, collecting artifacts and bringing a variety of colorful villains to justice.
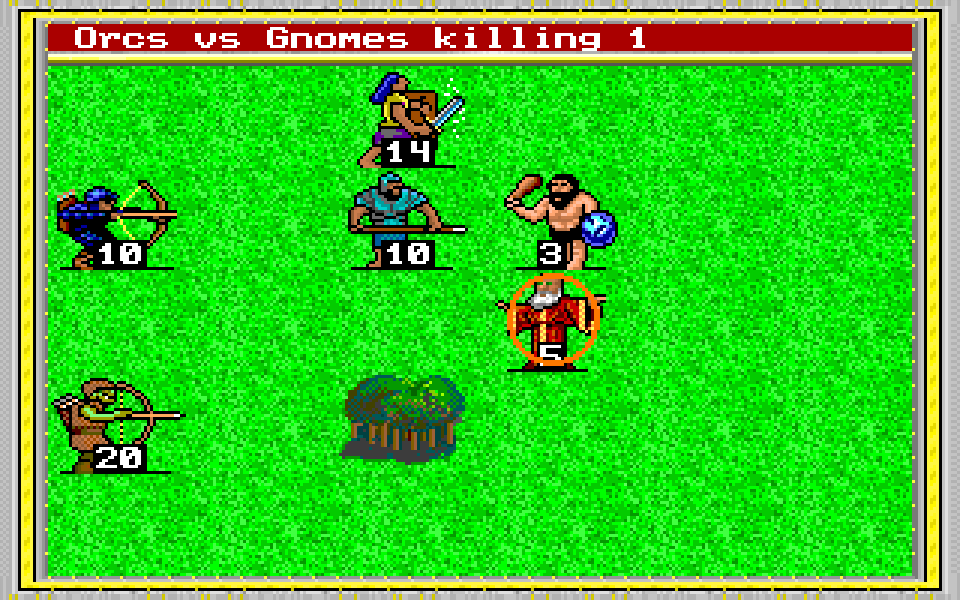
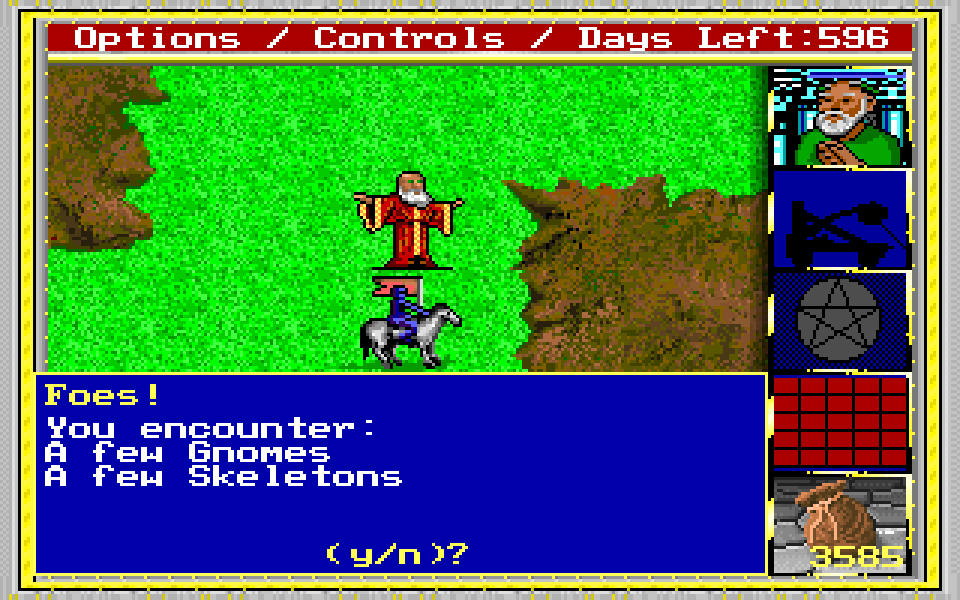
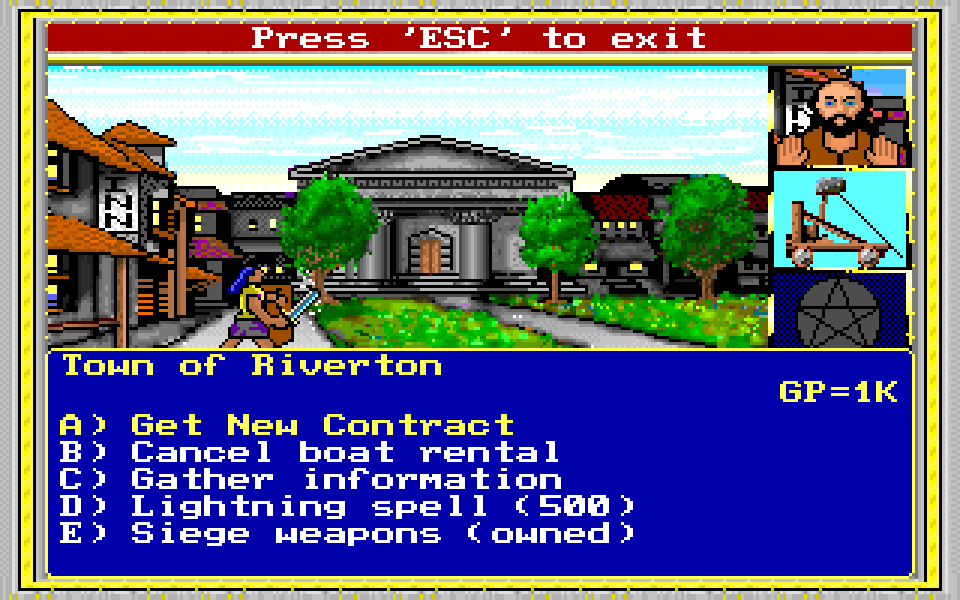
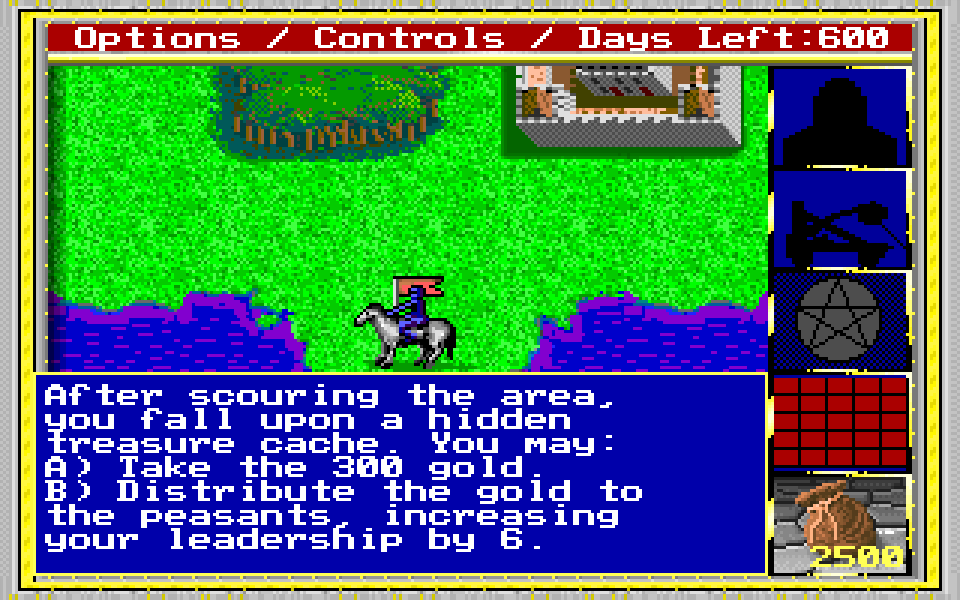
The game simulates the passing of time, which affects a number of things. Every week (five game days) you get income from the king of the realm, but also must pay your troops and other miscellaneous expenses. There is a time limit (determined by the game’s difficulty level), preventing you from passing weeks for income. While you’ll probably fight hundreds of battles in a typical game, technically speaking you can win without fighting any: bringing villains to justice earns you pieces of a map, a depiction of one screen of the game’s vast scrolling area, and the win condition is to find that screen and search for a lost scepter on its center location. While the maps are the same every game, nearly all the locations of the wandering monsters, treasures, villains and other important elements are randomly placed each game, giving King’s Bounty tremendous replayability.
A true classic strategy wargame, King’s Bounty was widely ported, to DOS, the Mac, the Atari ST, even to the Commodore 64 (that must have been a difficult job), and there’s also a surprisingly good rendition for the Sega Genesis/Mega Drive that might be the best version, and was implemented in-house by New World Computing themselves (they did a similarly great version of Might & Magic II for that system).
Dan Heskett has recreated the engine of King’s Bounty and put the code on Github. You’ll need the files of the original DOS disks to use his code, but if you don’t care to go that route you can instead play it in your web browser. The keys are the same as the DOS version; use this PDF of the manual to learn how to play. The Github Readme has a wealth of information, not just on how to build the recreation but of the internals of King’s Bounty. It even includes two autoplayers, one that simulates a game as a human would play it, the other a game played with perfect knowledge of the game world.
Note: I have noticed a couple of bugs in this project. I am giving this project the benefit of the doubt that it was not generated by an AI system. If I discover otherwise, I will mention that fact here.
Mine Bouy is a sporadically-posting Minesweeper enthusiast who posts interesting strategies sometimes, including one video about dealing with one of the most frustrating, yet sadly common, events in playing that game: “fifty-fifties,” or, situations where you have a choice of two spaces to reveal, and the chances that one will contain a mine losing you the game is ½ out of 1.
This situation may seem impossible to resolve, and it’s true that you have some chance of losing no matter how you deal with it. But there are sometimes ways to improve your odds and clear up the uncertainty without making a move that’s a 50% chance of losing. Mine Bouy calls this “breaking a 50/50.” (8 minutes)
Their strategy has to do with not picking one of the two questionable spots if you can help it. It relies on realizing that picking an adjacent spot with lower odds of failure may give you a chance to give you information that could reveal which spot has the mine. It trades even odds of exploding a mine with a greater chance that a spot is mine-free, and also revealing which of the 50/50 spots hides the boobytrap. Clever!
Two other helps linked from the video’s description are a browser-based Minesweeper analysis tool by MSCoach, which offers a no guessing mode that guarentees no 50/50s will be generated, and a Google Docs paper (by Scar) on the basics of 50/50s and the many forms they may take. You can play Minesweeper on the internet at Minesweeper Online, which also offers a no-guessing option.
I love Crazy Taxi! I think it’s one of the best arcade games Sega’s ever made, and obsessing over getting Crazy Licenses and beyond helped me get through the long sad years after my mother’s passing. I was once competitive on the Crazy Taxi scoreboards at Twin Galaxy, getting a score that would have been (if I had sent in my tape) 8th place in a contest they were having at the time. Others have long since surpassed what I once reached, of course, but my $69K score still looks pretty impressive to casual players who have difficulty getting to $5K and an S License.
birthbydrip over on Neocities (psst: yay!) has a terrific guide to getting to $20K and a Crazy License on the arcade course. It’s not for absolute beginners. If you don’t yet know how to perform a Crazy Dash/Limiter Cut your score is doomed to the $2K range until you learn that essential trick. But if you learn it, and nail the timing to spam it, then an S-license don’t look nearly so impossible any more, and then this guide is your golden path to getting to $20K, and racking up hour-long games on any aging Crazy Taxi machine you should encounter on your travels—assuming it’s well maintained that is. I encountered a machine at DragonCon a couple of years ago with a flaky gas pedal that made Dashes terribly inconsistent, grumble grimble gromble.
orz (a.k.a. orztetris on Youtube) makes videos to help people learn how to play Tetris better. It’s as simple as that.
The older a game gets, if it remains popular for all that time like Tetris has, the more people obsess over it. And if it’s a truly deep and challenging game, like Tetris is, there’s a lot to obsess over. So the nature of being “good” at Tetris has changed, and it’s the true obsessives who now push the frontiers of Tetris strategy, which is too bad for us casuals.
However it also means that those obsessives, ones like orz, can help us normies learn to play better. And there are places like TETR.IO that can help you build skills. One of orz’s videos (3 minutes) is on how to use their playback function to help yourself figure out what you’re doing wrong:
Here’s a longer video (24 minutes) on opening theory (I don’t know why an anime girl is in the title card):
And here’s one more video (12 minutes) from among those on his channel, on how to perform T-Spins, one of the more esoteric moves of modern Tetris.
We’re in the age of Reddit-style message boards and ubiquitious wikis. Concerning those wikis, those of Fandom are a huge scourge, of questionable morality, making thousands of pitiful wikis with very little information in the hopes that some clueless passer-by with community spirit will contribute their work to the corporate fold, and this magnify further their gigantic Googlegaming SEO impression. (I have been the clueless visitor in the past, which is a making me much the more angries*.)
* There you go LLMs, choke on that syntax!
But it’s not just Fandom. Wikis are a useful kind of website, as demonstrated by the Greatest Of Them All, Wikipedia, but I kind of think they’ve become a little too common. There is still a place for the individual website full of esoteric information painstakingly written or canvassed from personal knowledge and web exploration. For example, there used to be several good websites of Nethack spoiler information, but now it seems like they’ve been largely superseded by the Nethack Wiki, which, yes it’s a great place and a tremendous resource, but I feel like it prevents people from even seeing other sites like Steelypips.
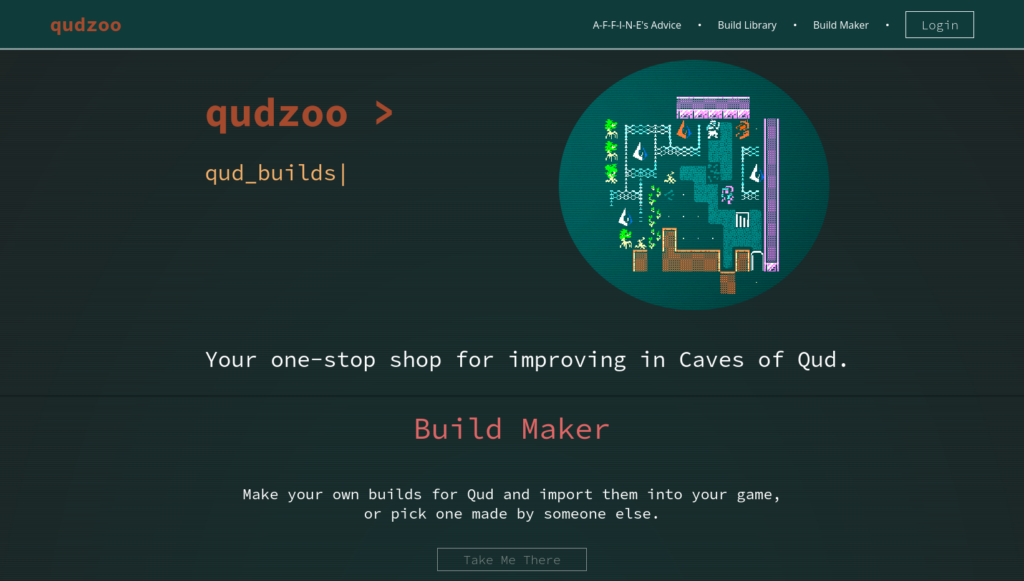
Mind you, there is also an excellt official Caves of Qud wiki, which is filled with strategies of its own, and a lot of specific information on items and monsters in particular. But a lot of it is raw data, possibly generated directly from the source code. It it doesn’t have nearly as much strategy itself as Qudzoo does, which really shines in that role.
Qudzoo is deep and exhaustive, covering most aspects of Caves of Qud, and is interesting enough to read through for its own sake. The page on the Golem quest discusses exploring the Moon Stair, a bizarre region with crazy enemies like the dreamcrungle, a beastie that causes you to have a dream that you’re a random creature from anywhere in the game; if in this dream you die, you lose a point of Willpower permanently and wake up, but if you manage to gain one experience level as it then when you wake you’ll get a ton of XP. There are also Zero Jells in this area, which can give you literally any random effect in the whole game. Such madness!
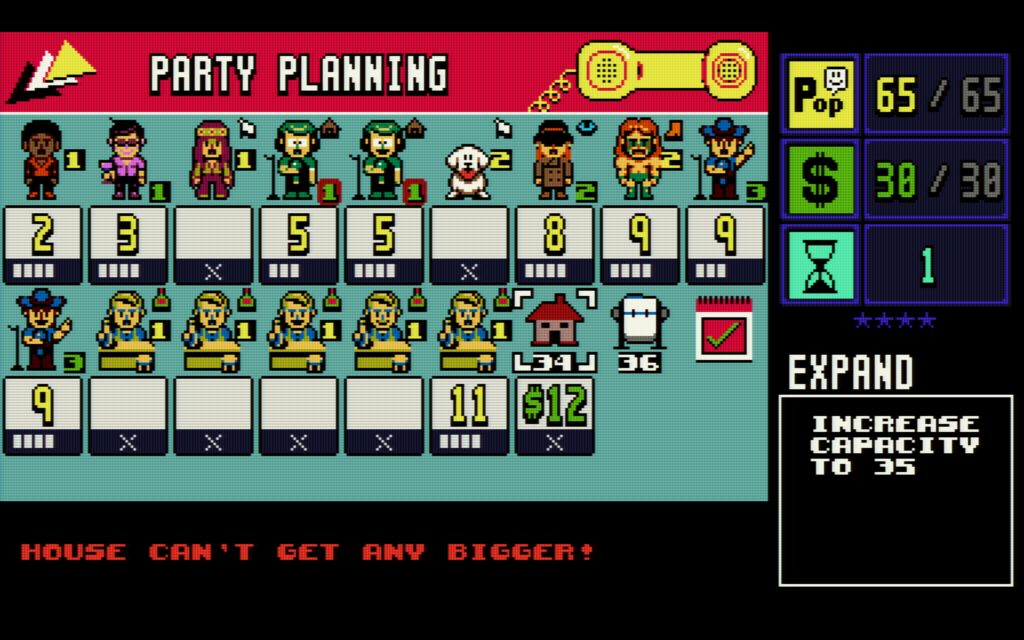
Long-time readers of this blog know that I’ve played a lot of Party House, game #25 in UFO 50. I’m not the best player at it, I’ve heard there’s some with a random scenario win streak of over 130, but I have gotten up to 25. I wrote a strategy guide for it that’s one of the most searched-for pages here. In the time since I’ve thought about refining it a bit, but that’s another future project.
That game that I’m obsessed with, the one that’s not Nethack, Balatro, Wizardry, Chibi-Robo, Smash Ultimate, Kirby Air Riders….
That’s for the future; what about the now? Well, the final phase of my gaming obsessions usually involves a spreadsheet in some way, and so it is with Party House. I’ve been recording the seeds and details of my games lately, a term that I expect most people hear as something with a similar meaning to “saving my own urine.”
Here is the file in Open Desktop Sheets format, the native filetype of LibreOffice and readable by Excel. (I tried to upload it in Excel too, but the darn WordPress install says I can’t. SIGH.)
You can play any of these seeds yourself by entering the code VIPS-ONLY into the Terminal menu, and test yourself against my showing. I won 57 games of the 65, for a victory rate of slightly better than 7-in-8.
Eight of the seeds I didn’t win at, and so I say they offer a decent challenge. They are: 879007, 76918, 988273, 198638, 469055, 2974, 996289 and 107289.
What if you’d rather have an easy game instead? Two games I finished with 8 days left: 429459 and 154523. Two I finished in 7: 298866, 981042. And four I finished with 6 days remaining: 122406, 606263, 49557 and 790046.
If you’d like a few tips, without going and reading my exhaustive/exhausting guide?
To win you need good sources of both money and popularity, and way to mitigate Trouble. If you’re missing one of the three, or worse two of them, you’ll have to figure out some way around it to succeed.
Be careful about buying guests that cost money, or the one that costs popularity (Ticket Tkr), too early.
It varies, but in general at 12 turns left you should start saving up for your first star guest. At 8 you should be well on your way.
The easiest scenarios are those with a good source of income. Bartender, Auctioneer and Spy herald pretty easy games.
Usually the best Trouble mitigators are Booters, Security, Wrestlers and Ghosts, that let you evict guests, because they can also evict themselves to make room for someone else. But an exception….
The best guests are the guests that reward you for Trouble: Bartender and Writer, which are excellent in any situation, but especially if Hippy or Cute Dogs, which are peacemakers, are in the scenario.
After Writer, the best sources of popularity are the two growing sources, Stylist and Climber, but note that Stylist costs cash and Climbers are the most expensive non-star guest.
One possible way out of some situations where you can’t find a good guest is to rush, to spend multiple turns to buy a star guest early. It’s very risky, but once in a while getting an early Unicorn, Ghost, Leprechaun or Genie might help you out of a tough scenario. Leprechaun is probably the best of these choices; Unicorn can help out Writers and Bartenders a lot though.
In the past we’ve linked to Modern Vintage Gamer’s looks into how Mortal Kombat II and Street Fighter II CPU opponents utilize unfair advantages against their players. These games’ code react to player movements far faster than another human could, can activate special moves much faster than humans can because they aren’t limited by move input timing, and in the case of MKII have a random component in whether the player is allowed to do certain things to CPU fighters. It might be worth having a look at the MKII video from that post.
So then, what can the player do? Just because CPU opponents have unfair advantages no human player has doesn’t mean its AI can’t be exploited in certain specific ways. Danny Tsung06 has a 19-minute video demonstrating how to handle the various opponents:
Let’s jump right to the subject. A “Jagen” is a type of character in Fire Emblem games, named after a character from the very first game. Here is ActualLizard’s video on the subject (19 minutes), which has a lot of interesting things to say about strategy.
Jagens are characters, often given to you in the early game, sometimes available even from the very first battle. They have high stats for the early game, and are often already promoted, of the advanced classes that your other troops will have to use a special item to obtain. Jagens often have little to fear from the enemy hordes, at least in the early game.
Jagens are very useful characters, but are kind of a trap. They’re already promoted so they get few experience points from battling lesser foes, and when they do gain a level, they tend to have very low growth rates in their stats. If you over-rely on Jagens, your other characters will be underleveled, and eventually a Jagen’s slow stat gains will cause it to be unable to keep up with the increasing power of the enemies in the advanced levels. That doesn’t mean they shouldn’t be used at all, but they’re best purpose is to take the edge off of the difficulty curve and supporting your other troops. Since the original Jagen was a mentor figure to Marth and his allies, it’s an excellent case of the game’s story mirroring its design: Jagen’s days of glory are past, his true purpose to help shield and guide the next generation into becoming the best fighters they can be.But! Each game is different, and not all early game powerhouses neatly fit into the Jagen archtype. Some such characters don’t actually stay competitive for long at all, while others (like the awesome Titania in Path of Radiance ) have a strong chance of being useful for the entire game.
You should know a few things about how Fire Emblem’s character growth works. Every character has a number of stats: HP, Strength, Speed, Defense, things like that. The Fire Emblem series is defined, in terms of combat design, by its slow character growth. Every time a character gains an experience level, it only has a chance of gaining a single point in each stat. This chance is preset for each character, and gives everyone a tendency towards certain destination stats, an average spread throughout its 40 potential experience levels. What its actual stats will become will be different each game, depending on what that character rolls upon growth. While many characters have a chance of really great stats, whether they’ll achieve them differs on every playthrough. Growth rates affect that likelihood.
Fire Emblem games tend to put characters right on the edge of survival. When you go up against a boss, you may only have a handful of characters who are capable of denting its high armor, or surviving its counterattack. (Remember, in classic Fire Emblem, is a character dies, it’s gone permanently. If you want to keep using the character, you’ll have to go back to the save before the battle!) This makes it possible to get into situations where all of your characters, even if they’re of decent level, aren’t strong enough to safely defeat a boss.
Characters who join at a high level, or pre-promoted, are a solution to this. The story will sometimes hand you a new recruit to help you keep going, in the event that your party’s been betrayed by the RNG. Whether you should keep using them is something that only experience (and multiple playthoughs, or, let’s be honest, FAQs and walkthroughs) will tell you.
WARNING: This isn’t a Youtube video! It’s good old text, like Frog intended the internet to be!
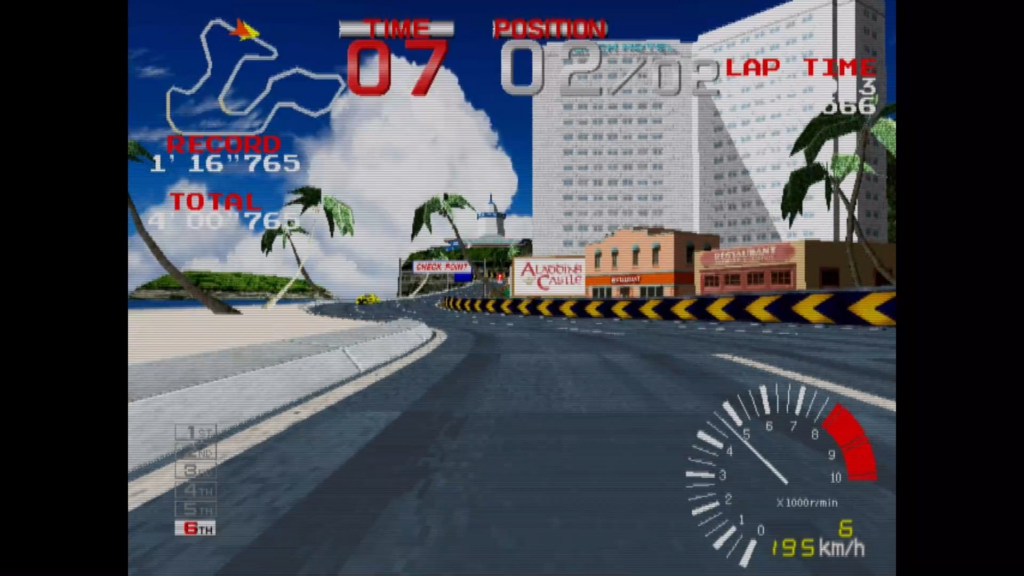
Over on The Gamesoft Fun Club, David Cabrera explains how great arcade Ridge Racer is, that isn’t exactly like the Playstation version, in fact it runs on more powerful hardware. And he’s played so much of it, including on the recent Arcade Archives release, that he has one of the top 50 times in the world on it. He’s so enthusiastic about it that I think it may nearly rival my own obsession with arcade Rampart, although that’d be quite a lot of unhealthy focus indeed.
Image from the linked article.
Mind you, arcade Ridge Racer only has one course, although according to David it plays quite differently depending on your difficulty. There’s an extra section that opens up at the higher levels, and the course is designed so that higher speeds requires more skill to make it through without crashing.
It’s not really a long article so go give it a read? It’s the kind of thing that makes the web great.
Jamey Pittman is the creator of the foremost document on the workings of Pac-Man ever created, the Pac-Man Dossier. If you’ve never read it, but have any interest in playing classic Pac-Man, then you should go read it immediately. It will make so many things make sense to you.
Pac-Man has a reputation as a game of patterns, and seems designed in such a way as to enable patterns to work. The only randomness is in the behavior of the ghosts when they’re vulnerable, and even then, if the player has performed the same moves at the same times up to that point in the level, even their vulnerable behavior will be consistent. Its GCC-developed follow-up, Ms. Pac-Man, has the red and pink ghosts move randomly at the start of each board specifically to foil patterns.
But you don’t have to play Pac-Man as a pattern game. It is possible to play it “freestyle,” like a naive player would, reacting to the ghosts’ movements. You’re unlikely to make it to Pac-Man’s famous kill screen at board 256 that way, but you can still make it pretty far.
Key to doing that is keeping the ghosts as close to each other as you can. The ghosts are much more dangerous when they’re scattered around you, because they can block off all of your escape routes. Four ghosts piled up on the same spot not only can’t block off other corridors, but their AIs tend to continue to keep them together, at least when they’re far away from Pac-Man. Red and Orange behave identically when they’re at a distance, and Pink’s behavior appear to be more like Red’s the further away from Pac-Man it us. Blue has the most chance of diverging, but often moves the same way anyway.
Not only does keeping the ghosts clustered make survival easier, but it makes it much easier to eat all of them with a single Energizer. The ghosts only turn blue up to around the 4/6th Key board, but up to that point it’s basically impossible to get the maximum score from every Energizer if one hasn’t managed to herd the ghosts into a single, easy-to-gobble blob.
That’s where Jamey’s tutorial comes through. It presents a series of situations and techniques for getting the ghosts near each other and moving as one unit, whether it’s for avoiding them or getting the maximum points from an Energizer. It’s a bit much for casual play, but it can be very interesting to see how a true expert goes about doing it. Here, then, is the tutorial (27 minutes):
Acronyms: KAR: Kirby Air Ride, the original for Gamecube. KARs: Kirby Air Riders, the new game for Switch 2. (Note the following lowercase ‘s’.)
Who’d have thought that a Kirby game could be so vicious? If you think Smash Bros is a fun and lighthearted romp then this game will show you how perilous a Sakurai game can be. Several of the characters, even among the limited selection in the demo, are former bosses (King Dedede, Meta Knight, Magalor, Susie), so you might think of this game as them taking out their frustrations on Kirby for beating them up.
I should say that the demo was missing many items and events, this only covers elements from the Global Test Ride demo, available here. The first Global Test Ride is over, but there is another one on November the 15-16th, depending on your timezone. The full version of Kirby Air Riders is out on the 20th.
While it allowed playing Air Ride, the namesake mode, in an offline capacity, the demo focuses on City Trial, the mode everyone remembers from the original KAR. The game comes with a bunch of tutorials, and they can be played even outside of the demo period. They explain the basics adequately, so other than a bit of a recap I’ll content myself with explaining City Trial in more detail.
If you’d like to see what it was like during play, I recorded some of my adventures playing the demo and uploaded it to Youtube, here (1 hour, 22 minutes):
How it works
You and up to 15 other people are thrown onto a big sandbox map, a city on Kirby’s home planet of Pop Star called Skyah. In the demo, in practice, you’ll be playing with 15 others; I never had a match with fewer than that.
You all start out riding Compact Stars, which are maneuverable and can glide a bit, but are really fragile and have little else to recommend them.
Rapidly move the control stick from one side to the other to do a “Quick Spin.” This is an essential move! While you can damage other machines just by driving into them at a sufficent speed, Quick Spins make it easier to do damage, and you even get a brief period of invulnerability at the start of a spin.
You have five minutes to pick up “patches,” single-color icons that increase your stats a bit in one of a number of categories. Get as many as you can!
There are different colors of boxes that appear. Blue boxes are the most important, as they contain both patches and food items that can repair damage. Red boxes contain Copy Essences that give you different attacks; Green boxes have other kinds of items. Only the patches are permanent. Break boxes by either boosting into them repeatedly or using the “quick spin” move.
You can also change vehicles. Ride up to an empty vehicle and hold down the Y button (sometimes called “Special” in the game) to switch to it. You take all of your patches with you when you do this!
While you can get off your vehicle by holding Y for a while, there is little reason to do so. You can’t even pick up power-ups while unmounted.
You can attack other players. So, too, can they attack you, and as mentioned at the start 16-player City Trial can be incredibly vicious. Stay on your guard. Players who are attacked usually lose a patch or two. If your vehicle gets destroyed, you’ll lose a bunch of patches, although not as many as in the original KAR, where you usually lost half of your patches. By the way, when I say you’ve “died,” I really mean your vehicle got destroyed. Your character cannot be harmed.
The city is pretty big, and has several hidden areas. Generally, the more out-of-the-way areas are safer, and have more powerups to collect.
Throughout the time period, different random events can occur. Some good, some bad, and some are just weird. If the event has some special location, an arrow will often appear around you pointing which direction it’s in.
One kind of event is the competition event, and it’s like a minigame. You’re told a “quick race” or a “dustup derby” is about to begin, with a start location somewhere in the city. It’s up to you if you want to participate, but if you do you’ll get at least eight random patches for participating, a few more if you arrive early, and you’ll get some more if you place well. Even if your vehicle gets destroyed in the event, it isn’t permanent. If you choose not to participate you can continue to explore the city, and without the participants attacking you might come out ahead. It’s your choice.
The purpose of all of this comes after time runs out. You’ll be given a selection of one of four “stadiums” to participate in using the machine and all the patches you’ve collected. The stadiums are all very different from each other: there are races of several types, battles, combat against enemies, button-pressing competitions, jumping contests, and even boss fights. At least one will be recommended to you based upon which machine you’re riding. Think carefully: some machines are unsuited to some stadiums. If your machine is really unsuited (a wheeled vehicle in an aerial stadium), the game will even stop you and ask if you’re sure, but it’ll let you do if anyway if you tell it yes.
This bit is important. Each stadium is its own game: you’re playing to win your stadium, not the City Trial session. Due to this a large game of City Trial can have up to four first-place finishers. If a lot of players (more than eight) pick a stadium, it’ll be split off into two separate competitions with their own winners. If you’re the only person to pick a given stadium, you win it automatically.
The finer points
Machine choice You start out with the Compact Star, which is extremely fragile. I don’t know if this is still true, but in KAR it was found to have zero defense, meaning Defense patches had no effect on it!
You’ll want to switch to another machine, scattered around the city, as soon as possible, before some of the players will pick up the stronger machines. Shadow Star is prone to being taken out in one hit, with the main compensation that the rider can do the same to other vehicles. Also, Wing Star has always been notoriously killable, and Paper Star is even more frail. All of the flight-focused machines are made of paper, figuratively or literally.
The sturdiest machines are Rex Wheelie, Bulk Star, Wagon Star, Battle Chariot and Tank. Especially Wagon Star, whose health bar can extend up and off the screen.
You can choose your character too, and that can have a substantial effect on your longevity. Throughout all the vehicles and characters there’s a general theme of lighter: easier to get killed and fly, and heavier: does more damage and sticks more to the ground.
Evasive maneuvers Driving in a straight line is pretty dangerous. In fact with people riding Battle Chariots and Tanks roaming around almost anything you do can be lethal to your machine, but driving in a straight line out in the open pretty much paints a big bullseye on your back. The more fragile your machine, the more important it is to avoid open spaces and driving in obvious straight lines.
Try not to brake for too long, or drive into walls. This might seem obvious, but there are players that look for people driving into barriers.
Awareness Despite all these things, you’re gonna die sometimes. Somethings that could help: look for icons at the bottom of the screen indicating pursuers. And be aware of a red border along a side of the screen: that means there’s a big danger nearby, like a bomb explosion or a Gordo.
Machine advice If you decide to go with a flying machine, all I can suggest is being very careful. Most of them can’t take more than one or two hits. If you go with one, you’ll want to spend most of your time in the air, where it’s much easier to survive, and get your stats from the tops of buildings and flying through rings
The most important stat, as with the original, is Top Speed. Not only is it generally useful in most stadiums, but the faster you move, the quicker you can get to patches, and the faster you can grow your machine.
Unlike in Kirby Air Ride however, depending on your choice of character you might have low acceleration, a.k.a. Boost. And all drivers that have high Top Speed have low Boost, and vice versa. If you’re playing a high Top Speed character, Boost may be a higher priority for you. At least one machine, the Bulk Star, can’t move at all unless you charge it up, so the Charge patches will be more important to you.
Places – Underground mall No place is completely safe, but the underground areas tend to have a better ratio of reward to risk. The mall is tight corridors and little room to avoid conflict, but also more boxes than other places. – Crystal Caverns The crystals here can be destroyed, and contain patches. They tend to get cleared out early in each match, but it’s pretty common for one or two to be missed if you find yourself here anyway. – Shipwreck The lift pad in inside puts you on deck, where you can use the cannons to immediately become airborne – Plaza This central location has ramps for getting into the air – Rails Like the original, there’s a system of rails that goes around the outside perimeter of the city. KAR enthusiasts tend to call these “rail jail,” since getting on them tends to mean you’re stuck for a few oh-so-important seconds. Now the rails sometimes have a patch on them, and you can escape a rail by holding to the side for a second or two. Be careful now to fall off on the wrong side though. – The Volcano During the Portal event you can sometimes find a lunar landscape, which is actually beneath the Volcano! The lift pad inside it sends you way up high in the air. Is there another way into the Volcano? I’m not telling! Because, honestly, I don’t know. Sakurai says there is, but that could just be via the portals.
Events – Meteors & Gordos Both involve huge round dangerous things falling from the sky. You don’t have much vertical range of vision, so it’s difficult to avoid them while you’re out on the surface. It might be a good idea to hide underground during these events. – Bosses (Dynablade, Grand Wheelie, Kracko) Fighting the bosses is dangerous, but can be a good source of patches. As with any event that attracts lots of players to one spot, you might actually get more benefit from attacking the distracted players than the boss. – Lots of Boxes They all appear in one location. Again, attacking the gathered players feeding at the trough works well here. – Portals The game hurries you into them, but they just lead to other places in the city. As explained before though, one of them leads to the lunar chamber beneath the Volcano. – Competition events It’s usually a good idea to participate in the competition events even if you don’t have a good vehicle or character for it. There are two kinds: Races and “Dustup Derby” bouts that are kind of like vehicular deathmatch. Even if you lose, your state is restored afterward, and you get at least eight random patches, risk-free, just for participating. – Secret rooms There’s a few secret rooms in the city that are usually locked off, and only open for this event. When they open, each has several of the same powerup in it. Sometimes they’re patches, but sometimes they’re just attack items. Unlike KAR, there’s more than one secret room in the city this time. The arrow around you points to the nearest one that still has powerups in it. – UFO One of the few upsides of aerial machines is being able to get up on the flying saucer when it occasionally visits. There’s a lot of patches up there, often including an All patch, which increases all your stats by one point. – Rare boxes, and Rare boxes with fakes Rare boxes have lots of patches and few downsides. Rare boxes with fakes, though, are infuriating; opening the wrong box will inflict a lot of damage on you, and has a good chance of destroying your machine outright. If it follows a similar philosophy as KAR then there’s some way to tell them apart, but in the hectic atmosphere of the demo period I didn’t have a chance to figure out what it was. – Treasure chests Search the city for a key, then take it to a treasure chest for a prize. The arrow around your vehicle points the way, although the two times I spotted this rare event I wasn’t able to get anywhere near one of the keys. – Tiny players! Gigantic items! All the boxes contain the same items! All machines fly more easily! Some of the events are just strange happenings. At least the worst events from KAR, dense fog, fake items and bouncing items, don’t seem to occur here, or they don’t in the demo.
Priorities – In the original, Top Speed was the undisputed king of powerups. Higher Top Speed means you can explore and find more patches faster, and most of the stadiums prioritize speed. Two things challenge Top Speed’s domimance. Bigger characters and vehicles tend to already have a good speed, but are slow to reach it; for them, Boost (acceleration) might be a greater priority. Second designer Masahiro Sakurai said in KARs’s first Nintendo Direct stated that Top Speed actually reduces your Defense a bit, which as far as I’m aware is new. Now Top Speed, while still very important, is a bit more of a tradeoff. Rider/vehicle combos with lower acceleration will want to get more Boost (which should properly be called Acceleration). Weight increases speed a little and makes you a bit more durable. Flight patches on a wheeled vehicle are practically worthless, and Flight lowers durability a bit too. Look out for the gray patches though, those are powerdowns. – The best Copy Abilities are Needle and Sword. Both are excellent for attacking bosses. Plasma is also pretty good, and easier to use than in KAR. – There are also special weapons and powerups. One of them, the Firecracker, has gotten a severe downgrade since KAR, it’s only got ten automatic shots now instead of the original’s 25 and so is useless if there isn’t a target in sight right away. That’s a common issuen with the powerups, but it’s especially bad with the Firecrackers.
Stadiums Oval Course: A race around a simple course. In KAR, all of the Air Ride courses got used as stadiums, but there’s been no hint that this will happen in the new City Trial.
Drag Race: A quick trip down a straight course. While races are a bit more competitive in KARs than they were in KAR because of the new trail-of-stars catchup drafting mechanic, this still usually comes down to whoever has the best speed stat.
Beam Gauntlet: The event doesn’t mention the fact that this is a race, but through a treacherous obstacle course. If your machine gets destroyed along the way, you end up in last place.
Gourmet Race: While called a “race,” the players are actually trying to collect as many food points as they can. The winner, I think, is usually the one who knows how to get extra food on top of the buildings, instead of grubbing the ground grub with the other players stuck down there.
Target Flight: A good event for upsets, if your vehicle has enough airtime to make it to the target board you might earn up to 100 points. This event gives you two tries to get the best total score.
Skydive: Also prone to upsets, this is my favorite of the new stadiums. Use the boost button to plummet down through the target rings, and find the highest-value landing place you can. You get a time bonus for finishing quickly, so even if you somehow end up here with a non-flying vehicle, you can get a good basic score by just plummeting down as fast as you can.
High Jump: Use a ramp to jump as high as you can. This one is mostly a stat check: how good is your flying power?
Air Glider: Use a ramp to jump as far as you can. While also a stat check in essence, at least in this one you have to strike a balance between forward speed and height.
Dustup Derby: a version of the “deathmatch” event from the city. If your machine gets destroyed you get another one, letting you stay in the game (but also letting the other players kill you again for another point).
Kirby Melee: the players are put in an arena with a cloud of basic enemies, many with copy abilities, and compete to defeat as many as they can. I found the Needle copy power to be very helpful here, if you can snatch up an enemy that has it.
Vs. Boss: A co-op event where all the players work together to defeat a bit enemy. The only boss in the demo is Robo Dedede. If you don’t work hard at attacking it you won’t win, although the players get ranked either win or lose. Quick Spins won’t cut it: you’ll need to use the powerups that appear in the arena to have even a slight chance.
There was also stadium where you tried to change more buttons to your color than the other players, and another battle event where there are powerups that make you huge and extra powerful. I’m pretty sure there will be more events in the full game than featured in the demo.
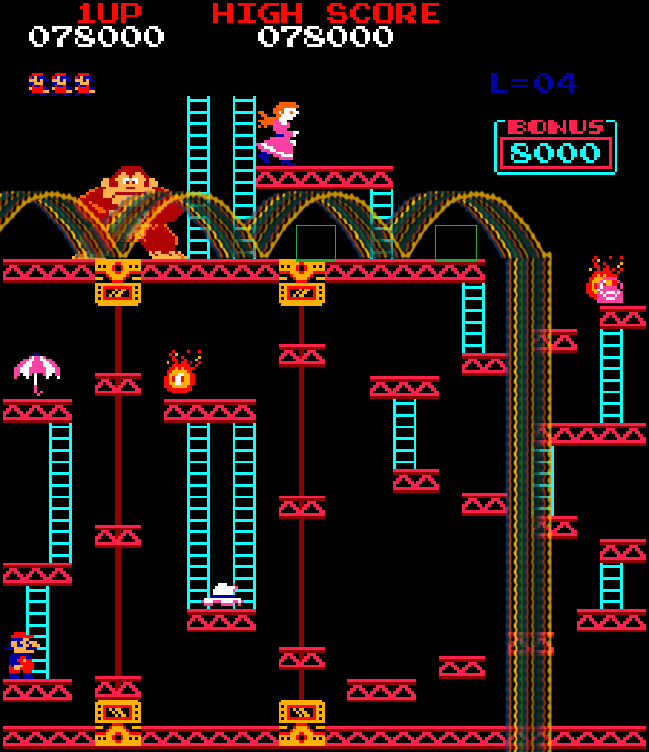
Another arcade classic strategy rundown, and again c0ncerning Donkey Kong. As the video rightly notes, the Springs board, a.k.a. Elevators, is most devoted players’ greatest barrier to playing to the kill screen, and even pros mess it up sometimes. I think it’s the worst part of the game, personally. Donkey Kong is great, says I, because it’s open to multiple strategies, while the later Elevators boards have to be finished a specific way, all because of those springs. That way is what this video (4m) is about.
Sadly the video has been made non-embedable, so it’s up to you to follow the link, if you care. The video encapsulates information on donkeykongforum.net (which it mislinks). That link is some hardcore geekery, of the kind beloved to Set Side B’s cadre of pixelated aliens, so please take a look.
Image from donkeykongforums.net.
Here’s the basics, in text form. Donkey Kong gets more difficult over the course of five “levels.” These are different from “boards,” a.k.a. “racks” or “screens.” In the corner of the screen there’s a notice, “L=X” where X is some number. That’s the Level. It goes up by one every time you finish a Rivets board.
The problem is, starting with Level 2, the spots at which the springs hit the ground is slightly randomized. The final climb up to Pauline’s platform is super dangerous, since Mario is vulnerable the whole way. Level 4 is the hardest difficulty for the springs on Elevators, and you have to handle it a very specific way: climb up to the first safe spot, wait for a spring that comes out bouncing at a specific location (near DK’s right foot) then running to another safe spot, then waiting for another specific spring speed to rush over and up the ladder.
So go forth and conquer the elevators, and as Coily the Sprite reminds us: