
If you know where to look, there are many arcade machine restoration videos on Youtube, whole channels devoted to them. This Halloween-themed video from Electric Starship Arcade is only one of them. It’s mostly about the process of fixing up the cabinet and has very little gameplay, but it does end with a fun sequence where they dress up someone as a vampire and, driven in a hearse, bring him out in a coffin to introduce it! (40 minutes) And if you watch it, it’ll haunt your view history, and influence Youtube into recommending more restoration videos to you, in a suitably spooky fashion. Ooooooo!
Category: arcade
Beat the Springs in Donkey Kong
Another arcade classic strategy rundown, and again c0ncerning Donkey Kong. As the video rightly notes, the Springs board, a.k.a. Elevators, is most devoted players’ greatest barrier to playing to the kill screen, and even pros mess it up sometimes. I think it’s the worst part of the game, personally. Donkey Kong is great, says I, because it’s open to multiple strategies, while the later Elevators boards have to be finished a specific way, all because of those springs. That way is what this video (4m) is about.
Sadly the video has been made non-embedable, so it’s up to you to follow the link, if you care. The video encapsulates information on donkeykongforum.net (which it mislinks). That link is some hardcore geekery, of the kind beloved to Set Side B’s cadre of pixelated aliens, so please take a look.
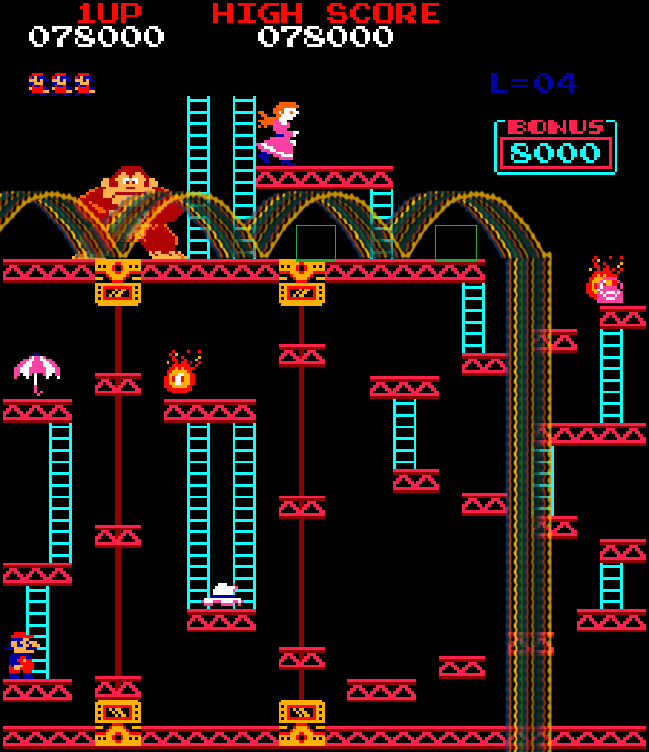
Here’s the basics, in text form. Donkey Kong gets more difficult over the course of five “levels.” These are different from “boards,” a.k.a. “racks” or “screens.” In the corner of the screen there’s a notice, “L=X” where X is some number. That’s the Level. It goes up by one every time you finish a Rivets board.
The problem is, starting with Level 2, the spots at which the springs hit the ground is slightly randomized. The final climb up to Pauline’s platform is super dangerous, since Mario is vulnerable the whole way. Level 4 is the hardest difficulty for the springs on Elevators, and you have to handle it a very specific way: climb up to the first safe spot, wait for a spring that comes out bouncing at a specific location (near DK’s right foot) then running to another safe spot, then waiting for another specific spring speed to rush over and up the ladder.
So go forth and conquer the elevators, and as Coily the Sprite reminds us:

Great Mappy Strategy Video
Our retro arcade strategy week is over, but this is a related video that I’ve been sitting on for quite a while. The Disconnector made a very nice strategy video (20 minutes) for Namco’s cult favorite cat-and-mouse game Mappy. It works as both an introduction and a guide to the game as it develops.
Not only is the information good, but it’s really well put together! Looking through the rest of their channel, while the post about other games (most recently about Robotron [8 minutes]) it seems to be the only strategy video of its sort. I hope they make more, I think they have a talent for it!
The @!#?@! of Q*Bert
Fourth of five retro arcade strategy posts this week, how about we learn how to play the swearingist classic game: Q*bert.
Here’s a video that covers what each of Q*bert’s five levels is like (18 minutes):
You play Q*bert, and at first it seems simple. Level 1, you jump on each cube once. Slick and/0r Sam may change them back once in a while, but you can just jump on them again.
Level 2, you jump on each cube twice. That makes each level twice as long, but still not much of a problem. The rising difficulty here comes from more and faster enemies.
Then you reach Level 3, and Q*bert becomes a much different game. Now jumping on a solved cube unsolves it. If you don’t work out how to handle this, levels can drag on indefinitely. It’s a bit of a wall for players here, and Slick and Sam become much more annoying.
Level 4 is similar, except you have to jump on each cube twice, and jumping on one after it’s complete changes it back to the intermediate color. But worst is Level 5, where jumping on a solved cube changes it back to the original color. This is a huge change, for it means the pyramid can actually become unsolvable without using a Disk, or waiting for Slick or Sam to come in and reset some of the cubes. For more details, I refer you to the video. You know, the one I embedded a few paragraphs up. Go! And if you think that’s nuts, check out what happens in the unreleased sequel Faster, Harder, More Challenging Q*bert (GameFAQs link).
Here’s another strategy video (10 minutes), with tips by Jody Martin, released to the Youtube channel of Starfighters Arcade. It more basic in focus, but is more interested in explaining enemy behavior and how to react to it.
Something I’ve thought is interesting about Q*bert, which is also true of Pac-Man, is that it’s like a turn-based game, but where you can play around with the timing of the moves. I’ll try to explain.
While both games let you decide when to make decisions, both encourage playing in a discrete, point-by-point way. When Q*bert lands on a cube, there’s a limited number of decisions they can make, other than waiting to make your move. In Pac-Man, your moves are constrained to the maze paths, but you can turn slightly early, you can pause when you hit a wall, and you can double back at any point. You usually don’t want to pause or double back in that game, because they introduce uncertainty in patterns (although a few patterns rely on them, which makes them much harder to perform). Q*bert is resistant to patterns, using pseudorandomness to affect the paths of the balls and most enemies, and the player’s ability to break out of the rigid temporal confines of that game’s movement is more helpful.
Contrast both games to Robotron and Defender. Those games have “free” movement, they’re not confined to a playfield with limited choices but let the player move around how they want. In actuality they’re games where the turns are taken in real time each frame. That adds a much greater role for player skill, but it also requires you to be much more precise.
Defender Strategy
Defender’s difficulty is legendary. Craig Kubey in The Winner’s Guide to Video Games said it was like being locked in a closet with a swarm of killer bees, and I actually think that’s not overstatement. And yet, people have flipped Defender’s score counter many times in a single game.
In an 18-minute strategy session, Joe Dearman explains the basics of playing Defender well, but I’m afraid if you don’t have a certain base facility it might be hopeless. Although I’m generally good at video games, I don’t seem to have it myself. Take a look and see if this looks like something you might be good at, but be warned, Defender’s controls themselves are complicated, with a lever and five buttons, although I dunno, game controllers these days tend to have many more than that. It is important, however, not to underestimate this game. It will rapidly annihilate you if you aren’t very good.
Both Defender and Robotron 2084, mentioned yesterday, were made by Williams, and designed by Eugene Jarvis, who still works in arcade game production today, or did last time I checked.
Another thing these games have in common is they’re very adjustable. Operators can choose starting difficulty, ending difficulty and on which wave it’s reached. This thread at arcade-museum.com breaks down the different romsets and differences between them. The earlier roms, “Blue” and “Green,” are generally harder, and increase in difficulty through 99 possible levels. The most common and latest set, “Red,” only has 30 effective levels.
At the higher numbers of Blue and Green, weird behavior can be seen. Defender has an enemy called the Baiter, which exists to harass the player if they take too long in clearing a wave of other enemies. At maximum difficulty Baiters become hilariously numerous, the game sending them in about once every two or three seconds. Watch a few minutes of this game with the wave difficulty settings cranked up to maximum from wave 1 (39 minutes). The extra ship level is set it easier than normal, needing just 5K to get an extra, and it’s set to restore all the Humanoids every wave, but that’s mostly to make the game possible, although there does exist video of someone surviving maximum difficulty with ships and Humanoids at normal settings, up to a score of 909K. (1 hour 7 minutes, somehow).
Here is the first of those two links, I’ll leave the other for you to click on if you’re interested. Both of them have the amazingly persistent Baiters, and in both of them the player manages to hold up under the pressure, for a while anyway.
Robotron 2084 Strategy from arcadeimpossible
It’s the third of this week’s classic arcade strategy find posts, and today’s dedicated to the original twin-stick shooter, Robotron 2084.
Robotron’s what I’d call a very pure game. It’s simple in play, nowhere near as complex as Eugene Jarvis’ first game Defender, but deep despite it. The left joystick moves, the right joystick fires, and until you get used to that you’ll have short games. In fact, you’ll probably have short games regardless. It is ruthless.
These videos feature host “Greg” and star player “Darrin,” who is the one giving most of the advice. The first video covers the first nine waves (5½ minutes). They set the template for the game: there are theme levels that cycle every ten waves. There are Spheroid, Quark, Brain and, for levels ending in 9, Grunt waves that completely surround you with enemies right from the start, and each poses its own kind of challenge.
The second video covers intermediate-level play, and wave beginnings (7 minutes):
The videos mention three parts, but it appears that only two were ever uploaded. They mention a site in their descriptions, robotron2084guidebook.com. In the 12 years since the videos were posted that site’s gone dark, but being a text site it’s pretty well preserved on the Wayback Machine, and has lots of good information. They also mention video on the high score site scoreground.com, but sadly it’s also defunct, and the mentioned video that was hosted there is probably lost. If there’s one good thing about Google, I guess, it’s that they let Youtube videos persist on their site for decades without culling them too much.
Classic Arcade Tips: Phoenix & the Centipede Trap
Let’s have a week of tricks & tips for retro arcade games. Here’s one you don’t hear about too often, Phoenix, and one still popular, Centipede.
Phoenix is a standard old-school space shooter. Your spaceship is affixed to the bottom of the screen, where spaceships should be affixed as God and Kazunori Sawano (designer of Galaxian) intended. It’s got a bit more atmosphere than most of them from the time, and is particularly known for being one of the first video games to feature a boss battle, with a big flying saucer with shields to chip through.
One trick in Phoenix, the result of a bug: if you shoot three enemies in rapid succession as they ascend upwards onscreen, you get 200,000 points! This is a gigantic amount, in the video below (18 minutes), which is blurry so you can’t really tell.
The interesting thing about it (which is explained here) is, it’s not a bonus. The score is set to around 204,000 points. If you had a higher score (which is very unlikely in Phoenix) then you lose points because of it.
As for Centipede, there’s a clever trick that takes advantage of a number of converging aspects of the game. First, nothing affects the playfield mushrooms globally (this was corrected in its sequel Millipede, making it ineffective there); second, the Spiders that emerge and periodically clear out mushrooms from the bottom of the screen never touch the first two rows on the side they emerge from; third, centipedes that make it to the bottom of the screen and cycle up and down through the player’s area can get caught by carefully-placed mushrooms at the side of the screen; and fourth, a trapped centipede may halt game progression, but it doesn’t stop scoring, as Spiders, Fleas and Scorpions will continue to emerge into the board, which are worth significant points by themselves.
The result is: The Centipede Trap. Observe (video by “pat,” 12 minutes). If you want to skip right to the trap in action, you can jump to an appropriate place here.
I’ve known about the trap for a long while, it was reported in an issue of my favorite classic arcade magazine, Joystik, in a feature interview with early arcade champion Eric Ginner, where he laid out how to make it, and how it could be useful. It’s a pretty boring way to play, but it works. It doesn’t make the game completely boing, Spiders can still be a big threat, and if one makes it across the screen from the opposite side without being shot it still has a chance to eat the trap. But it does give the player an opportunity to clear the upper reaches of the screen of mushrooms while the centipede is pinned in.
If it’s done on the first wave of each set of twelve, the one where a whole centipede emerges at the start, then Fleas won’t ever appear to add mushrooms, and you can actually clean the entire board of mushrooms, excepting the ones that make the trap. Fleas emerge, on most boards, when the number of mushrooms near the bottom of the screen get too low, but are programmed never to appear on a full-centipede board.
I’ve got some interesting strategy video finds for other classic arcade games coming up over the next couple of days, I hope you’ll like them!
Arcade Mermaid: Rampart, Part 4: Level Strategy
Arcade Mermaid is our classic arcade weirdness and obscurity column! Frequently (no promises) we aim to bring you an interesting and odd arcade game to wonder at.
Yes! More Rampart! I’m still out of town at DragonCon so I’m repurposing an old strategy guide I wrote for Extended Play into a week of posts. Even I’m starting to get sick of Rampart by now, but please stick around. And if you’ve ever tried playing this infuriating game in the arcade, this might give you the advice you need to get through to levels you might not have thought possible! And this is even a fairly short post!
Level Strategies
Level One (“Recruit”)
Castles available: 6
It’s advised not to start on this level unless it’s your first game. You’ll not only miss out of 5,000 points by starting here, but it means the beginning of Level 2 will begin you with only two cannons instead of three, and you’ll face more ships.
This level is so easy that it barely rates mention. It has six castles, and only Gunships appear. Unless you’re purposely stalling, you’ll finish this map in two rounds. Even if you stall, the level auto-completes in three rounds, regardless of if you fire a single shot.
Another reason to avoid picking Beginner is that its selection is always the “J” map, which is one of the easier selections from the initial four boards. It’s better if you pick it later, when the opposition is harder, to balance out the difficulty.
Level Two (“Veteran”)
Castles available: 5
The Veteran level is randomly chosen from one of the other three basic maps, although it tends to be the “C” map most often. Ideally it won’t be the “Hat” map, it being the easiest, as you’ll want it to be your Level 4.
If you started on the board, the first round will always put you up against four ships, one of which may be a Lander. Later ships are frequently also Landers. As a result grunts may appear on this board, but even if some appear, so long as you focus on destroying enemy ships and don’t suffer major setbacks like losing your home castle, you’ll probably wipe out the attackers before they become a huge problem.
On a later round in this level you’ll probably encounter your first Red Ship. A Red Ship tends to get off two or three shots in a round, each producing flaming crater you must build around.
Level Three
Castles available: 5
You always get to pick this level yourself. I usually try to make it “C,” “J” or “Hat,” in that order. I usually avoid picking “N,” but it’s not really harder than “C,” so pick whatever is your preference.
Much of the fleet will be Landers here, so this is the first level where you must be diligent about thinning out their numbers. Especially try to take care of ships about to land; grunts are unwelcome visitors to deal with, and it’s best if they never show up at all. In the event of a landin, which is sometimes unavoidable, try to spare a few seconds to build a barrier to them, to wall them off from the rest of the board. If you can contain them in a small area around the landing, you can keep their numbers down that way and thus reduce the number of shots you must expend in cleaning them up. Don’t think you can just let them be! They will overwhelm you easily if you ignore them.
I try to pick a home castle that’s near another castle, so I can capture them both with one wall. If you can consistently get both each round, that’s three cannons each time. Use them to connect the space between the two castles, but try to keep that space as small as possible. Try to aim for the minimum-sized rectangle needed to save both of them, and then try to place all your cannons within that rectangle.
Level Four
Castles available: 4
Now the game starts to get serious. If you can get here on your first credit you’ve done very well, but your weak basic guns will become more and more of a liability for you. Dark ships start appearing on this level, and will continue to appear until the end of the game. They all take one extra hit to sink. That’s three hits for Gunships, four for Landers, and six for Red Ships.
Try to make Landers that have a chance of landing at a diagonal shore your top priority. If one makes it through, then at the start of the Building phase devote three seconds or so it blocking their progress with walls. If they get away from the shore and a significant number appear, then focus on surviving and shoot them with cannons during Battle. Red Ships start to be a significant threat here. Once all the potential landings are taken care of, try to pump six shots into a Red Ship.
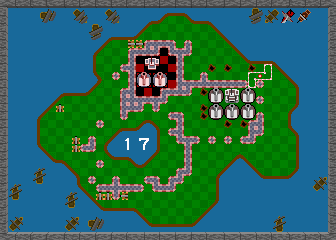
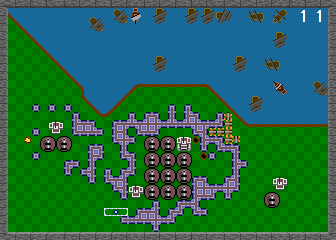
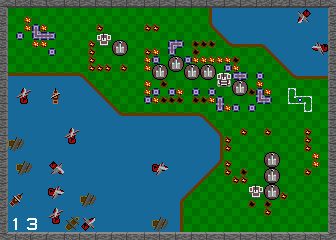
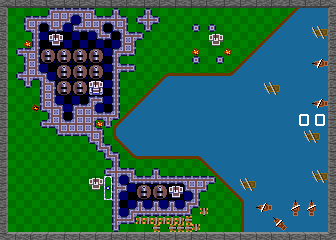
Level Five (peninsula)

Castles available: 3
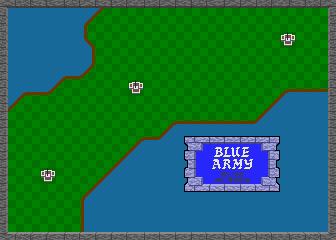
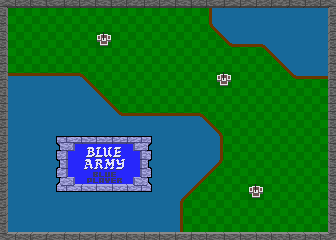
Regardless of how you got here, you have a choice between two new maps for this level, a diagonal peninsula going upper-right to lower-left, or one going from upper-left to lower-right. I call these the “slash” and “backslash” maps, respectively. I usually pick backslash, but both are about the same difficulty.
These maps have the property of having two seas, a small one at the top of the screen and a more typical larger one at the bottom. The small water region is both a blessing and a curse; the restricted movement makes it easier to destroy ships there, but landings are very likely unless you clear out the Landers arriving there. What is more, these maps are the only ones in the game that break the rule about landings only being possible on diagonal shores. Landers in the small sea are also counted as landed if they contact land at the very edge of the screen, even if there’s no diagonal shore nearby. This property doesn’t extend to screen-edge landings in the larger sea.
The worst thing about these levels is that the game takes off the limiter on the number of Red Ships that can be generated each round. Red Ships here are nearly as common as Double-Sailed ones! You’ll frequently see seven or more on-screen at a time. While you must remain vigilant to prevent and/or mitigate landings, you must also work towards reducing the number of Red Ships. The large number of flaming craters on these levels made adopting a “summer home” strategy imperative, where you switch off between castles when one gets too difficult, or even impossible, to save. It’s usually a good idea to try to capture two castles in the first round because of this; then you can station some or all of your cannons for that round at the other castle, so you’re not defenseless when you’re forced to turn to it for survival. From there, you can focus on getting cannons around the third castle for maximum safety.
This level is a strong test of your Rampart skills, and often is a barrier to progression until you’ve played many games. But it’s not invincible. On Easy difficulty, I’ve passed this level still on my first credit multiple times. The biggest thing you have to worry about is the high probability of impossible situations.
Consider: when any castle is adjacent to other objects, you must capture the whole collection as a set. Chains of objects like this increase the difficulty of getting the whole thing, and increases the odds of getting an impossible save. I’ve seen this happen after even the first round on a peninsula board, and I’ve seen it happen on all three castles on one of these maps at the same time.
The only substantive thing you can do, besides rotating between castles, is to shoot some of the dangerous walls yourself. Red Cannonballs don’t leave craters if the wall is already destroyed, but that takes time and often makes for a difficult repair.
So, what if you manage to clear this map? What happens next? The game scrolls the FINAL BATTLE banner, and you get a one-way ticket to:
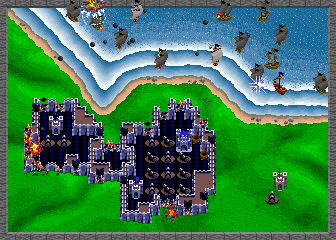
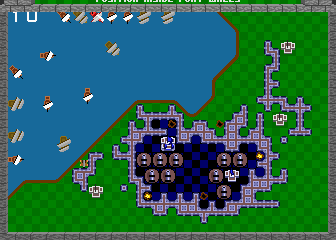
Level Six (island)
Castles available: 2
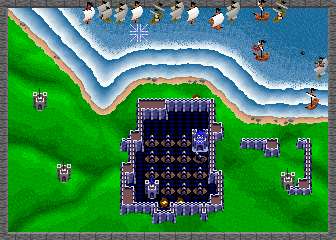
It all comes down to this. This level is a special kind of hell, only slightly mitigated by the fact that it seems you can get away with sinking fewer ships here, and, because you’re surrounded on all sides, your shots often don’t have that far to travel to reach a ship. There are four prime landing areas, each in one corner of the map, so landings can only be delayed, not prevented. And you only get two castles. Enjoy!
When you start looking more closely at the map, some slight advantages become apparent. There’s a lake in the bottom-left of the board, which gets in the way, somewhat, of grunts approaching from the bottom. Both castles have a good amount of land around them, although there are so many Red Ships here that the “summer home” strategy is essential to survival.
The continue limit eases up a little bit here. If you were at the maximum of four continues upon starting Level Six, the game will grant you an extra continue when you get here. (You still have to pay your coins for it though.) And also, if you were at that final credit, the game will actually downgrade your cannons one step when you get here, so get used to expending two/three/five shots for Gunships/Landers/Red Ships again. If (ha ha, “if”) you do expend that last continue, you go back to only needing one/two/four shots to sink ships. (There is more information on the effects of continues on cannon power in the notes, later on.)
This level is an ordeal, but it can be finished surprisingly quickly. I’ve seen it cleared in three rounds, although that was after several continues (it had been a pretty great game up to that point). This level is the big obstacle to one-credit clears, I’ve managed to finish everything up to it on one credit only to bang my head against it repeatedly. Using save states, I’ve managed to finish it with a single continue, so it is possible to finish it relatively cheaply, but making do with such weak cannons is a real challenge.
Arcade Mermaid: Rampart, Part 3: The Phases
Arcade Mermaid is our classic arcade weirdness and obscurity column! Frequently (no promises) we aim to bring you an interesting and odd arcade game to wonder at.
Because I’m out of town for a few days, we’re continuing our week-long coverage of Atari Games’ brilliant, yet really hard classic arcade strategy game Rampart.
Each of Rampart’s phases has its own considerations, so let’s take them one at a time.

Battle Phase
Rampart’s most traditional mode is its Battle sequence, which plays a bit like Atari’s old hit Missile Command. For a limited amount of time, players use the trackball to move a crosshairs around the screen, and the Fire button launches a cannonball from one of their cannons aimed at that spot.
Cannonballs have a set speed that they travel as they move through the air; nearby shots go directly towards the destination, but distant targets travel in a high arc. Thus, more distant shots take much more time to reach their targets, due to the fact that they have to be angled upward.
The speed of your shots matters for two important reasons. First, in single-player mode, enemy ships don’t always sit still and let your projectiles sink them, but move around at different speeds, and sometimes even try to dodge your shots. One of the most annoying events in Rampart is when you launch a volley towards a ship, and it decides to pull anchor and float elsewhere just as your shots launch, wasting those precious missiles. Firing at close-up ships means you don’t have to lead your targets by nearly as much, and reduces the chance that a ship will just sail out from under your projectiles.
The other important thing is, each cannon can only have one shot in the air at a time. Firing at nearby targets means you can get more shots off during a Battle phase. The combination of the two, being more accurate when shooting moving targets and getting more shots off, means that, absent other issues, you should prioritize firing at ships near your guns.
You cannot entirely erase the chance that a ship will decide to start, or stop, moving after you launch shots towards it, but there is some finesse that can be applied. Ships always sail in a straight line in one of the eight cardinal/diagonal directions, and ships cannot move through other ships. If a moving ship runs into another one, it will stop. They cannot turn around while in motion, but must wait until their invisible captain picks a new direction, which could be immediately or never. They also stop if they reach the shoreline, which for a Lander could be very bad for you. Once in a while a moving ship will just stop for no reason. The only constant is, all ships stop moving at the very end of the Battle phase, once all cannonballs have landed.
The rules of cannonfire, the ones concerning shot speed and there only being one shot in play at a time per weapon, they also apply to the enemy ships. Nearby ships are able to launch more shots at closer walls than distant ones, another reason to prioritize shooting nearby ships. But this must be balanced against those times when you need to prevent a landing, or take out some Red Ships to make the Build phase more survivable.
The game continues no matter how many ships you sink in Battle, but to progress to the next level, and eventually win the game, it’s advantageous to sink ships. The exact qualification for finishing a level is unknown, but it seems to happen after you wipe out most of the ships on-screen.
There is a maximum of 16 ships that can be in play at any time. If that number is reached, but there are some weakened or Single-Sailed Ships on-screen, Rampart is known to remove some of them so stronger ships may enter the fray.

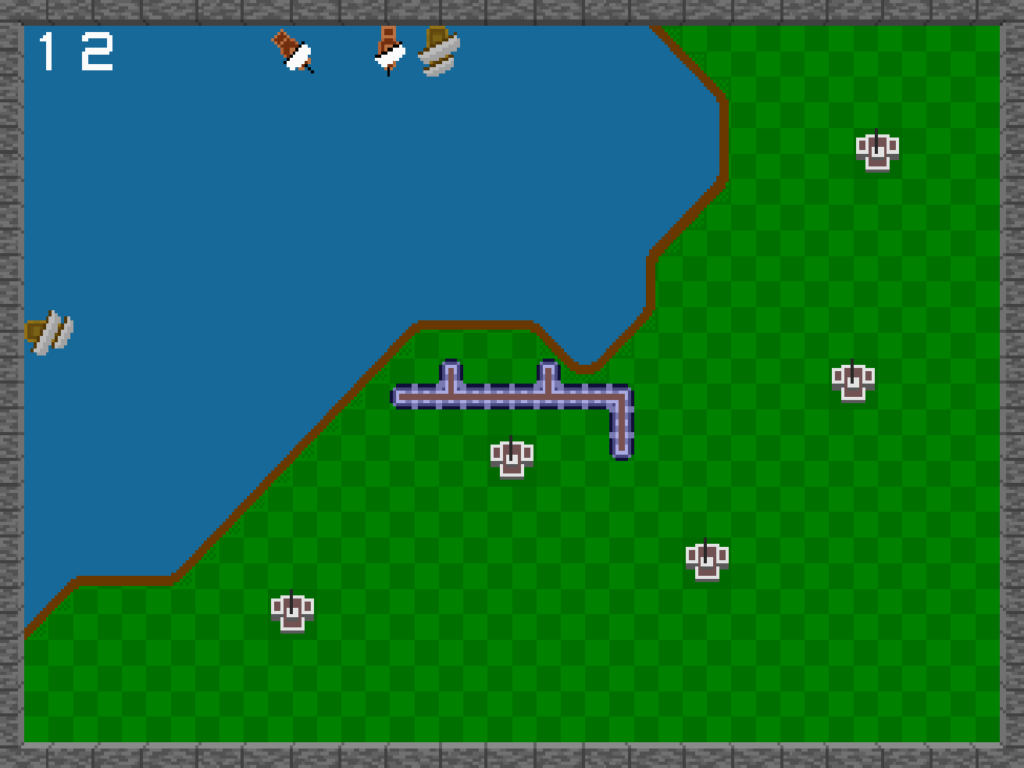
Building Phase
This is the meat of the game. While shooting ships eventually clears levels, you can’t do that without cannons, and cannons are awarded from skill at building. Also, if you fail to capture at least one castle in a round, you lose.
The way it works is, the game hands you an assortment of building pieces of various shapes, one at a time. The pieces you’re given first exist as just a flashing outline that you can maneuver freely over the land with the trackball or joystick. You can move it anywhere while you’re getting it into position, or rotate it clockwise with a press of the “Rotate” button. (If you start out your first building phase without using the button, the game’s voice will suddenly intone, “Use ROTATE for a better fit!” Rampart doesn’t have nearly as much digitized speech as Gauntlet, but it sure is memorable when it does speak.)
The difficult bit is, you cannot place pieces anywhere there is something per-existing. A piece cannot be placed if any part of it overlaps with another wall, the shore, a castle, a cannon, a crater, a grunt, or the edge of the screen. Everything visible beneath the piece’s outline must be the clean, green checkerboard of countryside.
You must place the current piece before you get the next one. Intermediate Rampart players ruefully observe that the game tends to hand out just the wrong piece they need at a given time. A lot of this is observation bias, you don’t tend to notice the times when the game hands you just the right piece, but it’s true that the pieces the game has to hand get larger and more complex as the game continues.
When a piece is plopped down it turns into wall. If the wall adjoins wall pieces already extant, they’ll join together pleasingly into a solid-looking structure. Your task is to connect wall pieces together like this until you have a complete loop all the way around and enclosing at least one castle. Usually you want this castle will be the one you start with, called your “Home Castle.” It’s worth extra points and cannons if you capture it, but any castle will allow you to survive.
There are two particular hassles in the Building phase that deserve special mention. The first are those grunts the Landers sometimes drop off if they reach the shore, and that have the power to move around during Building. They look like tiny tanks, or little battering rams.
Grunts move during Building, meaning they can actually block pieces just as you’re trying to place them. They not only move, but slowly multiply as they go, tending to form lines between the shore and your castles. Worst of all, grunts that make it to your castles have the power to destroy them during the following Battle phase, the only thing in the game that can harm a castle itself.
Grunts are so dangerous that landings must quickly be dealt with or else your game will soon be over. You can shoot them during the Battle phase, or you can surround the territory they’re on, destroying them instantly with a satisfying crunching noise.
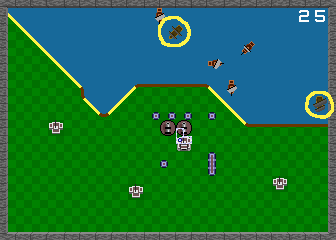
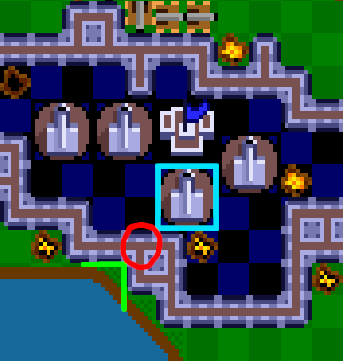
One important thing to note about grunts is that they can’t be dropped off just anywhere. Landers (here circled) can only leave grunts on diagonal shorelines. Highlighted above are the landing sites on the “Hat” map. Guard them at all costs.
The other problem you must worry about during Building is craters, flaming pits in the very ground left when the red cannonballs launched by Red Ships strike your wall. A crater is an implacable obstacle; there is no way to remove a crater from the board other than time. Near the end of the game, depending on the randomized ship generation, you may end up with rounds where you must face six or more Red Ships at once, which is horrifying.
When a crater is formed, it’s a full-strength pit of fire. Every Battle phase, each crater diminishes a bit. They all do this in lockstep: all the craters formed in one round will advance to the next state at once.
How does the game decide how quickly to make craters disappear? It’s a function of how recently you’ve put in money and continued the game! If you’ve recently continued, then for a while the game makes craters disappear in two rounds instead of three.

Cannon Phase
The Cannon phase is much less tense than the others. You get ten seconds to place additional cannons for subsequent Battles. But placement of cannons is one of the most important decisions of all. In a sense, the reason you’re capturing castles, beyond mere survival, is to support your artillery.
For the first Cannon phase of the whole game, the game gives you three cannons to get you started. On the first Cannon phase after continuing, you get four, as part of the “and more firepower” the game promises. On the first round of other levels, you start with just two.
Beyond that, on each successive Cannon phase, you get two more cannons to place for having captured your home castle, and one more for each other castle. But this only happens if you have room to place them. When surrounding castles in the Building phase, you must not only survive, but try to leave extra room for placing cannons, that is, if you want more artillery.
The more cannons you have, the more shots you can get off in the Battle phase, and thus the more of a dent you can put into the enemy navy and/or other players’ walls. This, in turn, decreases the shots coming in towards your walls, lets you do something about Landers before they drop off Grunts, lets you shoot at Grunts directly, allows you to sink more Red Ships before they set your whole countryside ablaze, and ultimately depletes the opposing navy faster.
Lots of cannons mean lots of shots! Shots can stop landings, clear out Red Ships, and hasten the end of the level.
But cannons are also a big problem. Each cannon you place is a 2×2 square of ground that cannot be otherwise built upon, which restricts the shapes of pieces that can fit on the ground. Having lots of cannons progresses you through the level, but increases the area you have to surround to survive.
Practically, you must build at least some cannons directly adjacent to your castle, and other cannons adjacent to those, in a big sulfuric blob. Thus, to capture that castle, you’ll also have to capture all the cannons that adjoin it, a mass of guns that grows in size with each round. And in case you come up with the idea to build cannons away from castles to avoid this, you should know that cannons that aren’t “owned” during a battle phase sit idle, doing nothing.
A “summer home” is a secondary castle you turn to in order to survive, usually with cannons attached, when your home castle is too difficult to recover.
You must have cannons to survive through each level, to punch back against the enemy, to take care of threats and eventually to advance towards finishing it, but having them makes later Building phases harder. Once a cannon is placed, it cannot be removed except by losing and continuing the game. And not having any cannons is a counter to using the “summer home” strategy for every round: while you can often abandon your home castle and its armaments in favor of a small unadorned dwelling out in the sticks, unless you’ve built cannons there on previous rounds, you’ll have, at most, one gun to thwart landings. A lot of games have ended due to this.
One subtle aspect to Rampart strategy is the cannon firing order. Cannons fire in the order in which they were placed. Any uncaptured cannons, and also cannons with shots in the air, are ignored in the queue. The difference in lead time between a cannon near the shore, and one way back at the screen edge, is significant, and can result in a lot of missed shots. To thwart this, it helps to try to build cannons in one mass, instead of spread out, and to try to build in more centralized locations, but truthfully it’s difficult to consciously make use of this strategy during a game.
This is a danger spot, a location where, if a single Red Cannonball hits, it renders the whole castle and its cannons impossible to capture.
One thing that players cannot afford to ignore is the danger of building cannons too close to the water or the edge of the screen. This is a huge concern. Building cannons close to hard barriers like those greatly reduces the number of pieces that will fit between the gun and the obstacle, and increases the chance that a red cannonball will hit in a such a place as to create an impossible rescue. To the game’s credit, Red Ships do not appear to target these locations intentionally, but neither do they avoid them, so It’s important to try to leave at least two spaces between cannons and any hard barriers, and more if you can. Especially look out for one-space diagonal separation, because it isn’t as obviously dangerous as horizontal or vertical. The more free space around your installations, the easier it’ll be to build walls there later, and the better off you’ll be.
So what if you decide you have enough cannons and don’t want to place some or all this round, do you have to sit and wait out the clock? Why, no: if you make five consecutive illegal cannon placements in a row, the game will take that as a signal that you’re done placing them and end the Cannon phase immediately.
That’s three parts so far! Yes, there’s more to say about this diabolical game, but we’ll take a break for a couple of days, for other posts. See you soon!
Arcade Mermaid: Rampart, Part 2: Overview
Arcade Mermaid is our classic arcade weirdness and obscurity column! Frequently (no promises) we aim to bring you an interesting and odd arcade game to wonder at.
We continue our lengthy, obsessive coverage of Atari Games’ brilliant, but really difficult, arcade strategy game Rampart.
Overview
Rampart is really two separate but related games, the single-player game and multiplayer. Both are excellent. Even so, this article mostly concerns itself with single-player, but towards the end I will have a few things to say about its multiplayer mode.
Before we begin, you should know that Rampart is a highly abstract game, and as such it might not be easy to see how it all fits together from a text description. I have uploaded several complete playthroughs of the game to YouTube, the first such on that site of the arcade version. You might watch a bit of one of them, it should make it pretty obvious how the game works.
The Board
In both single-player and multiplayer, after selecting a home castle and placing initial cannons, the game repeats a sequence of rounds, each consisting of a Battle phase, Building phase and Cannon phase. In the Battle phase, players shoot at ships or the other players’ walls, while those ships or enemy cannons fire back at their own walls. In the Building phase, players place a variety of shaped pieces in an attempt to fix their wall and/or construct walls around at least one of the castles on their land within a time limit. Then in the Cannon phase, players get a number of new cannons to place within the territory they captured in the Building phase, adding to the number of shots they can get off in Battle.
Select Home Castle, then
Cannons -> Battle -> Building -> repeat
This cycle continues until the player wins or loses. Losing happens when a player fails to capture a castle in time in Building. Winning happens, in single-player, when the game decides the ships don’t have a reasonable chance of defeating the player, and advances to the next level, out of six in total. In multiplayer, it happens when all the other players have lost and don’t continue, or for a set number of battles. If the fight goes the full distance, the winner is the surviving player with the highest score.
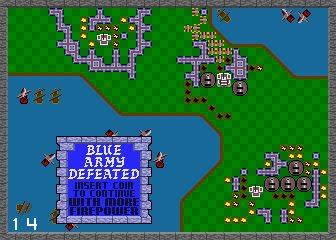
A defeated player can put more money in the machine to continue the game “with more firepower.” This is allowed four times in single-player, so up to five credits in all, and losing after that results in a solid Game Over. The dynamics of continuing in Rampart are really more complex than this, and I’ll explain those later, but for the time being, you should know “with more firepower” signifies several important changes that are not all clear during play.
In multiplayer, losing players can choose to continue individually twice. That can make for a decently long game if all the players choose to buy all their continues. But eventually, the game will declare a round to be the “Final Battle,” after which no continues will be offered to losing players, and the game ends regardless. The number of rounds a game is allowed to go is operator-adjustable, and continued games usually add a few battles to the overall length.
There also exists one semi-secret game variation. If just two players play Rampart, and at least one of them is joining in again after a completed game, there is a map selection screen that offers the chance to play a composite game mode, featuring both two players and ships! In this, the ships belong to one or the other side, and are color-coded based on who they belong to. They function like extra cannons, generally firing where the player aims their cursor, but are more autonomous. This mode is an interesting variation, and is fairly obscure. Could there be other such secrets hidden in Rampart’s code?
Basics
For now, we’re most concerned with figuring out and defeating the very difficult single-player game. The basic play of both games is similar, but there is a lot of difference between attacking ships or walls, and the structure of single-player is quite different, so it’s worth treating each mode separately.
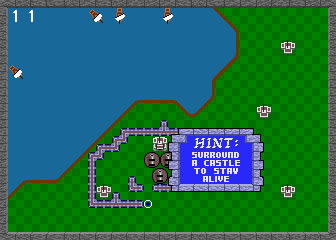
When you put a coin in and press Start, this appears:
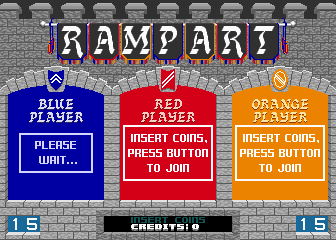
This ornate lobby screen is accompanied by booming drums and realistic, although synthesized, trumpets and fifes. With the volume turned up (as all Rampart machines should rightfully have) the effect is startling and bound to attract some attention. The purpose of this screen is to give other players the opportunity to join the game, for unlike the Gauntlet-style, “join any time” play model Atari pioneered and most arcade games used, once underway a game of Rampart cannot be entered by others. Players can only leave a game, by failing and not continuing.
An interesting thing about Rampart is that, after a game concludes, it always returns to the lobby screen and adds the player’s score to a total across all their games in the session. This encourages players to play repeated games, to see their overall score climb higher and higher. I’ve seen the total go up to over 900,000 points, which takes around 18 full-length games. I know of no reason to go for a high total score other than vanity, but if someone else has information on this I’d certainly like to know!
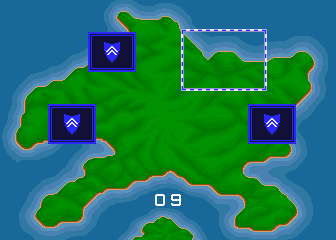
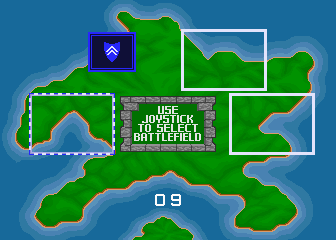
Your Domain

Assuming a single-player game, the screen clears and shows an overview screen of an island. There are four possible maps that can be selected for play here. At the start of the game, two areas along the shore are boxed, one marked “RECRUIT,” the other “VETERAN +5000 points.” Most of Atari Games’ arcade releases had such a selection, for it was a major part of their house style to offer a basic and an advanced difficulty, with a score bonus for starting harder. With Rampart, this choice is mostly an illusion. All choosing Recruit does is start you off with a very easy first board (the Recruit map is always the “J” map), which usually takes two rounds to finish.
Each level pits the player against a larger and more dangerous enemy navy.

At first, only weak Single-Sailed Ships attack, which go down with two hits from basic cannonry. Here, I call these Gunships.

With level two comes Double-Sailed Ships, a.k.a. Landers, which take three hits, and if they manage to get close to a diagonal shoreline, they drop off a swarm of evil little Grunts.

Grunts are a huge danger! They are the only enemy that has the power to move around during the Building phase. I’ll have more to say about them later, but for now just know that a grunt beachhead, left unopposed, has more credit-ending power than anything else in the game.

Starting with level three, Red Ships join the battle. Although few in number at first, these take five shots to sink, and their red cannonballs leave fiery craters where they land. Craters block piece placement and persist for multiple rounds. Usually a Red Ship can get off two or three shots each Battle, and they add up.
Levels four through six feature the same kinds of ships, but they’re darker in color, which in game terms means they take one additional hit before sinking. Dark Gunships take three hits, Dark Landers require four hits, and Dark Red Ships only go down after six cannonballs have struck them.
Every time you complete a level, you’re returned to the island screen to pick a new map to play. After the first level, three remaining unplayed options are offered. If you chose a Recruit game you’ll eventually have to face all these boards, but if you picked Veteran and started on level two, you end up skipping one of them, an opportunity to avoid a disliked map.
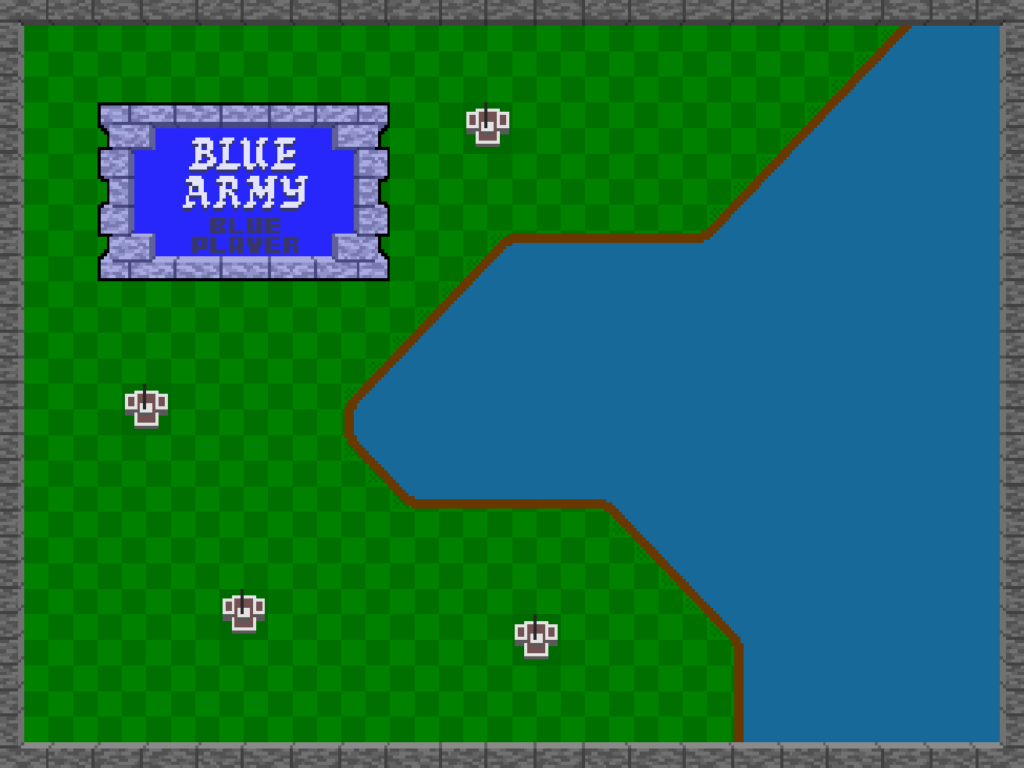
The “C” Map
The “Hat” Map
The “J” Map
The “N” Map
The maps are not even in difficulty. Generally, easier maps have castles with land around them on all sides, and more straight horizontal or vertical coastline, giving Landers fewer places to land. My opinion is that the “Hat” map is the easiest, followed by the “J” map, then the “C” and “Lowercase N” maps. A good strategy is to try to get one of the harder two maps out of the way as first selection, so you can later play the J and Hat maps to offset the harshness of the third and fourth levels, but sometimes the Veteran selection level ends up being the Hat, and you’ll have to play them in a different order.
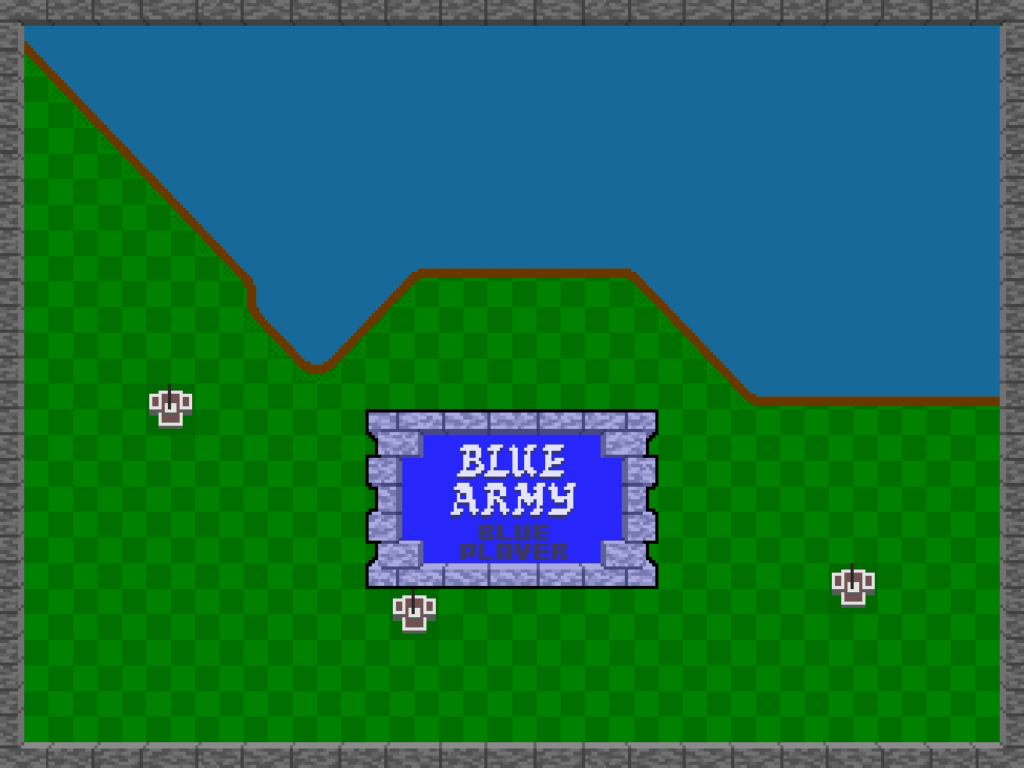
The “Slash” Map
The “Backslash” Map
Level five is selected from one of two unique maps, both peninsulas with water on both sides. Both are difficult, although I think the “Backslash” board is a little easier. As you progress, each level starts you out with fewer castles to capture. By this point you’re only getting three castles, and you’ll probably have to use all of them to survive.
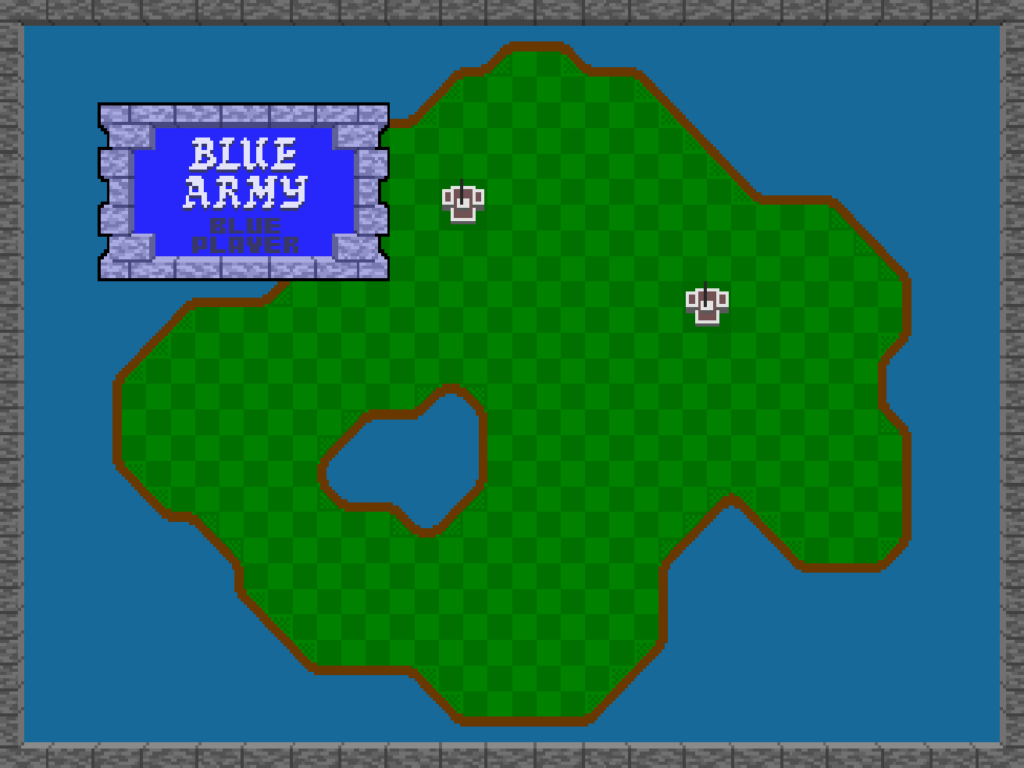
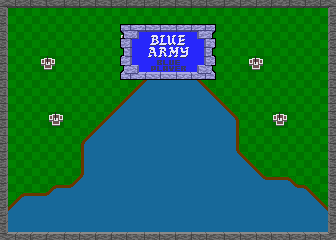
The final, “Island” Map
The last level is an island to itself, with a lake on it and only two castles! Here, ships attack from both sides of the screen. This level is a trial; although you have to sink fewer ships here to win, it’s difficult to prevent landings and grunts from overwhelming you, and the craters from Red Ships can easily give you an inescapable situation unless you mitigate them.
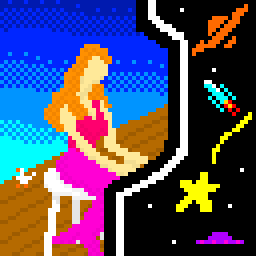
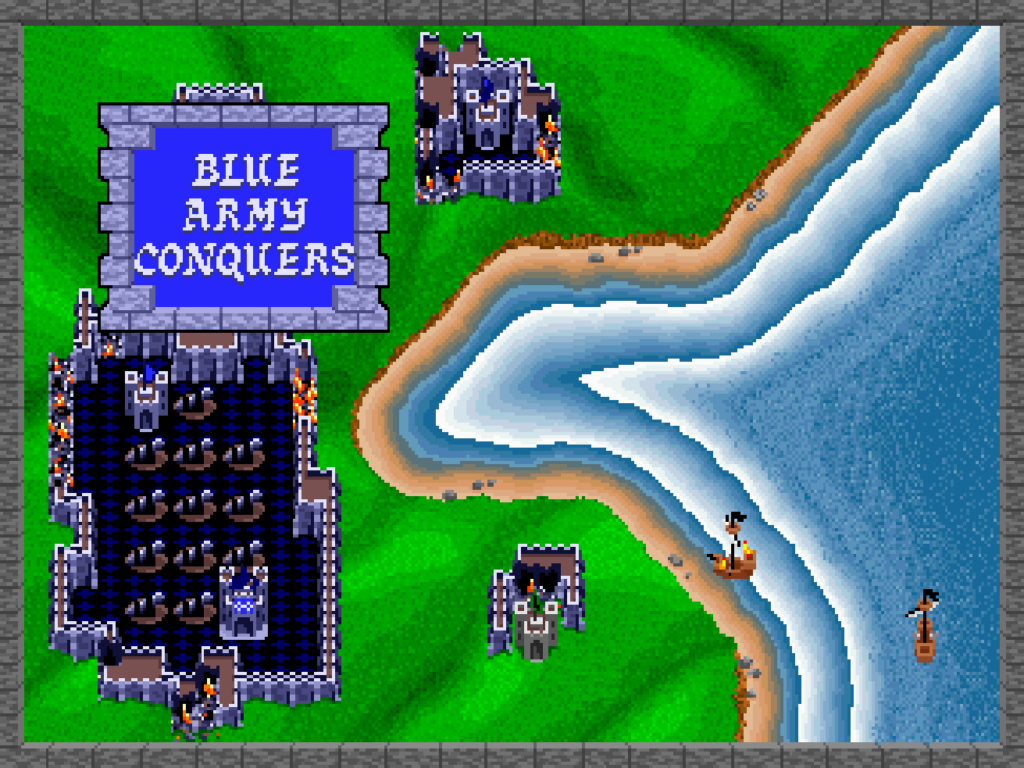
If you finish the last level, you get special ending music, and an illustration that few arcade goers have seen, before being returned to the High Score and Lobby screens. It may seem anti-climatic, but final victory and safe shores are their own reward.
Arcade Mermaid: Rampart, Part 1: Introduction
Arcade Mermaid is our classic arcade weirdness and obscurity column! Frequently (no promises) we aim to bring you an interesting and odd arcade game to wonder at.
The next week is going to be pretty busy for me, so I’m reusing a long long piece I originally wrote for the short-lived fanzine I made, Extended Play. It’s been seen before, but only by a very small audience.
Rampart has been an obsession to me since it came out around 1990. I still think it’s one of the finest arcade games ever made, actually one of the best video games period. People tend to describe it as either an early version of Tower Defense, or Missile Command meets Tetris, but neither description is very good. Simply, there had never been a game like Rampart before, and despite some attempts to clone it, there’s never been a game like it since, either.
We’re all as obsessed with weird old arcade games as I am, right? Right?? Most (but not all) of the next week of posts will all be about this wonderful, but extremely difficult, game, one of the best from Atari Games at their heights. Please bear with me, and please, try to understand why I’ve been so into this unique game for so long.
In the late 80s Atari Games was recovering from 1983’s Great Game Crash, which decimated the US arcade industry and resulted in a great dying out of companies. Atari Games, newly split away from the consumer electronics company that would make the Atari ST, weathered it better than most, primarily through developing ingenious kinds of games the likes of which were seen nowhere else.
This period, 1984-1990, is the age that began with Marble Madness and the System 1 hardware, followed by hits like Paperboy, 720 Degrees, Gauntlet, Toobin’, Cyberball and others. It lasted roughly to the release of Street Fighter II, which sparked the fighting game craze and made arcades inhospitable to most other genres for a while. At the tail end of this period came Rampart, designed by John Salwitz and Dave Ralston, who also created three of the games in the foregoing list.
It’s a bit obscure now, but it was quite a hit for Atari at the time. For home systems Rampart received no less than thirteen distinct ports, plus a few notable emulations. It got very good reviews from Nintendo Power (SNES version) and Videogames & Computer Entertainment (arcade). More recently, it was released emulated with network play for free for the PlayStation 3. And yet, still, no one talks about Rampart anymore.
That is a weird thing about what I call Atari Games’ “Silver Age,” that time after the classic arcade boom of the late 70s/early 80s but before the rise of one-on-one fighting games, its games, while still fun and surprisingly ingenious, and widely ported, don’t have the star power, other than a couple of things like Gauntlet, that Japanese releases from the same time have garnered.
Part of the reason may be trademark-related. The name Atari still carries considerable nostalgic weight, but another company, the one formerly known as Infogrammes, bought the trademark and the classic Fuji logo, and still releases games under it. They own the rights to everything before Marble Madness. Games after that were owned by Midway for a while, but Midway then, in a crushing indignity, renamed them Midway Games West, before closing them outright in 2005, getting out of arcades altogether. Many of its assets were sold to Warner Bros. Entertainment, who presumably now owns the rights to Atari’s post-Marble Madness catalog.
I’ve written before that, at their peak, I think Atari Games was more ingenious and original than Nintendo themselves. They made some stinkers, sure (few remember Thunderjaws, or their arcade take on Tim Burton’s Batman movie) but their best games were, and still are, amazing. I think that Rampart, while little talked about now, is at the top of the gilded heap.
Rampart is great, but it’s difficult. For a game I’ve been obsessed with since its release in arcades in 1989, I can only complete it on default settings about a third of the time, and usually only after expending all the continues the game allows. This was common for Atari Games games, who tended to make arcade machines that mocked the idea of one credit runs, but even among those, Rampart is hard. You are not going to master this one overnight.
I view my purpose here usually to be a secondary source. That is, I prefer to summarize, encapsulate, explain and preserve information available elsewhere. But the thing about Rampart is, there is very little of this information to find. For a game that was popular at the time of its release and with so many ports, googling it will not turn up much to aid you. As far as I know, and I’ve searched for it many times throughout the years, Rampart has never had a good, comprehensive strategy guide written for it.
It is because of this, favored reader, that I have decided that this shall be that guide. Since most of it is self-discovered, I have no one to blame for errors but myself. I have made some efforts to make sure it’s correct, but, well, sometimes even well-considered assumptions turn out to be false. I’ve done what I can.
(More tomorrow!)
Arcade Mermaid: Hole Land
Arcade Mermaid is our classic arcade weirdness and obscurity column! Frequently (no promises) we aim to bring you an interesting and odd arcade game to wonder at.
It’s been awhile since the Merm has brought us something weird and fun to look at, and wow, this one’s really weird.
To get us started, you are free to interpret this as either a warning, a promise, or a money-back guarantee, but you should know going in that this is a journey that ends with this upstanding member of the community right here:

They’re a stunner, aren’t they? And they live for the great taste of robots. But let’s start from the beginning.
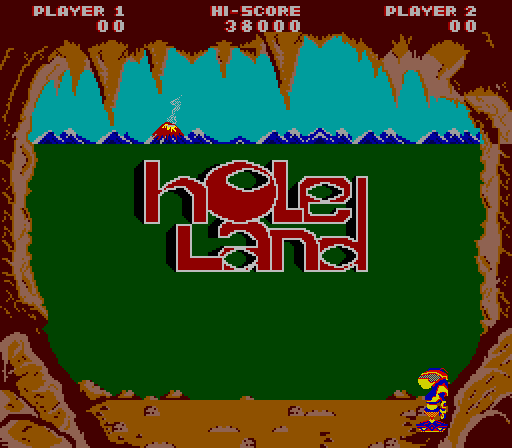
Hole Land is a shooter, and apparently the only game made by the Spanish company Tecfri. Wikipedia tells us it was only released in Japan, possibly because it came out in 1984, and the arcade scene in the US was falling apart.
Consider for a moment the concept. Hole Land. Land of Holes. Certainly a theme that bears contemplation. It seems that you are an invader to this land, a gaily-colored robot that runs back and forth across the bottom of the screen, that shoots upward at a horde of adorably, and understandably, angry monsters of various sorts, in order to claim it away for things that aren’t monsters, or holes.
The land itself is against you: volcanoes in the background launch rocks at your droid with suspicious accuracy, and the monsters throw bombs down at it. Getting hit by projectiles doesn’t destroy your ‘bot, it just disables it for a few seconds. A little guy runs on-screen to fix your problem and allow you to resume blasting after a short delay. If a rock hits you, it smashes your head down into your torso, and you have to push the fire button rapidly to decrush yourself.
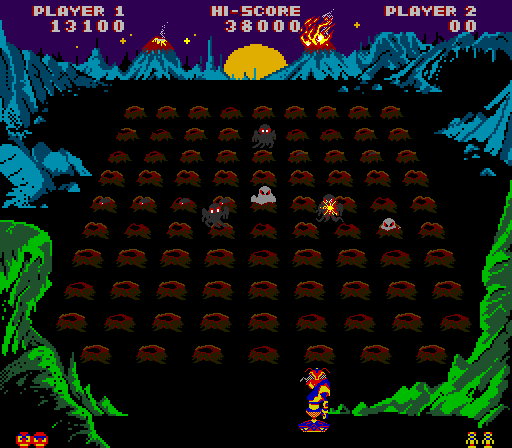
The game consists of three boards, that cycle. In board one, the monsters (called “Silfoos”es and “Xagart”s) all run down from the top of the screen. Because it’s a classic-era arcade game, they have a odd system to their attack: They wind their way down in a curious way, akin to the Centipede, moving all the way to one side, dropping a levels, then taking another horizontal pass.
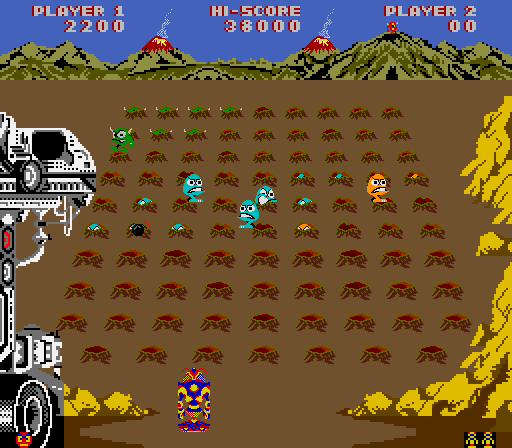
This gives you many opportunities to shoot them, but they’re a little cleverer than the standard video game oppono-target: they duck into the holes repeatedly as they pass, and your shots will miss if they’re in a hole, which is often. They’re also smart enough to stay in a hole if you keep shooting at it while it’s hidden. While they make a horizontal trip across the grid, if you hit the lead monster of a line, it causes the others to reverse direction, which may be good or bad depending on how far they’ve gotten. Unless the wave is almost over: then they progress to the bottom of the grid for a pass, then, as if dissatisfied that you haven’t killed them yet, sprint across one more time without even bothering with the holes.
If, after so many opportunities, you still haven’t fried one of them, it’ll take a run across the screen on your level. Your robot is blessed with the power of jumping, and you must leap over it to avoid losing a life.
The problems though are: you’re probably focused on shooting at its associates still falling, or dodging the bombs they throw or rocks from the volcanoes from the top of the screen, or if you’ve been hit you might not be able to jump it. If multiple monsters made it through it might not even be possible to leap over them all. If you don’t make it over a monster, it knocks the robot’s bottom half off, a type of damage your mechanical assistant seems unable to repair, so scratch one life. Helpfully, if you’ve already made it far into the wave when that happens, the game will advance you to the next level as a consolation.
Those bombs and rocks, from the monsters and volcanoes, are your biggest problems. They fall down with great speed, and bounce around too, and if one hits you when the monsters are low enough on the screen the chances are slim you’ll get repaired before one of them uses your lower half as a kickball. Despite all the chances that the monsters give you to shoot them, Hole Land is a dangerous place, and it took several tries for me to get through even the first three screens.
The second board is similar to the first. The monsters are “Kiles” and “Morfos” for some reason. The screen is a lot darker, making it harder to see the monsters and the bombs that fall down.
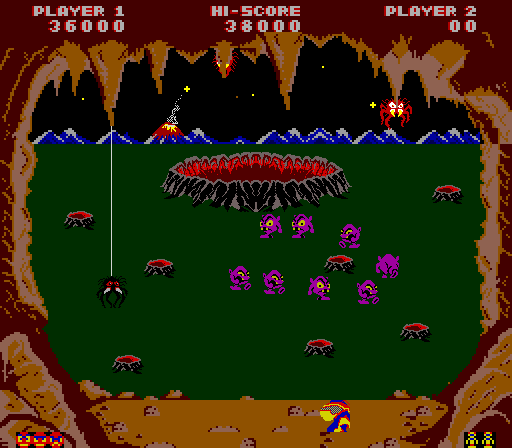
But then comes the third board, where the game changes up a lot. Now the grid of holes is gone, replaced by a few scattered openings, but dominated by a big imposing crater at the top of the screen. There’s some more new monsters, “Microons,” and some unnamed colleagues that I assume are also Microonian. They don’t hide in the holes, but instead parade around the screen in Galaga-like patterns, giving you a good chance to plug them as they pass by.
Sometimes they run straight down at you on their last pass, to try to overwhelm your gun before you can incinerate their monsterly asses.
On this level there are also little rat creatures that hide in the holes, waiting for the end of the level where the run in from the wings for their one pass at tearing up your droid. And there are spiders that hang down from threads, that can’t be shot, and will hold your robot in place for a few seconds if they touch you.
But all this is just in preparation for the main event: their boss.
In 1984 boss monsters were not yet in vogue, yet Hole Land certainly has a memorable one.
It’s not named in the game’s intro. I have put some effort into trying to come up with a suitable name. I thought of Testicules, rhymes with Hercules, but it looks like it’d be pronounced like “molecules.” Gonad Man is a possibility, but it’s obviously not a man; it may not even be male, technically, but Gonad Person doesn’t have the same ring. Scrotor has already been used by Mystery Science Theater 3000. As a brainstorming exercise, and for your own entertainment, I invite you to come up with your own name for this globular goblin.
Whatever its name, once it has emerged from its Hole, the fight is on. It advances straight down, slowly. Your job is to shoot out its jagged, pointy teeth, one by one. It feels like it takes multiple hits each, but in fact each tooth takes only one shot. It just has to hit it dead on; shots that don’t strike a tooth right in its middle have no effect. You also must knock out all of its lower teeth, every one, before any hits to upper teeth will register.
While you’re blasting away, it’s ominously stomping its way down towards you, KA-WUMP KA-WUMP, following your movements with its bloodshot eyes, and throwing rocks from its hands. It’s aim isn’t good, it can only really throw straight down or at specific angles to the left and right, but it can throw from either hand, and as it gets menacingly closer its rocks get harder to avoid. Hits don’t damage or destroy your robot, but they do knock it away, making you have to scramble back over to get in more shots, but likely getting back just in time to be hit by the next rock.
If it gets all the way down, it stomps to the side to catch your robot, then it eats it, its hands working with the effort of crunching it to bits:
But the best part is if you succeed in shooting out all of its teeth. While your robot jumps around in inane joy, your now toothless foe sits, defeated and sad. While it might be a grotesque testicle monster from out of a giant hole in the ground, it’s gracious in failure and acknowledges your accomplishment, with a synthesized voice no less. Civility is not dead in Hole Land!
Here is my playthrough, if you’re curious what this all looks like in action:
Better yet, you could have a look at this video from classic gaming Youtuber Zerst, who hosts plays of lots of obscure and bizarre old arcade games and whose channel was where I first found out about it, and who made it through all five difficulty levels. There is no ending other than the Congratulations screen at the end of each level; it probably cycles endlessly from there.
I don’t know if I could add much more about it than this. It’s very hard, it’s difficult knocking out all of the boss monster’s teeth before it eats you, and on later levels the volcanoes’ rock deluge is incessant. But they really don’t make them like this any more. The time window for the making of this kind of crazy arcade game was pitifully short. Even relatively simple games take so much time and person-power to construct that, unless one’s just doing it as a hobby, willfully chasing bizarre concepts will probably turn away most of the gaming public, and that’s a shame.
Well, that’s all on this one. I bid you all a fond farewell, coming from the Land of Holes!